13
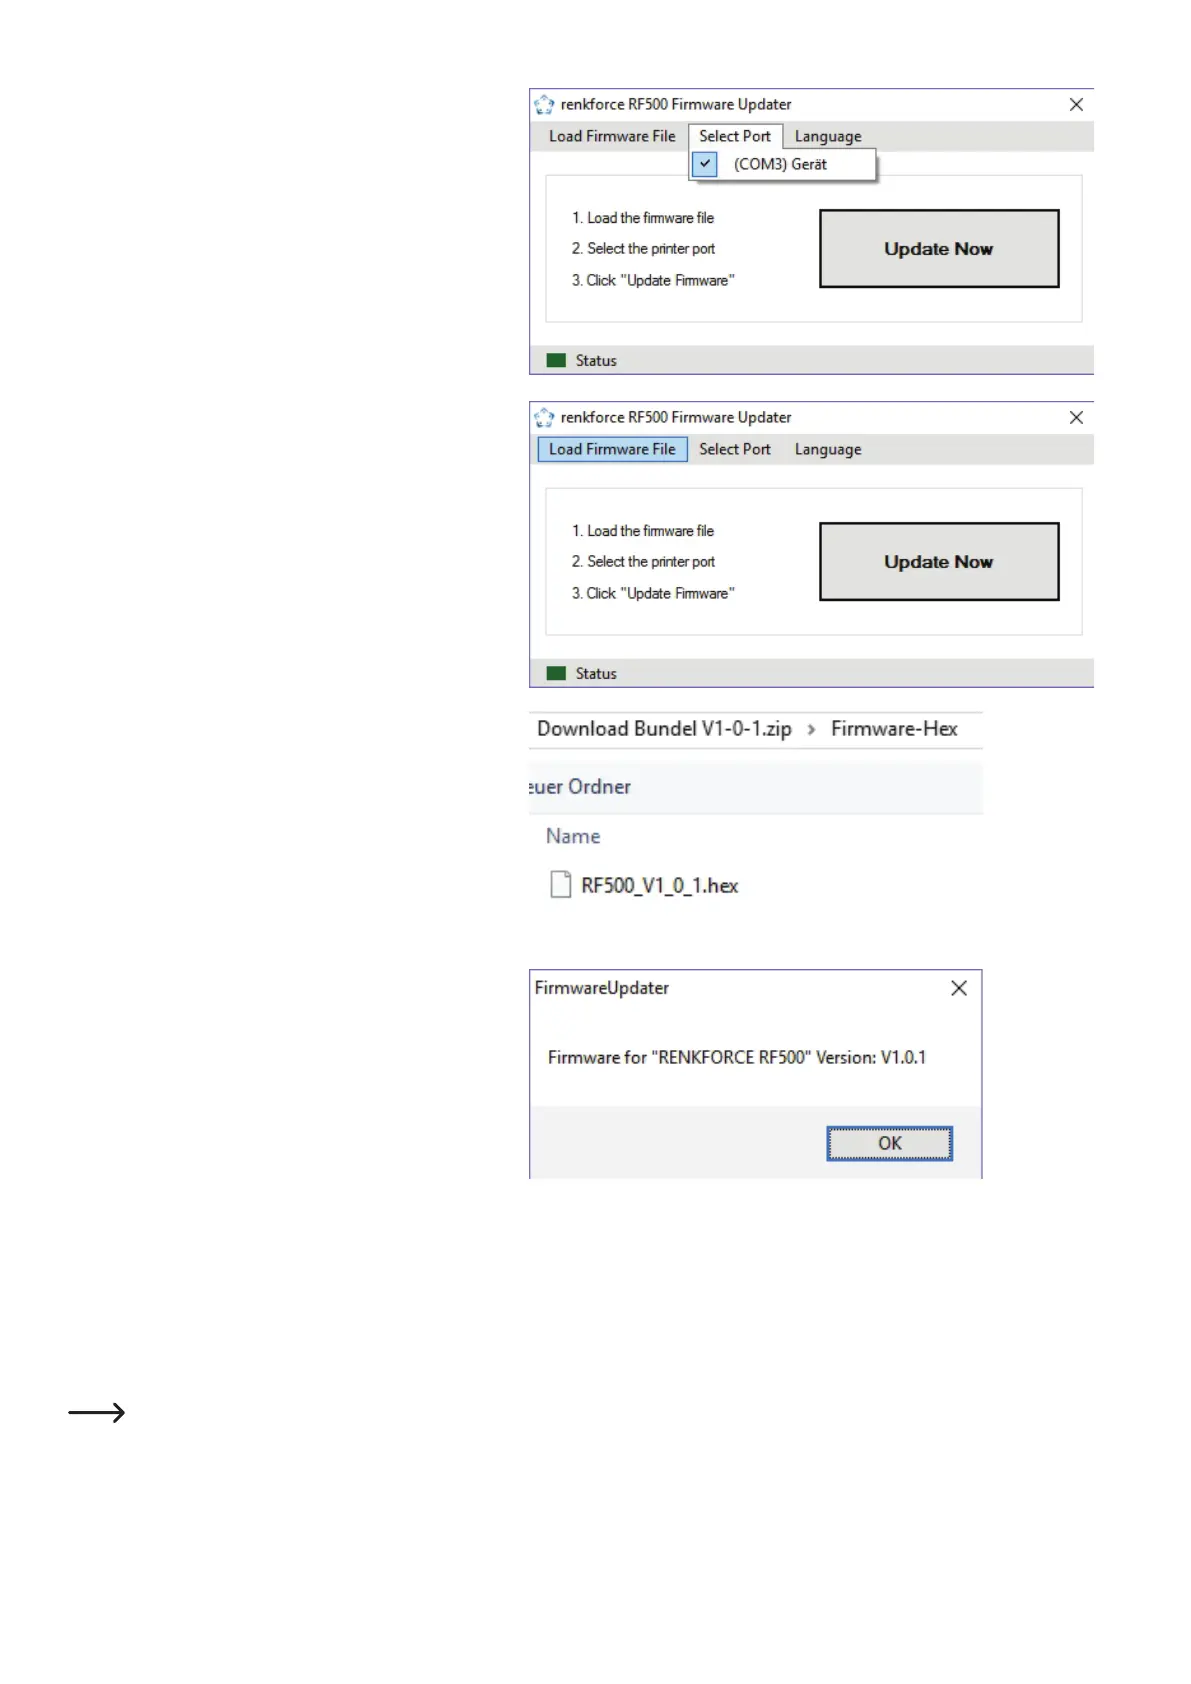
• Now select the desired serial connection. For this, click
"Select Port".Ifmorethanonedeviceisdisplayed,briey
disconnect the main PCB at the USB connection and then
recommend it. The device that disappearedbriey isthe
right one.
• Toselectthermwarele,click"Load Firmware File".
• Usually,thefolderinthedownloadbundlethatcontainsthe
rmwarewillbeopenednow.Ifthisisnotthecase,open
the folder "Firmware-Hex" manually. Then open the cor-
responding subfolder "RF500-withBed"(forthepreassem-
bled device) or "RF500-withoutBed"(fortheconstruction
kit).Openthermwarele"RF500_Vx_x_x.hex" in it.
• Tostarttheupdate,click"Update now".
• Thermwareversionwillbedisplayed.Conrmwith"OK".
• Tostarttheupdate,click"Update now" in the main window.
• Therewillbeanotherquerywhetheryoureallywanttoperformtheupdate.Conrmwith"Yes".
Theupdatewillnowbeinstalled.Duringthis,thedisplayinthelowerleftoftheupdaterandonthemainPCBwillash.
• Oncethemessageshowsthattheupdateiscomplete,conrmitwith"OK".
• Next,pushthebuttonatthemainPCB,waitforafewsecondsandthendisconnectthecablefromtheUSBconnectionagain.
If you update later, while the PCB is already installed, remove the USB cable and voltage supply from the printer after the update.
Wait for about 20 seconds to connect both again.