70
AssemblyofthePCBholderattheprinter
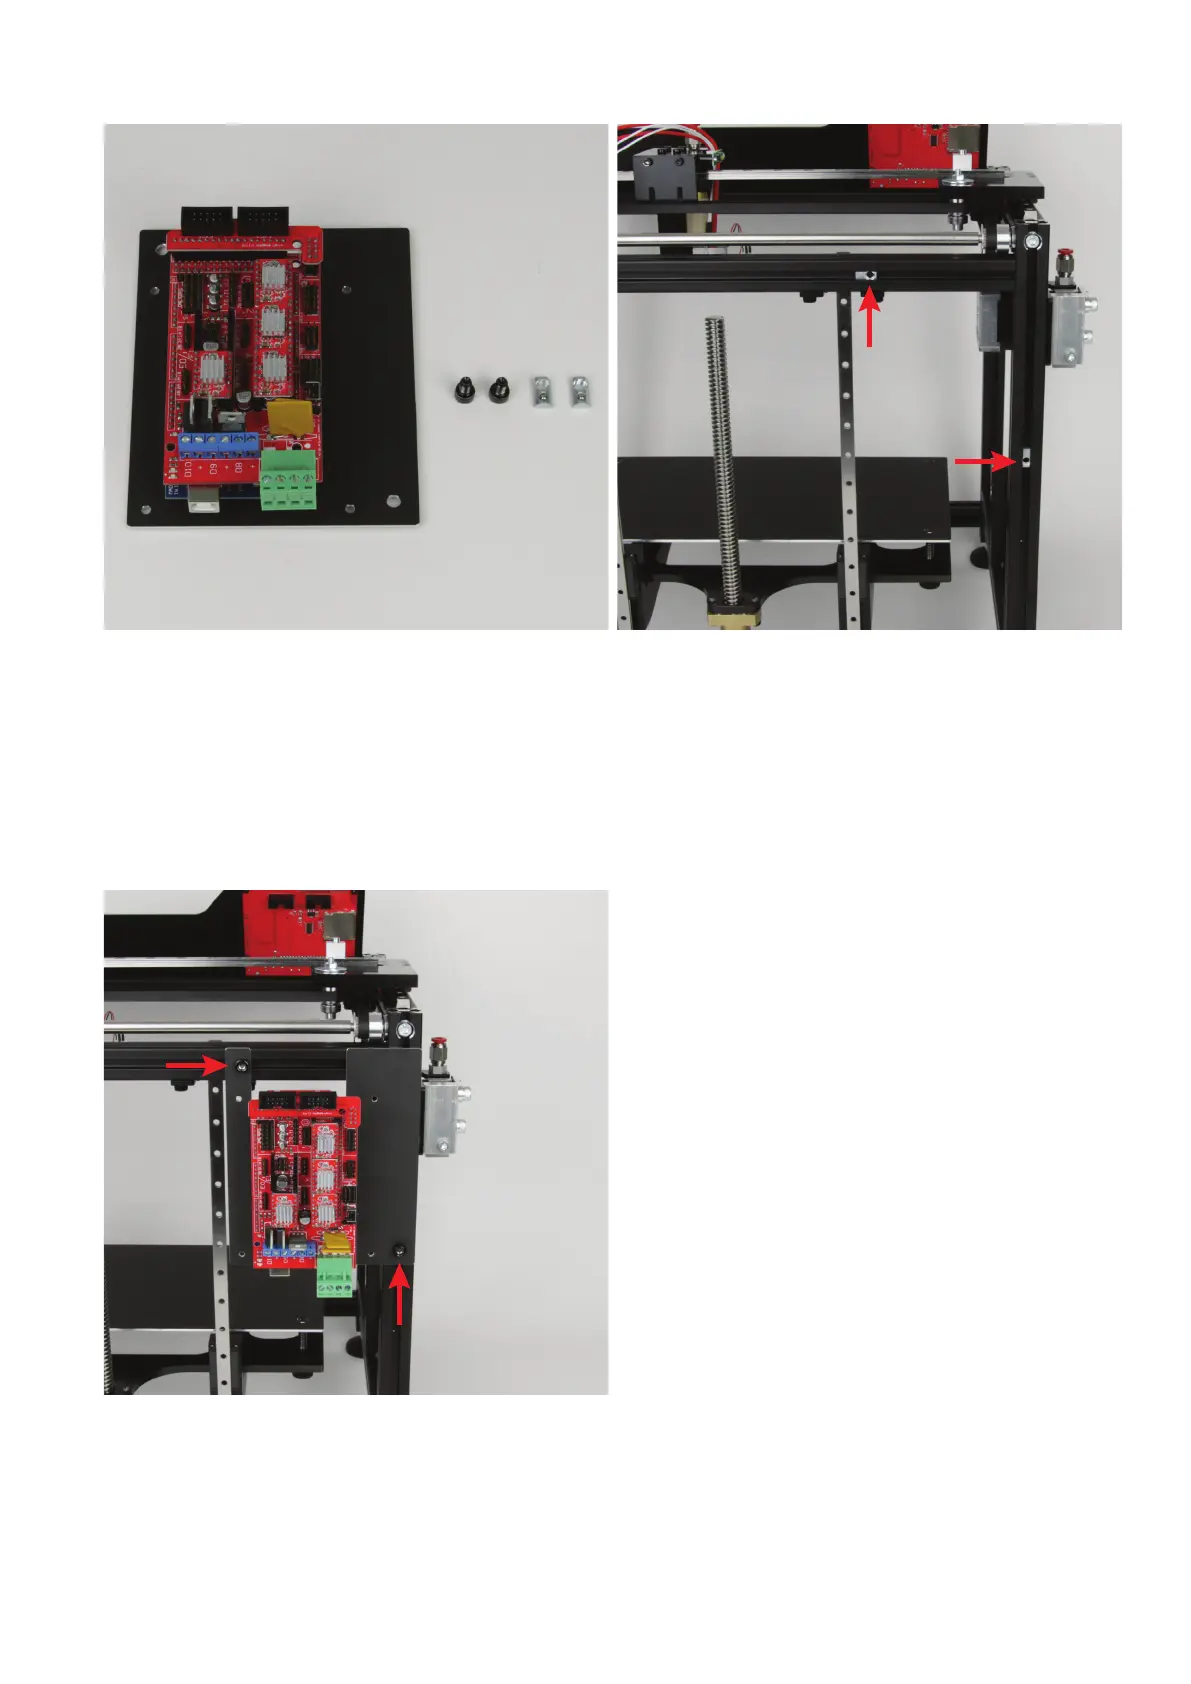
1x PCB holder with main PCB
4x cylinder head screw M5x8 black
2x slot nut M5
Pushthe2slotnutsintothegrooveoftheupperaluminiumproleand
theleftaluminiumprole(viewedfromthefront)attherearasshown
inthegure.Thethreadsmustbealignedtotherightordownwardsas
illustrated.
Hold the
PCB holder
against the slot nuts and align the two slot nuts
with the bores in the
PCB holder
.
Assemblyofthecoolingbodiesonthemotordrivers
Attach the PCB holder to the two slot nuts placed before loosely with
the two M5 cylinder-head screws.
Align the PCB holder with the outer edges of the two aluminium pro-
les.Tightenthecylinder-headscrews.