Specifying a Destination
51
1
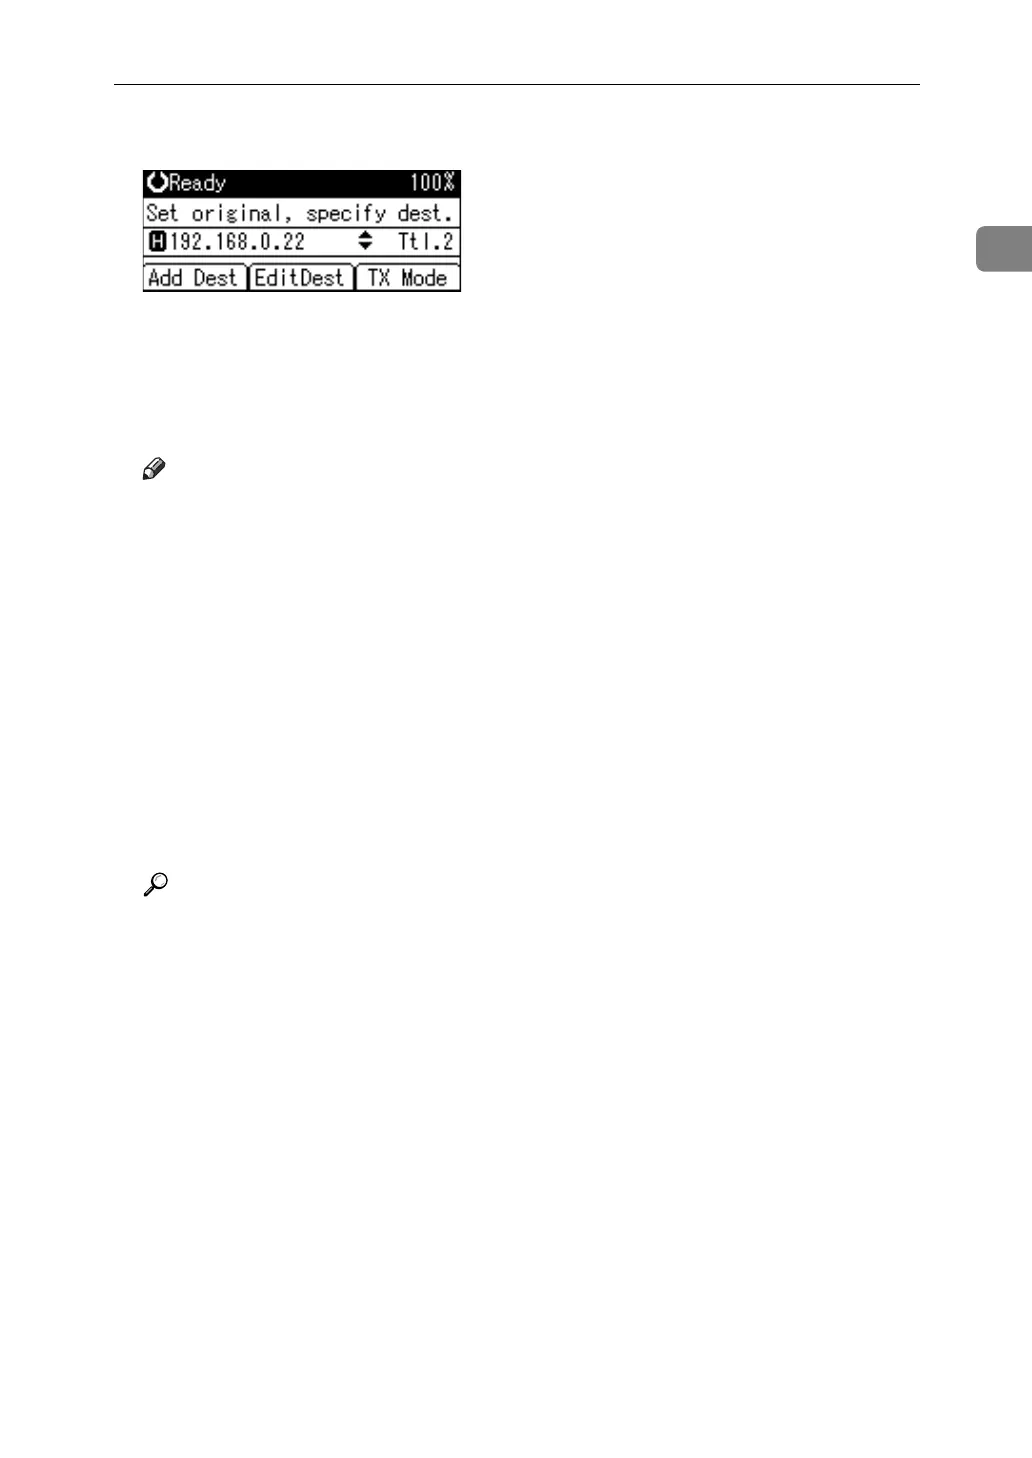
E Specify the next destination.
To add another destination, repeat steps
D
and
E
.
F Press the {Start} key.
The machine starts to scan the original and stores it in memory. When scan-
ning ends, the Communicating indicator lights and transmission starts.
Note
❒ Depending on security settings, [Manual] may not appear, and you may be
unable to enter the IP-Fax destination.
❒ For a list of gateways (T.38-compliant), gatekeepers, or SIP servers that are
certified as operable with this machine, contact your local reseller or ser-
vice representative.
❒ Methods of entering a destination vary depending on the network settings
made by the administrator. Ask the machine administrator for details. For
details about entering the IP-Fax destination, see “Regarding IP-Fax destinations”.
❒ To avoid accidentally pressing the wrong Quick Dial key, you can set the
machine so that each time a destination is added using a Quick Dial key,
[Add Dest] must be pressed. Make the setting in User Parameters (switch 17, bit 2)
in the Fax Features menu.
❒ For the maximum number of digits for a destination, see “Maximum Values”.
Reference
p.24 “IP-Fax Functions”
p.52 “Regarding IP-Fax destinations”
p.58 “Using the Quick Dial Keys”
p.186 “Maximum Values”
“Entering Text”, About This Machine
“Fax Features”, General Settings Guide