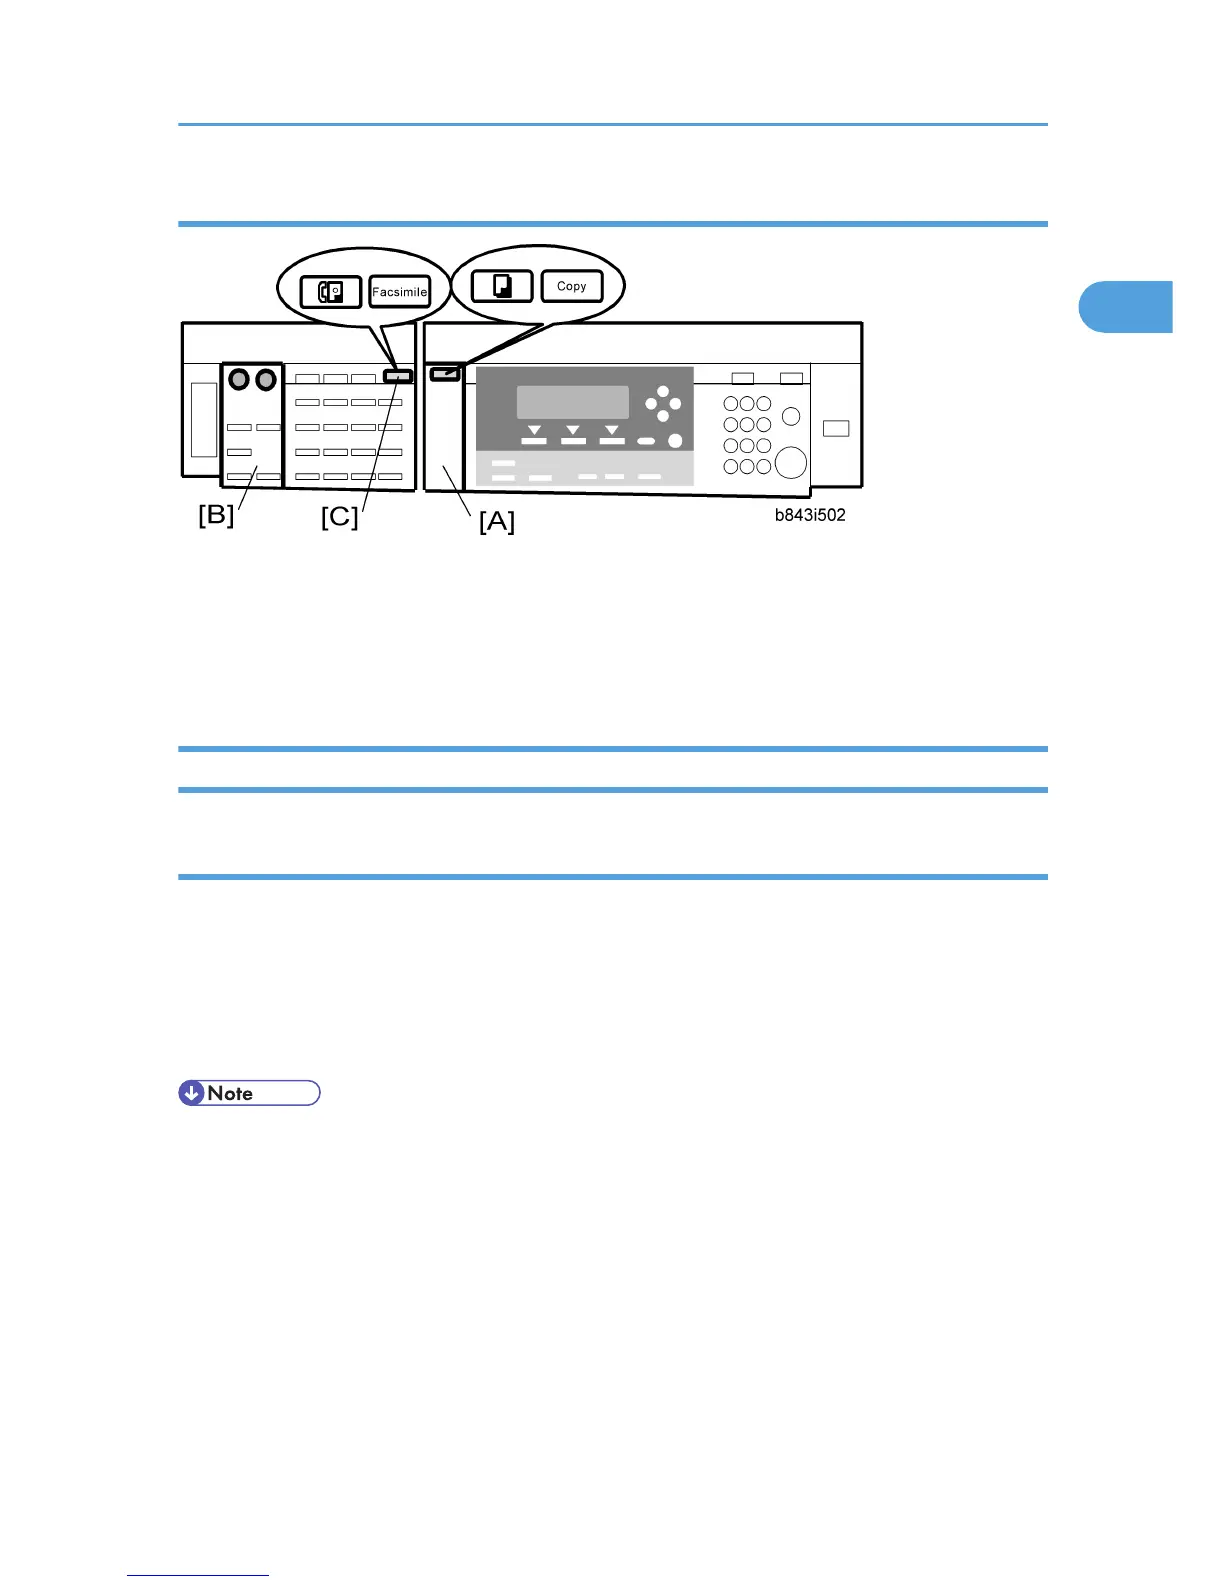
Step 5–Fax Keys
1. Remove the dummy cover (from the basic operation panel) and install the copy key panel [A].
2. Install the fax panel [B].
3. Remove the dummy key (from the optional operation panel) and install the fax key [C] to the optional
operation panel.
Settings
Step 6–Fax Settings
Initializing the Fax unit
When you press the Fax key for the first time after installation, the error "SRAM
problem occurred / SRAM was formatted" will show on the LCD for initializing
the program of the fax unit. Turn the main power switch off/on to clear the error
display.
• If another error occurs after initialization, this can be a functional problem.
1. Select fax SP1-101-016 and specify the country code.
2. Select fax SP3-101-001 and specify the service station.
For Fax option only (without printer/scanner option)
1. Turn the main switch on.
2. Start the SP mode.
3. Select SP5-985-001 (NIC setting) and change the setting value to "0" (OFF).
4. Select SP5-985-002 (USB setting) and change the setting value to "0" (OFF).
5. Turn the main switch off and on.
Fax Unit (B868)
13