13. Close the center cover.
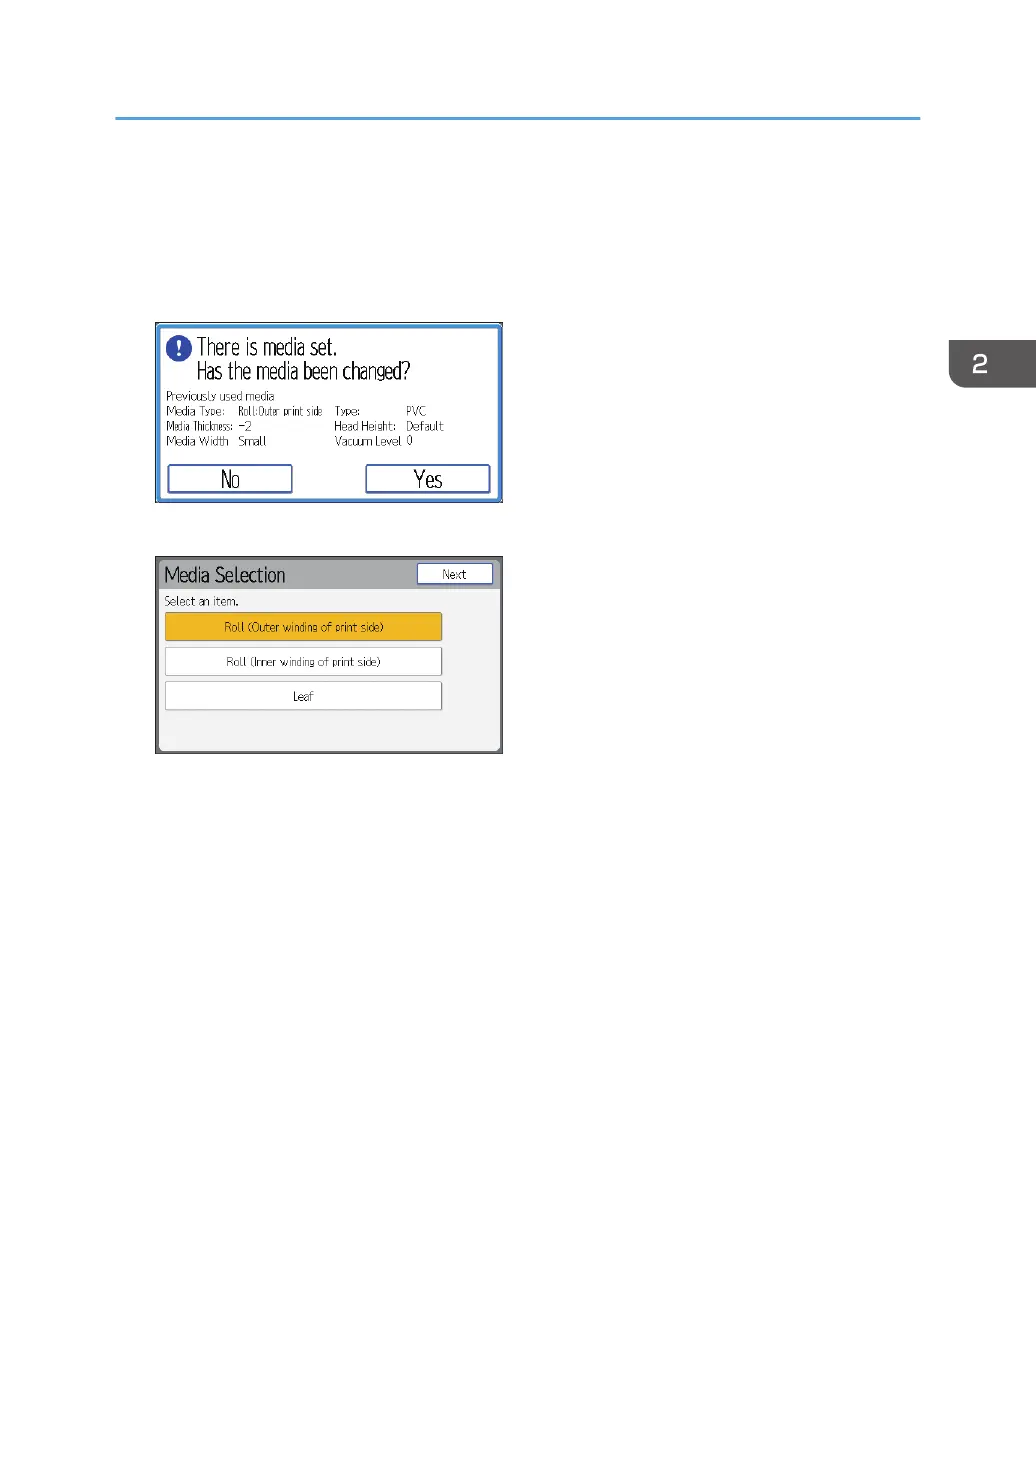
When the media has set correctly, a confirmation screen appears on the control panel.
14. Press [Yes] on the confirmation screen for media replacement.
If you do not need to change the media settings, press [No] to proceed to Step 25.
15. Select [Leaf], and then press [Next].
16. When changing the media type, press [Media Type].
17. Select the media type of the set media, and then press [Set].
18. When changing the thickness of the media, press [Media Thickness].
19. Select the thickness of the set media, and then press [Set].
20. When changing the height of the print heads, press [Head Height].
21. Select the height of the print heads from [Default], [+1], [+2], or [+3] depending on the
thickness of the media, and then press [Set].
Set the height of the print heads so that it does not interfere with the media. However, having too
much space between the media and the print heads can also have a negative impact on print
quality.
22. When changing the media width, press [Media Width].
23. Select the width of the set media, and then press [Set].
24. Press [Next].
The media feed screen appears.
25. Press [Feed] to feed the media to the media output location.
When the vacuuming of media is insufficient, press [Vac.Lv. Change], and then change the vacuum
level. The vacuum level can be set in 9 steps.
Setting Media
77
 Loading...