5. Tubing Curler Installation
a. Place the tubing curler on top of the tubing, asdepicted in the figure above.
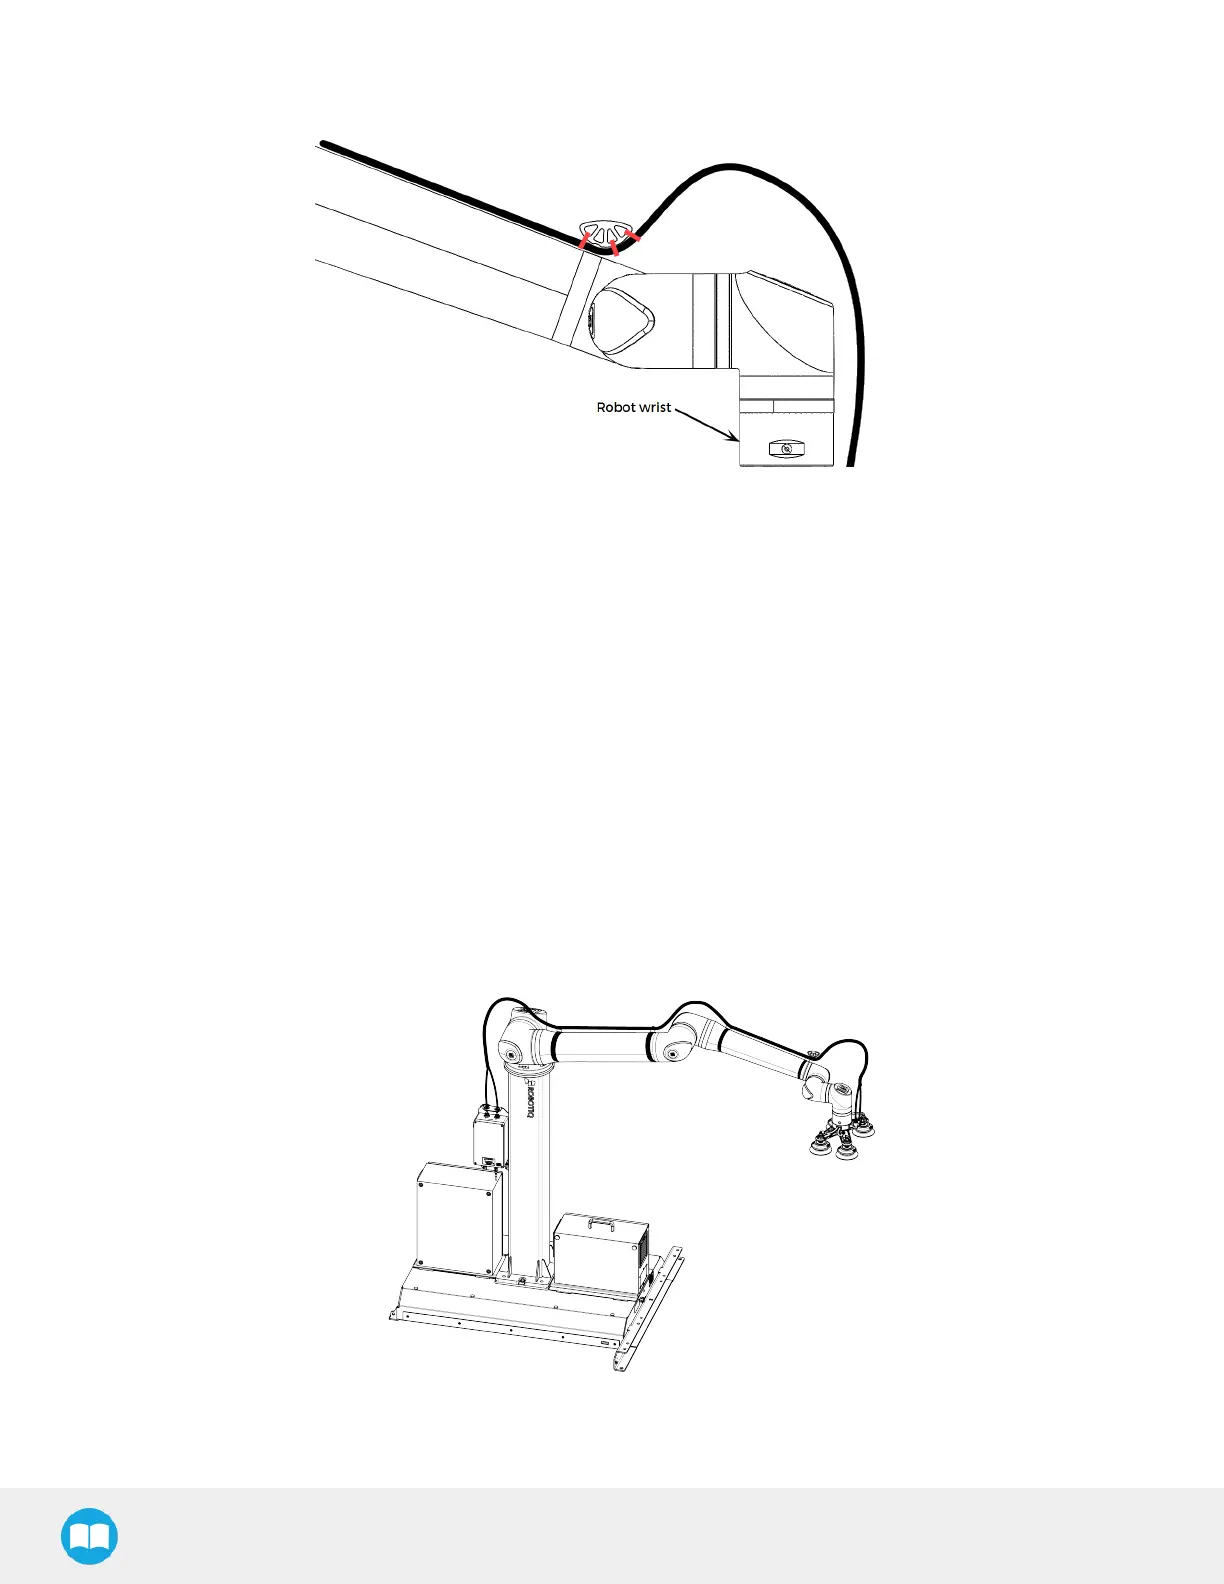
b. Align the tubing curler’s notch with the cable tie attached to the cable clip (#1)(the longer section of the tuble
curler should point towards the wrist of the robot).
c. Use the three provided cable ties(red component in the figure above)to secure the tubing to the tubing curler,
and make the tubing follow the arch of the tubing curler.
6. Finalization
a. Verify that the tubing travelsalong each straight section of the robot. Move cable clips #2 or #3 to adjust the position of the
tubing if needed.
b. Rotate the tubes to remove twists in the tubing, if any.
c. Verify each hook and loop fastener and tighten them until the cable clipscannot move when being pulled or pushed.
d. Verify each cable clip and tighten the cable tie to prevent the tubing from sliding.
e. Cut the excess length from the cable ties.
Depiction of Complete Cable Management
49