27
© Rodenstock GmbH
Status: September 2023
4.4.5 Box dimensions
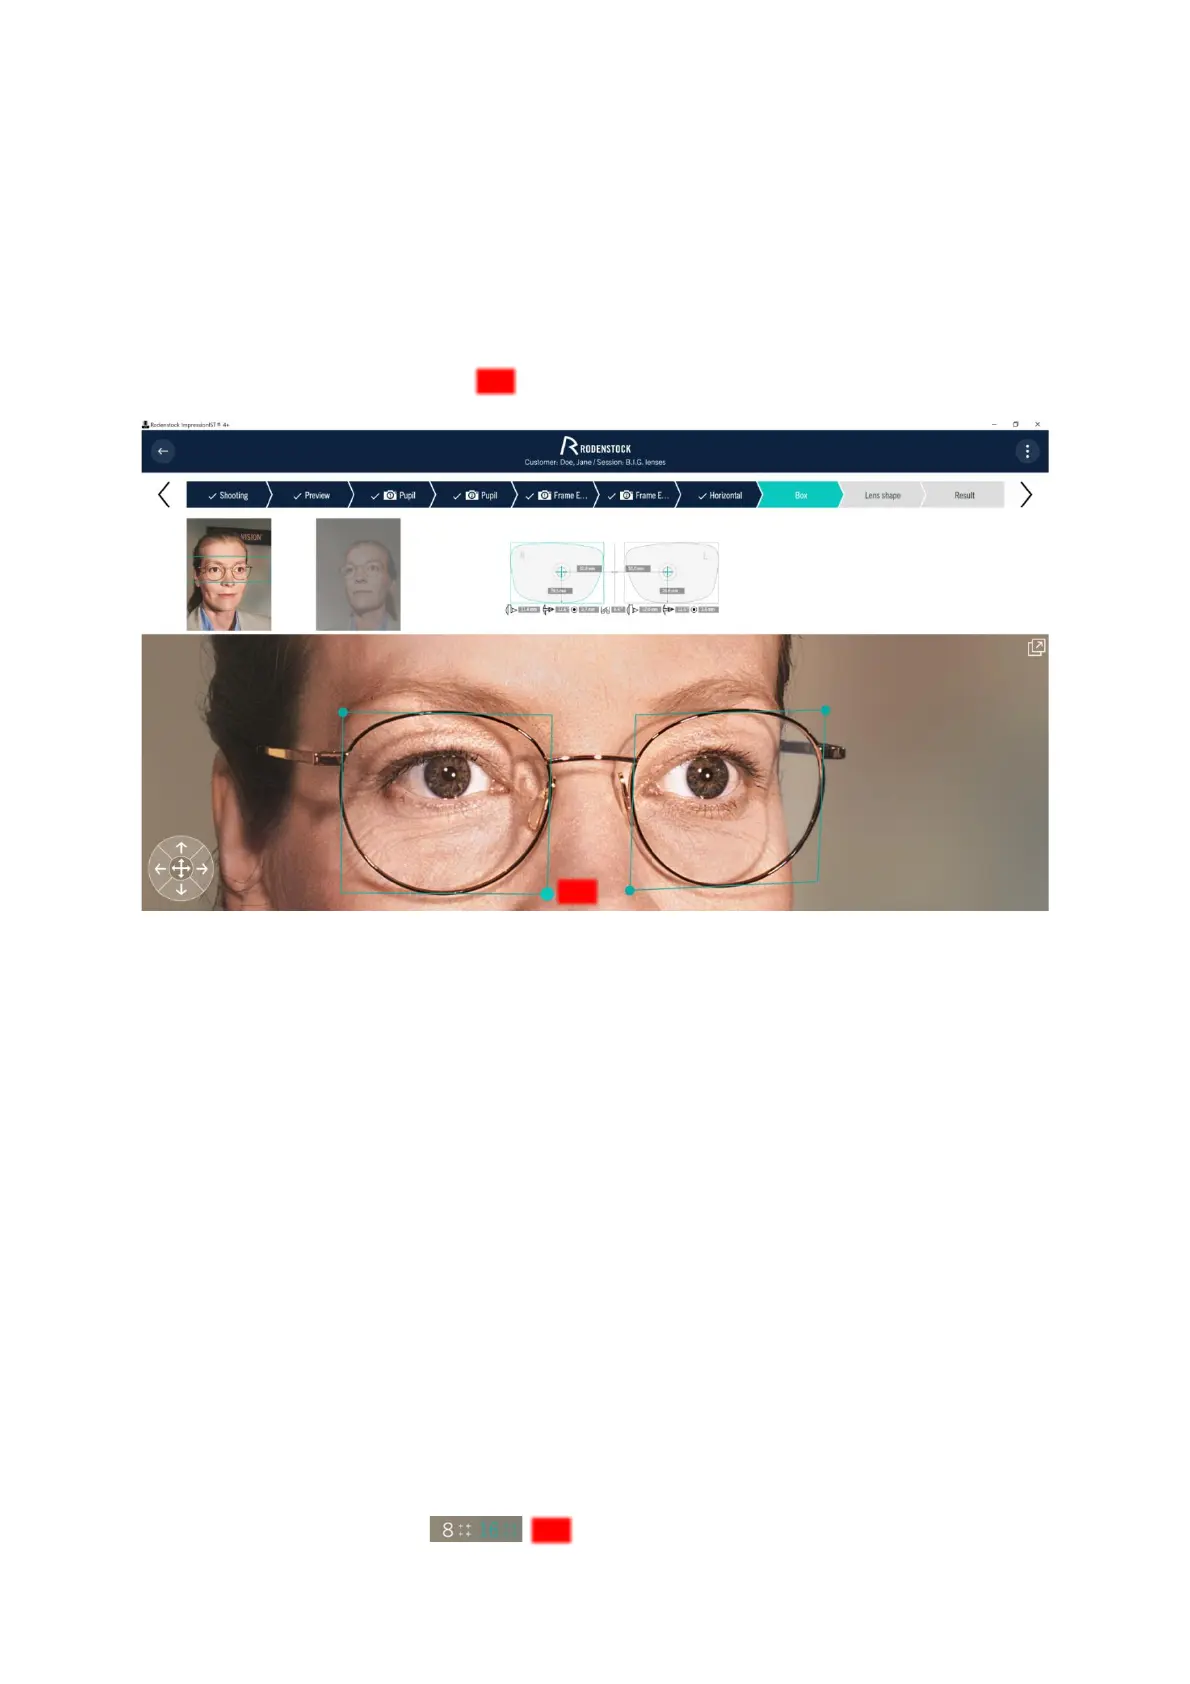
Now determine the box dimension (see Figure 4 14).
To do this, align both selection boxes at the innermost nasal point, at the lowest point of the disc front surface
edge, and at the maximum upper and temporal transition between the disc front surface and the frame edge. The
boxes are aligned to the three-dimensional disc and frame shape, considering the frame disc angle and pre-tilt.
Only then is it possible to determine the exact box dimensions in the plane of the pane. You move the selection
boxes by "touching and dragging" the selected corners ( ). For differentiation, the currently selected corner is
highlighted with a larger and brighter dot.
Figure 4-14: Box dimensions
• For optimal results, use the zoom function and the arrow keys to move the selection box.
After that, the software recalculates the individual parameters using the data from the previous steps, so there
may be slight changes in the values.
4.4.6 Lens shape
In the program item "Lens shape", the pane shape of the selected version is marked and saved for a later shape
data transfer (e.g. MDM order) or finishing consultation. After recording, the slice shape is passed on to the
results log, as well as the order form in Customer Management and is required for determining important order
and design parameters.
As soon as you have reached the "Lens shape" program item, sixteen selection points appear at the edge of the
slices, which have been automatically preselected by the system (Fig. 4-15). After activating a point, it can be
moved very precisely in all directions.
• You can set all selection points to the correct position on the edge of the target by "touch and drag" or by
using the [arrow keys]. Selecting with [arrow keys] will give you a much more accurate result than
selecting by hand.
Sixteen selection points are preset by default. For simple frame shapes, only 8 selection points can optionally be
assigned. To do this, press the icon