Connecting HDMI devices and outputting video via USB
26
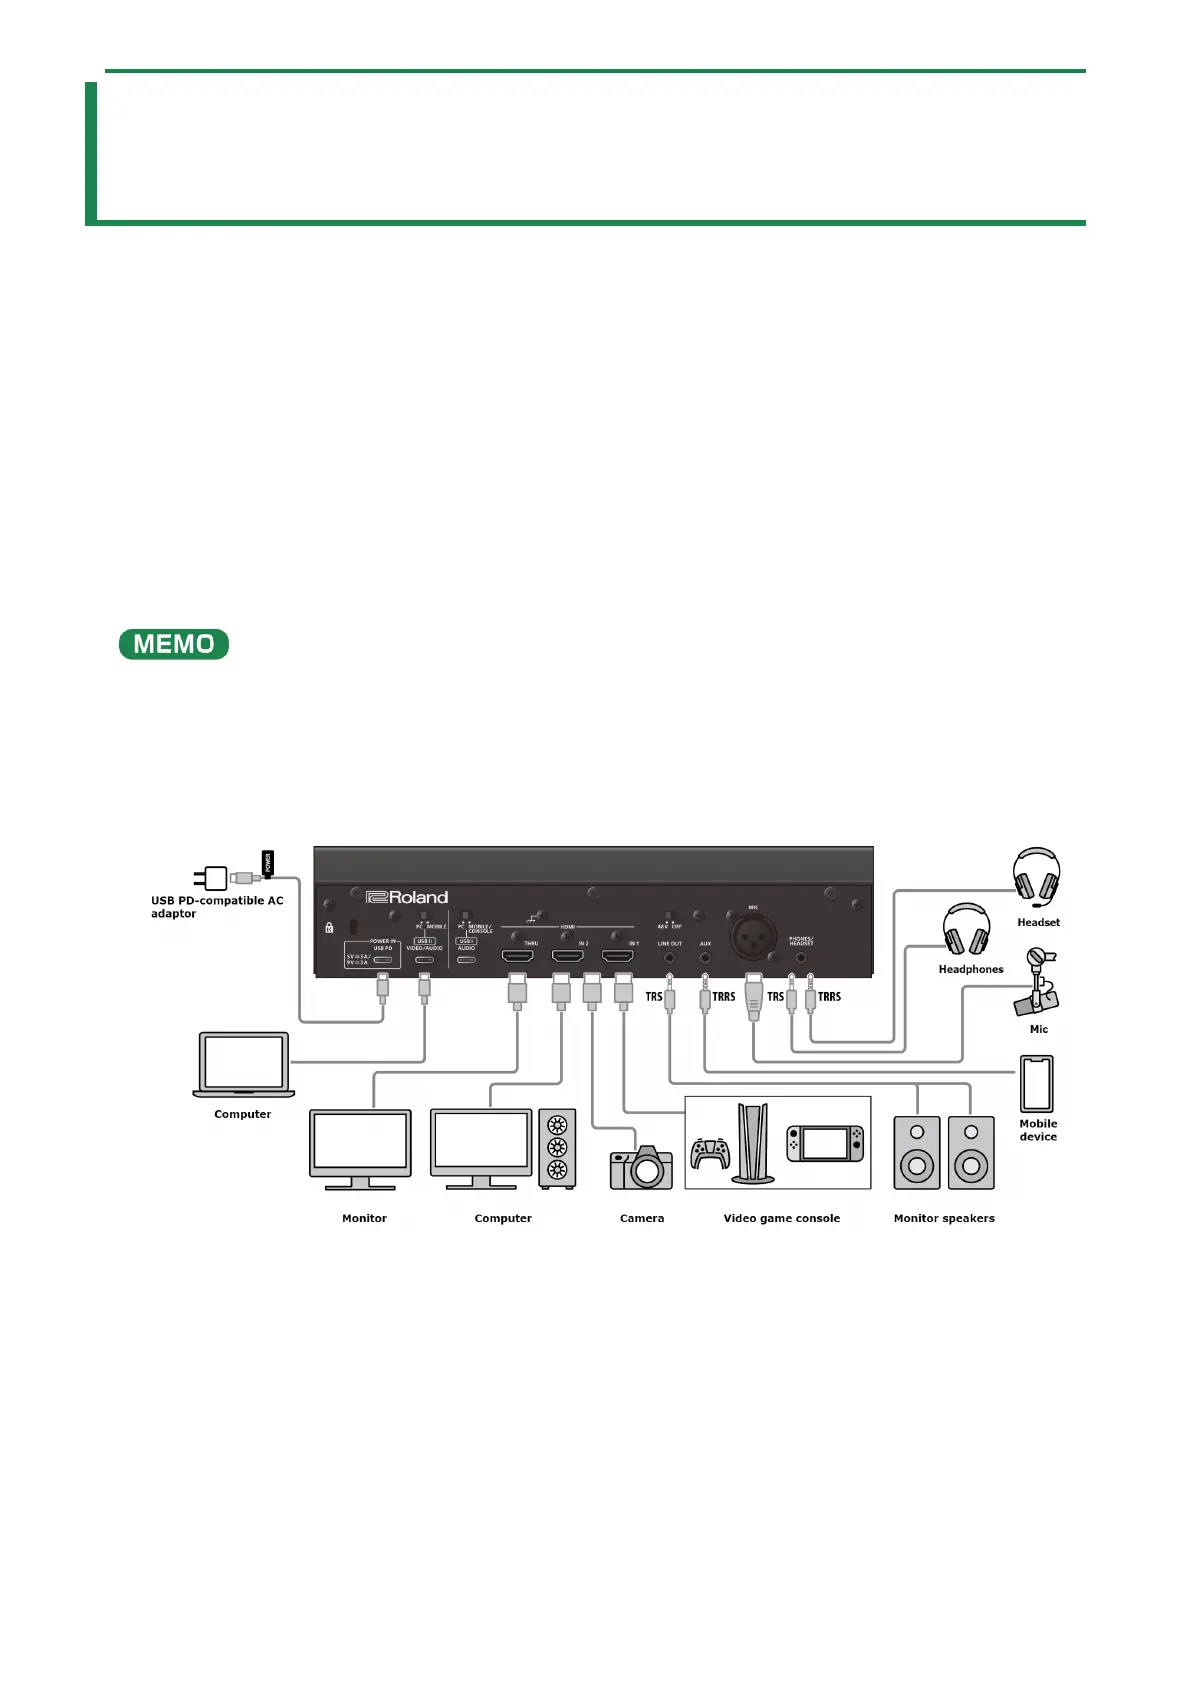
Connecting HDMI devices and outputting video
via USB
Here’s an example of how to output the game or other video signal that’s input from the HDMI IN (1, 2) connectors via USB to your
computer.
* To prevent malfunction and equipment failure, always turn down the volume, and turn off all the units before making any
connections.
* Before turning the unit on/off, always be sure to turn the volume down. Even with the volume turned down, you might hear
some sound when switching the unit on/off. However, this is normal and does not indicate a malfunction.
1.
Use an HDMI cable to connect your computer or gaming device to the HDMI IN 1 or 2 connector.
2.
If you want to use an external display to check the video that’s input from the HDMI IN 1 or 2
connectors, connect the display (monitor) to the HDMI THRU connector.
If you want to use the HDMI THRU connector to output a video that’s input to the HDMI IN connector with a frame rate of 60 Hz
or greater, set HDMI IN CAPABILITY MODE (EDID)(P.84) to “DISPLAY THRU” or “MERGED”.
3.
When outputting a video via USB that’s input to the HDMI IN 1 or 2 connectors, connect your computer
to the USB II port.
Be sure to use only the included USB cable.
4.
Press the VIDEO [HDMI IN] button to select the input video.
Press the button to toggle between 1 (HDMI IN 1) and 2 (HDMI IN 2).
5.
Press the VIDEO [USB OUT] button to output the video to your computer.
The VIDEO [USB OUT] button lights up, and the video signal is output to the computer that’s connected to the USB II port.
When you press the VIDEO [USB OUT] while it is lit, a black screen is output to the computer, and the VIDEO [USB OUT]
button blinks.
Long-press the VIDEO [USB OUT] button to stop the video output to your computer. The VIDEO [USB OUT] button goes dark.
 Loading...