86
Ways to Record a Pattern
There are three ways to record a pattern.
Realtime
recording
(Realtime REC)
Create a pattern by recording your keyboard performance and
controller operations just as you perform them.
Step recording
(Step Rec)
Create a pattern by successively recording your keyboard
performance one step at a time.
TR-REC
This method lets you place notes of each instrument on the
steps at which you want them to be heard. This method is
suitable for creating drum patterns.
Preparing for Recording
Here’s how to prepare for recording a pattern.
1.
Select a scene (p. 22).
Patterns, groups, and songs are stored for each scene.
Some of the scenes provided with the factory settings contain
patterns and songs. If you want to start with a blank state and
make a new recording from scratch, delete the existing patterns
(DELETE ALL) as described in “Deleting Patterns (DELETE)” (p.
91), or select one of the empty scenes (INITIAL SCENE) of
number C017 and follows.
NOTE
A deleted pattern cannot be recovered.
If you create a pattern and then switch to another scene or turn off the
power without saving the scene, the data you created is lost.
2.
Select a sound (tone) for the zone (p. 23).
In advance, it’s a good idea to decide generally which
instruments will be assigned to which zones. If you want to
record layered tones, you should also make layer settings in
advance. You can also change the selected tone afterward.
Realtime Recording (Real Time REC)
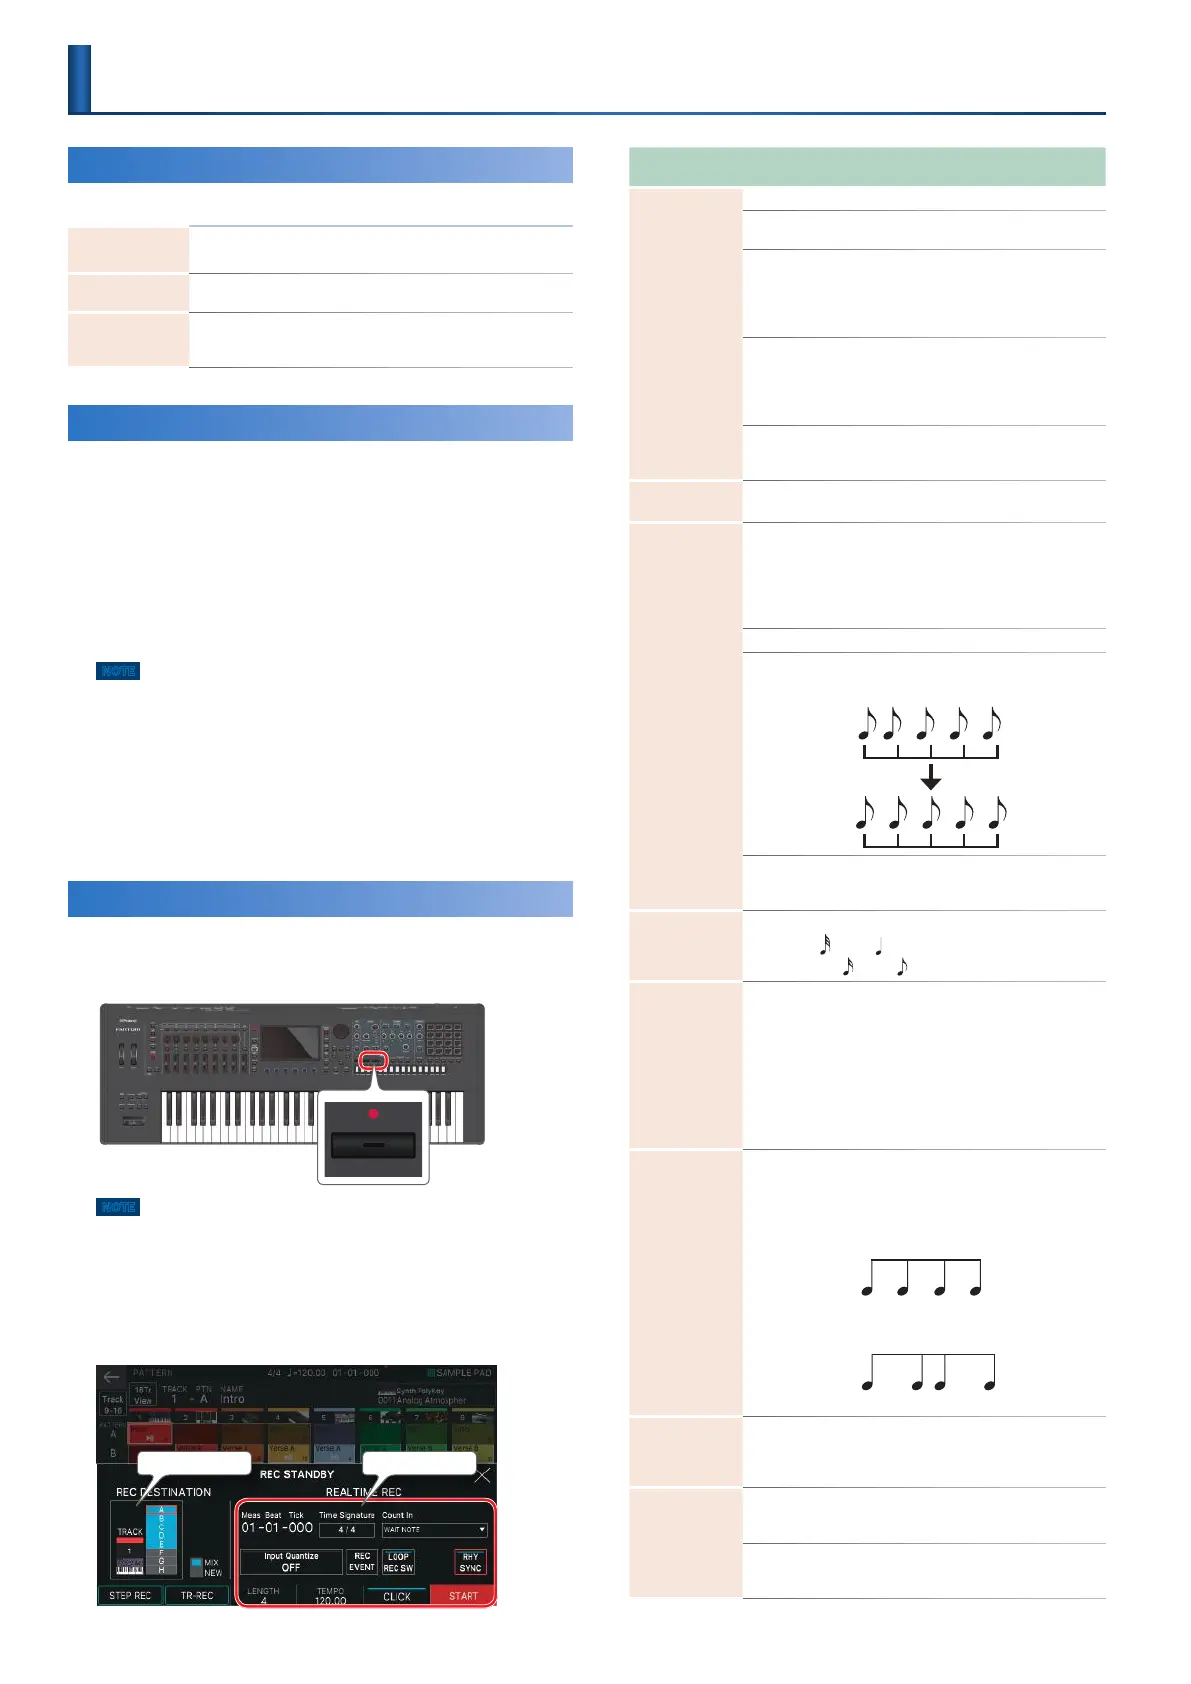
1.
Press the [7REC] button.
The REC STANDBY screen appears.
NOTE
Although recording operations can be done even while a pattern is
playing, you can’t perform recording operations from the GROUP screen
or the SONG screen.
2.
Make settings for recording.
Directly touch parameters in the screen to select them, or use the
[VALUE] dial to edit the value.
TRACK/PATTERN Recording Parameter
Recording
Parameter
Value Explanation
<Count In>
Selects the way in which recording is started.
NONE
Recording begins immediately when you
press the [JPLAY] button.
1 MEAS
When you press the [JPLAY] button, a
count begins from one measure before
the recording start location; recording
begins when the recording start location
is reached.
2 MEAS
When you press the [JPLAY] button, a
count begins from two measures before
the recording start location; recording
begins when the recording start location
is reached.
WAIT NOTE
Recording begins when you press the
[JPLAY] button, or when you press a key,
press a pad, or press the hold pedal.
<Time
Signature>
4/4, 3/4
Specifies the time signature.
This can be specified if all patterns are empty.
<Input
Quantize>
Quantize is a function that automatically corrects
inaccuracies in the timing at which you play the keyboard or
the pads, tightening-up the rhythmic accuracy.
You can apply the quantize function during realtime
recording. This setting specifies whether quantize will be
applied during recording.
OFF Quantize is not applied during recording.
GRID
Grid quantize is applied during recording.
Use this when you need accurate timing,
such as for drums or bass.
SHUFFLE
Shuffle quantize is applied during
recording. Use this when you want a
bouncy rhythm such as shuffle or swing.
Resolution [E5]
knob
Specifies the note timing value at which quantization is applied.
GRID: 1/32 ( )–1/4 ( )
SHUFFLE: 1/16 (
)–1/8 ( )
Strength [E6]
knob
0–100%
This setting is used with grid quantize. It
specifies the degree to which your notes
are moved to precise intervals of the
note values specified by the RESOLUTION
setting. If this is set to “100%,” the notes
that you record are moved all the
way to exact intervals of the specified
RESOLUTION. With lower percentages,
less correction is applied. If this is set to
“0%,” the timing is not corrected at all.
Rate [E6] knob 0–100%
This setting is used with shuffle quantize.
If this is set to “50%,” the notes sound
at equal intervals. Raising the value
produces a bouncy feel as with dotted
notes.
50 5050 50
90 10 90 10
Rate=50%
Rate=90%
<RHY SYNC> OFF, ON
Specifies whether the currently selected
rhythm pattern is automatically played
and recorded (ON) or not recorded (OFF)
when recording starts. (p. 33)
<LOOP REC SW>
ON
Continue recording even after you’ve
recorded the measures specified by the
Length setting.
OFF
Transition from recording to playback
when you’ve recorded the measures
specified by the Length setting.
Recording a Pattern
 Loading...