141
Expanding the memory
Appendices
4.
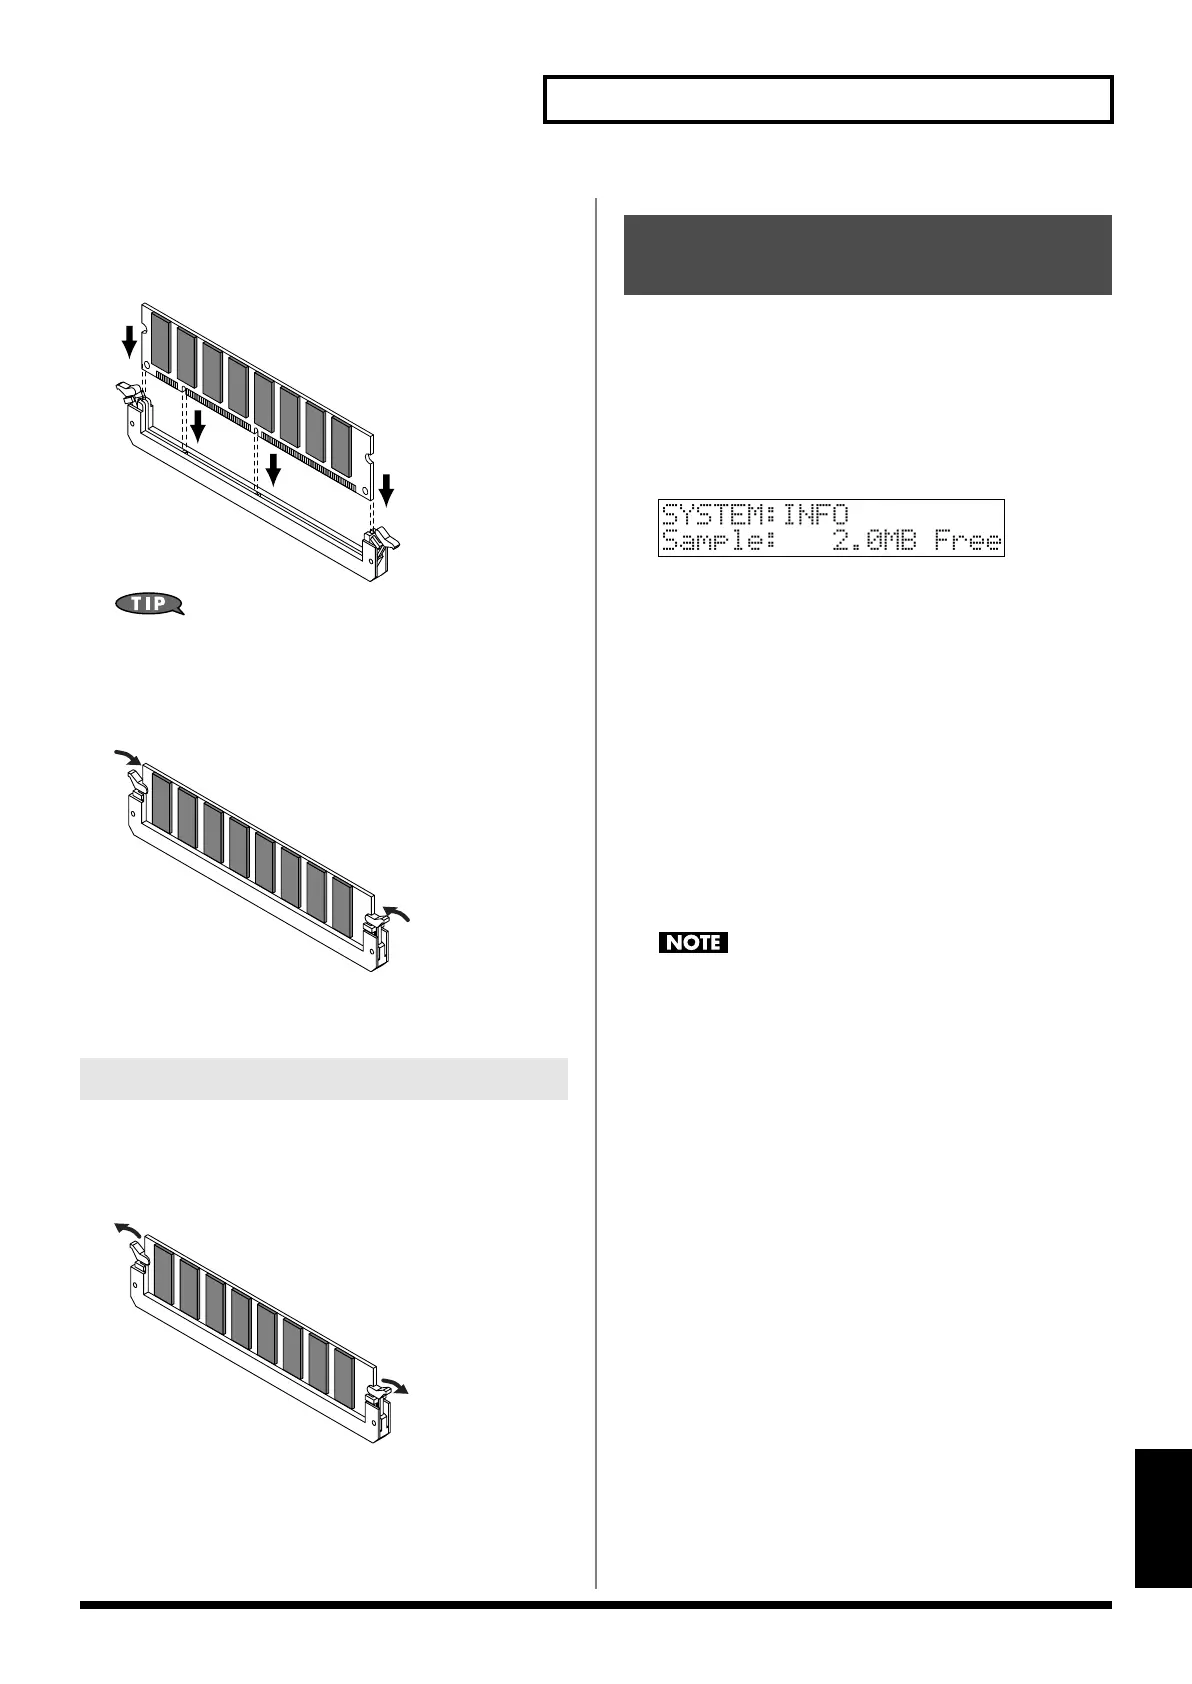
Paying attention to the location of the notches on the
memory module and the correct orientation, insert the
module vertically within the guides at either side of the
socket.
fig.DIMM-02
If you have difficulty inserting the memory module, try tilting it
a bit and inserting one end at a time.
5.
Press them until the white clips move upward and memory
module is locked in place.
fig.DIMM-03
6.
Use the screws that you removed in step
2
to fasten the
cover back in place.
To remove the memory module, reverse the installation procedure.
1.
Simultaneously press outward the white clips located at
either end of the socket.
fig.DIMM-04
2.
Remove the memory module from the socket.
1.
Turn off the power as described in “Turning on/off the
power” (p. 18).
2.
Press [SYSTEM] to enter System mode.
3.
Hold down [SHIFT] and press keyboard pad [14].
Verify that the screen shows the amount of free memory you
installed.
fig.08-008
4.
Press [EXIT] to return to the previous screen.
* If the correct amount of free memory is not shown, it is possible that
the memory is not being recognized properly. Turn off the power as
described in
“Turning Off the Power”
(p. 18), and re-install the
memory correctly.
Specifications of the expansion memory
(DIMM) that can be used
Number of pins:
168-pin
Speed:
100 MHz (PC100 CL=2)
133 MHz (PC133 CL=3)
Voltage:
3.3 V
Capacity:
128 MB–512 MB
Board height:
38 mm or less
The MC-808 has been confirmed to work with standard
memory that meets the above specifications. However, we
cannot guarantee that all memory of these specifications will
work correctly. Please be aware that even with identical
specifications, differences in the design of the memory module
or the conditions of use may mean that a memory module may
not be usable.
Removing the memory
Checking that memory is
installed correctly
MC-808_r_e.book 141 ページ 2007年7月17日 火曜日 午後5時1分
 Loading...