Do you have a question about the Roland TrueVIS VG2-640 and is the answer not in the manual?
Overview of printer unit, operation panel, display screen, and menu structure.
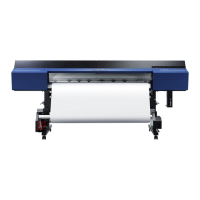
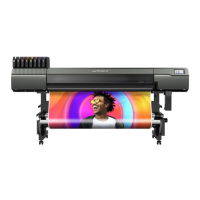
Identification and overview of printer components including front, rear, and side views.
Details on media types, sizes, and conditions for usable media for the printer.
Diagrams illustrating the main menu, calibration, and sub-menu structures.
Instructions for turning the printer power on, off, and precautions for operation.
Procedures for installing and setting up roll and sheet media on the printer.
Guidance on initial adjustments, including ink landing position and pre-output checks.
Steps for verifying LAN settings and preventing ink sedimentation.
Instructions on how to pause, resume, and cancel printing operations.
Information on handling out-of-ink warnings and replacing cleaning liquid pouches.
Includes performing printing tests and normal cleaning procedures.
Steps for batch settings and starting the printing process.
Steps for switching off heaters and adjusting cutting settings.
Procedures for batch settings and starting the cutting process.
Includes printing tests, normal cleaning, and cutting adjustments.
Steps for batch settings and starting the combined printing and cutting process.
Details on printing tests, normal cleaning, and cutting adjustments for crop marks.
Procedures for batch settings, starting output, and preparations for crop mark cutting.
Adjusting ink landing position and reducing horizontal bands for better print quality.
Adjusting print head height and settings for transparent, hard-to-dry, or sticky media.
Methods to prevent media soiling, dot drop-out, and misaligned media.
Settings for print heater, dryer, preheating, and drying times for optimal ink drying.
Fine-tuning cutting conditions like force, speed, offset, and cutting-in amount.
Correcting misalignment between printing and cutting positions.
Manual alignment of positions and sensor correction for crop mark cutting.
Saving and loading current settings for media optimization.
Setting the base point to define the printable area and optimize output.
Speeding up output for narrow media by adjusting head movement.
Information on the optional media take-up unit.
Using the mobile app for printer operations via Bluetooth.
Features like print light and horizontal test print arrangement.
Setting date/time, displaying media remaining, and using pinch rollers.
Configuring menu language, units, Bluetooth, and system information.
Safety and handling guidelines for the printer and ink pouches.
Information on maintenance types, timing, and measures for prolonged periods of non-use.
Procedures for cleaning the media path and knife carriage roller.
Precautions and procedures for safely disposing of discharged fluid.
Performing printing tests and normal cleaning for print head maintenance.
Using medium and powerful cleaning methods when normal cleaning fails.
Steps for manual cleaning when symptoms persist after other methods.
Mixing ink by shaking pouch trays and performing damper/super cleaning.
Guidance on damper cleaning and troubleshooting white ink color issues.
Procedures for super cleaning, print head restriction, and emergency cleaning.
Using nozzle mask to limit print heads and reduce dot drop-out impact.
Procedure for emergency cleaning of the print head surface.
Instructions for replacing wipers, tray pads, and cleaning the wiper tray.
Procedures for replacing the cutting blade and separating knife.
Troubleshooting steps for coarse prints or horizontal stripes.
Diagnosing and fixing issues where media gets soiled during printing.
Addressing issues with unstable or uneven color reproduction.
Troubleshooting steps for misaligned or skewed cutting operations.
Checking and correcting misalignment between printing and cutting.
Troubleshooting steps for when crop mark detection fails.
Correcting misalignment when using crop marks for printing and cutting.
Addressing issues with media wrinkling or shrinking during operation.
Troubleshooting steps for media not feeding straight.
Resolving issues with smooth media feeding, including contact and thickness.
Steps for handling media jams, including error messages and head height adjustments.
Troubleshooting steps when the print-head carriage does not move.
Checks for power, setup status, covers, menus, messages, and cables.
Troubleshooting steps when the media heating system fails to warm up.
Checks for separating knife and cut rail installation.
Troubleshooting Bluetooth and mobile application connectivity issues.
List of machine messages that prompt correct operation, not errors.
Descriptions and actions for various error messages displayed on the panel.
Pre-move preparations including fluid disposal and print head securing.
Procedure for removing media and detaching the blade holder.
Ink circulation procedure, mainly for white ink, before moving the machine.
Procedure to discharge cleaning liquid from the wiper tray.
Using the retainer to secure print heads during machine relocation.
Steps for reinstalling the printer after moving, including power and filling procedures.
Details on maximum printing and cutting areas, including with crop marks.
Information on blade types, cutting conditions, and estimated blade life.
| Print Technology | Eco-Solvent Inkjet |
|---|---|
| Print Resolution | 1200 dpi |
| Ink Type | Eco-Solvent Ink |
| Ink Configuration | CMYK + Light Cyan + Light Magenta |
| Media Width | up to 1625 mm |
| Media Thickness | Maximum 1.0 mm (39 mil) with liner |
| Maximum Media Roll Weight | 50 kg (110 lb) |
| Connectivity | USB 2.0, Ethernet |
| Power Supply | AC 100-240V, 50/60Hz |
| Dimensions (W x D x H) | 740 x 1260 mm |
| Operating System Compatibility | Windows |