BRP-Rotax
INSTALLATION MANUAL
INSTALLATION OF THE BATTERY
CLAMP ASSY.
Tools required:
• Allen key 4 mm
• Ratchet wrench with socket 8 mm or Phillips
screwdriver
m WARNING
Non-compliance can result in serious injuries
or death!
Make absolutely sure to avoid short-circuiting of
battery terminals. A short circuit will ruin the bat-
tery and could cause an explosion.
Step
Procedure
1
Attach the battery fixture (pos. 5) with
the two pipe clamps (pos. 1 – 4) on the
left side box beside the driver’s seat.
NOTE
The clamps (pos. 2, 3) are designed for chassis
tubes of 30 - 32 mm (1.18 – 1.26 in) diameter.
ATTENTION
Risk of clamp fracture!
Do not over tighten the screw of the pipe clamps.
Step
Procedure
2
Install rubber pad (pos. 6) with battery
(pos. 7) into the battery holder (pos.
5).
3 Put the battery (pos. 7) into the fixture
and install the cover (pos. 8) with pre-
assembled wiring harness using the
Allen screw with rounded flange head
(pos. 9).
TIP
The battery fixture (pos. 5) can be fixed
with one screw on one side of the clamp
(pos. 3).
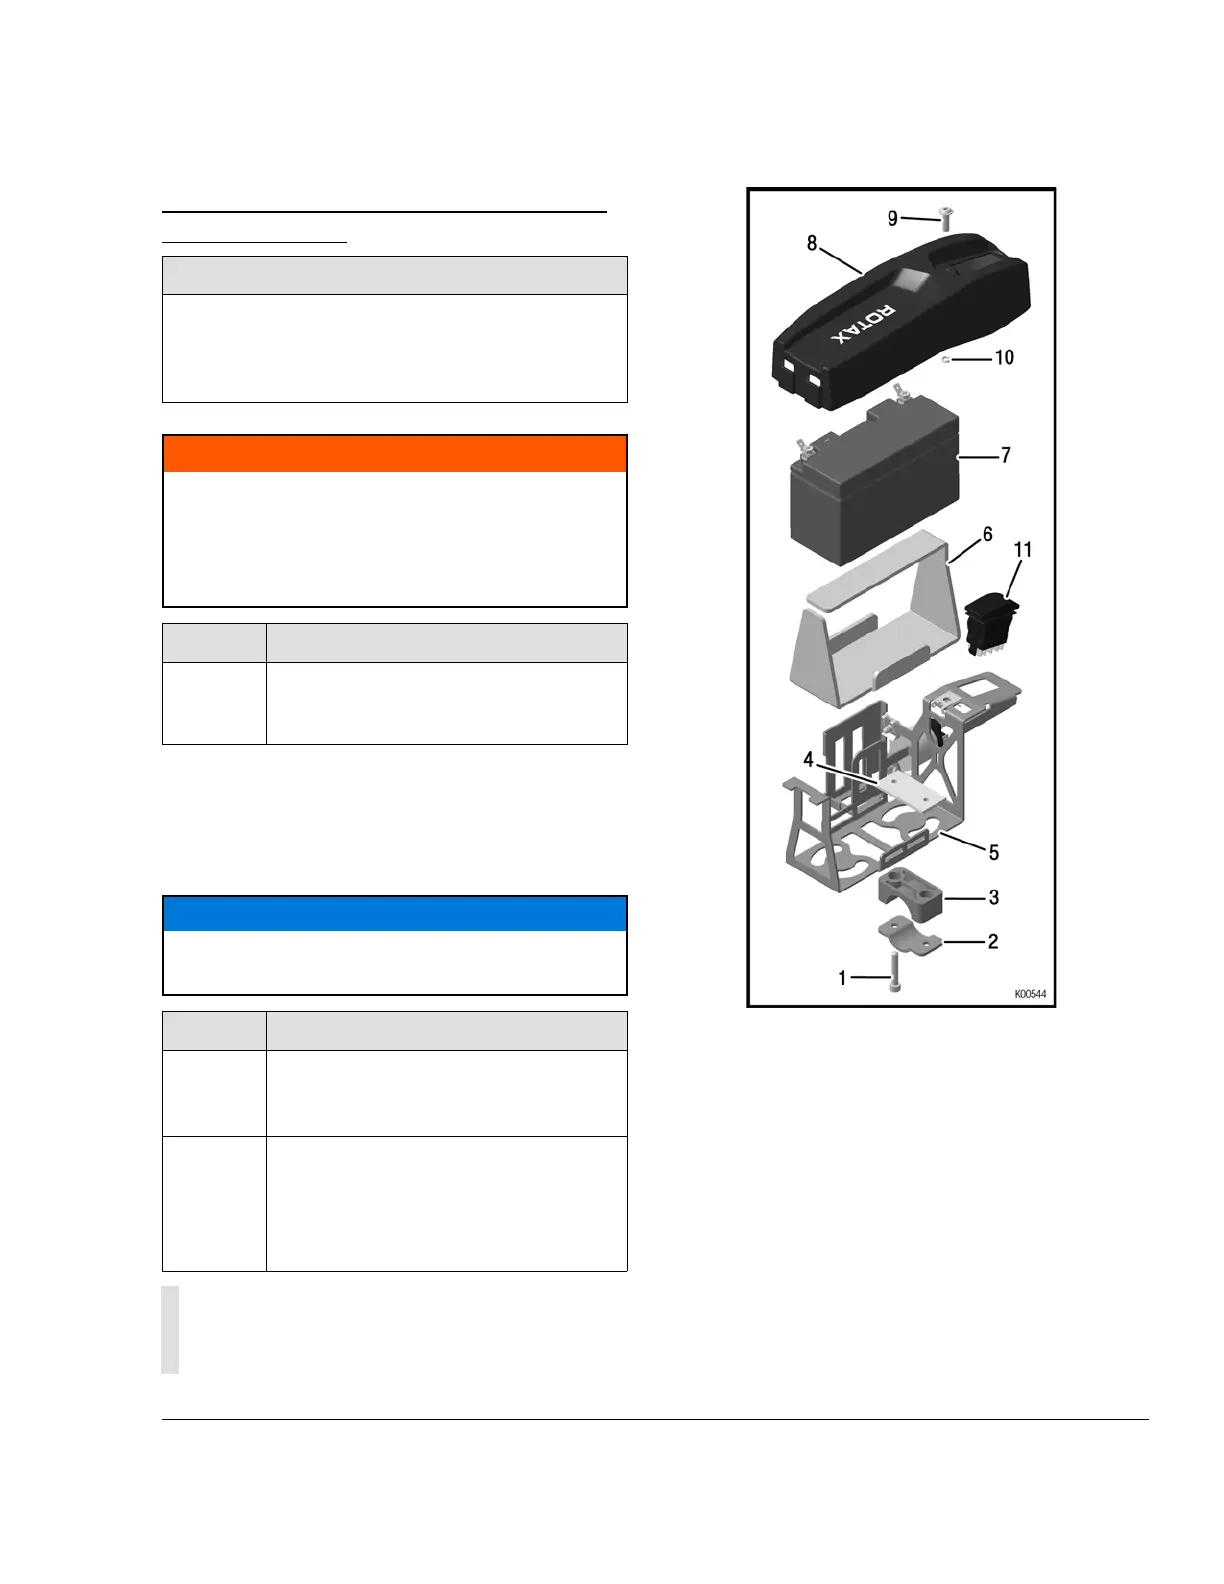
Figure 4.5
1–4
Pipe clamps
5
Battery fixture
6
Rubber pad
7
Battery
8
Battery cover
9
Flange head screw
10
O-ring
11
Multiple function switch
Effectivity: 125 MAX DD2 evo
3
Page 5
Edition: September 01 2019

 Loading...


