BRP-Rotax
INSTALLATION MANUAL
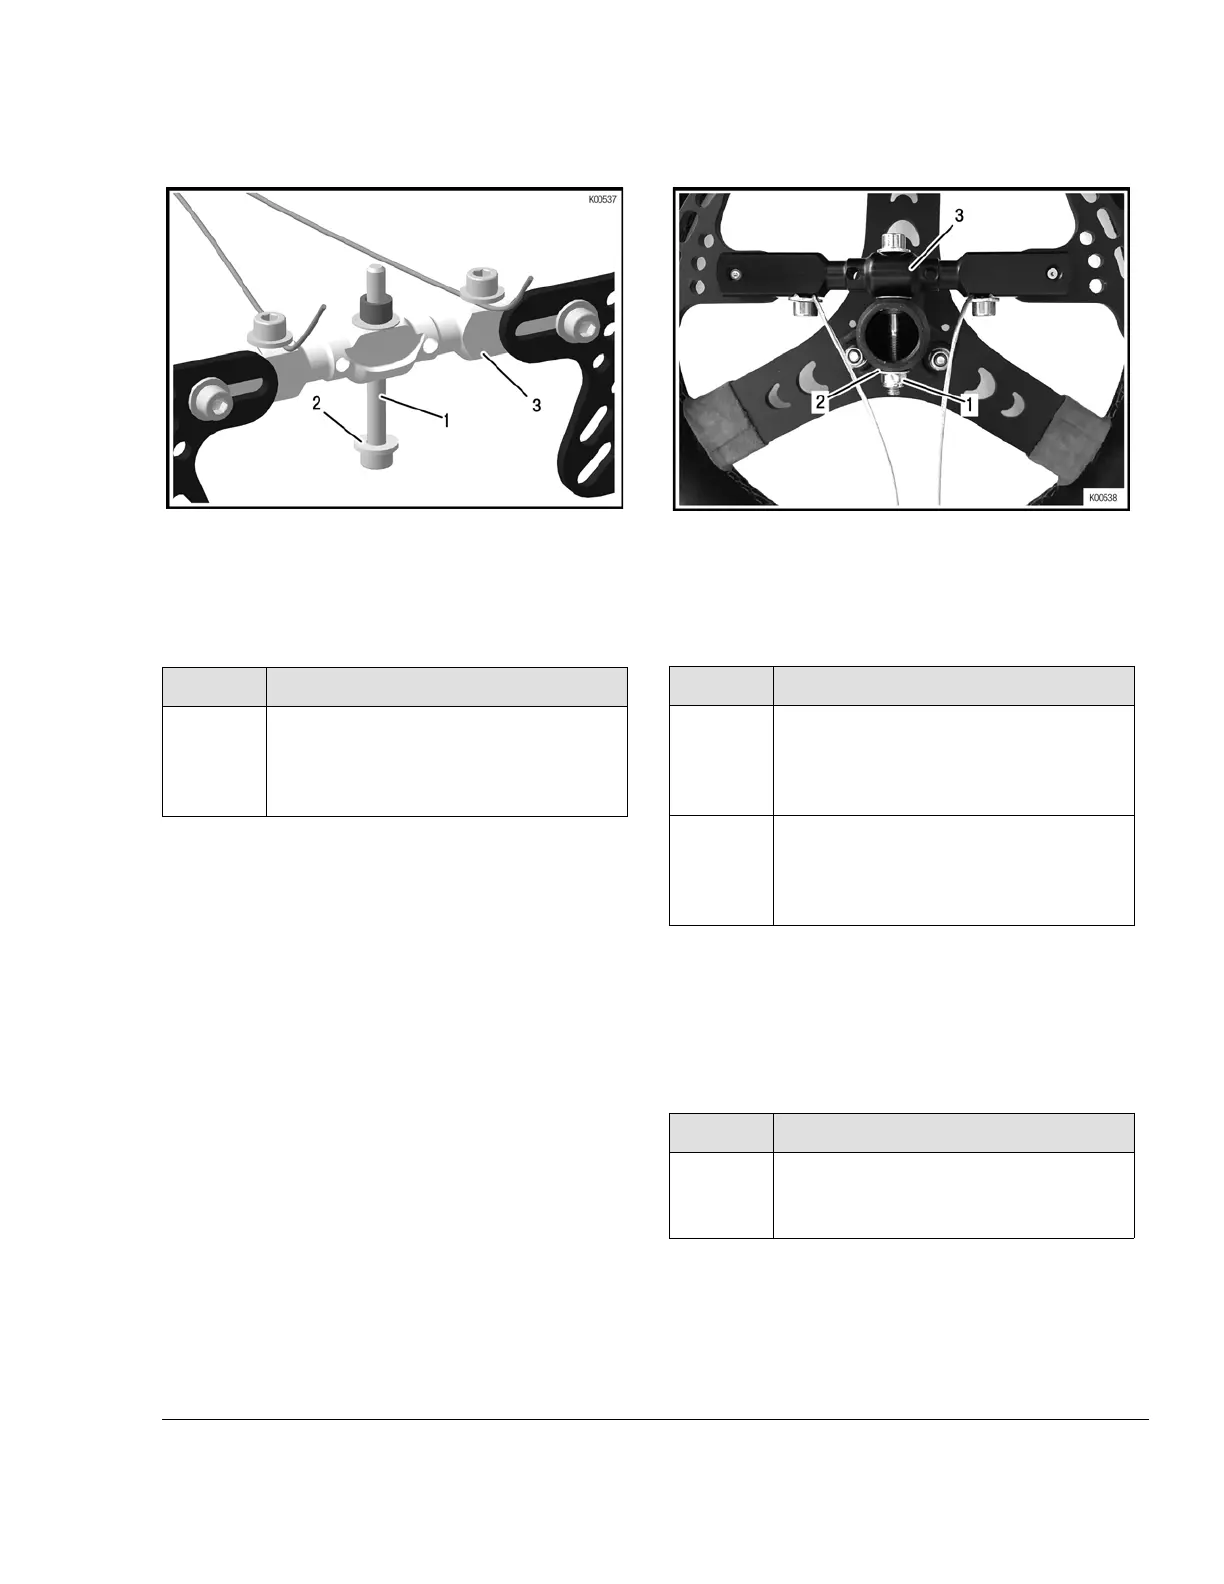
Figure 7.23
1 Allen screw M6x60
2
Washer
3
Control whip
Step
Procedure
15
Place the entire shifting unit onto the
steering wheel and tighten it using Al-
len screw M6x 60 (pos. 3), M6 lock nut
(pos. 1) with washer (pos. 2).
NOTE
Control whip must run smoothly.
NOTE
Spacer must fit into the bore provided on the
steering wheel.
Figure 7.24
1 Lock nut M6
2
Washer
3 Allen screw M6x60
Step
Procedure
16 The setting of the shifting is carried out
in neutral gear, which means that the
control whip must be in horizontal
position.
17
Tighten screw (pos. 2) of the cable
abutment (pos. 1) and the screws of
the Bowden cables on the control whip
(pos. 3).
NOTE
At full steering angle, no gear must engage. If a
gear engages by itself, the distance between
control whip and cable abutment must be
adjusted.
Step
Procedure
18
Finally, the length of the Bowden ca-
bles can be adjusted so that they do
not disturb the driver when shifting.
Effectivity: 125 MAX DD2 evo
6
Page 11
Edition: September 01 2019

 Loading...


