23
Installing the Wireless Bridge
Preparing for Installation
2. Open a Web browser (Internet Explorer) and enter the default IP address in the
URL bar (default IP: 192.168.2.1).
3. Enter the Username and Password (default username: super; default password:
sp-admin) and click Login.
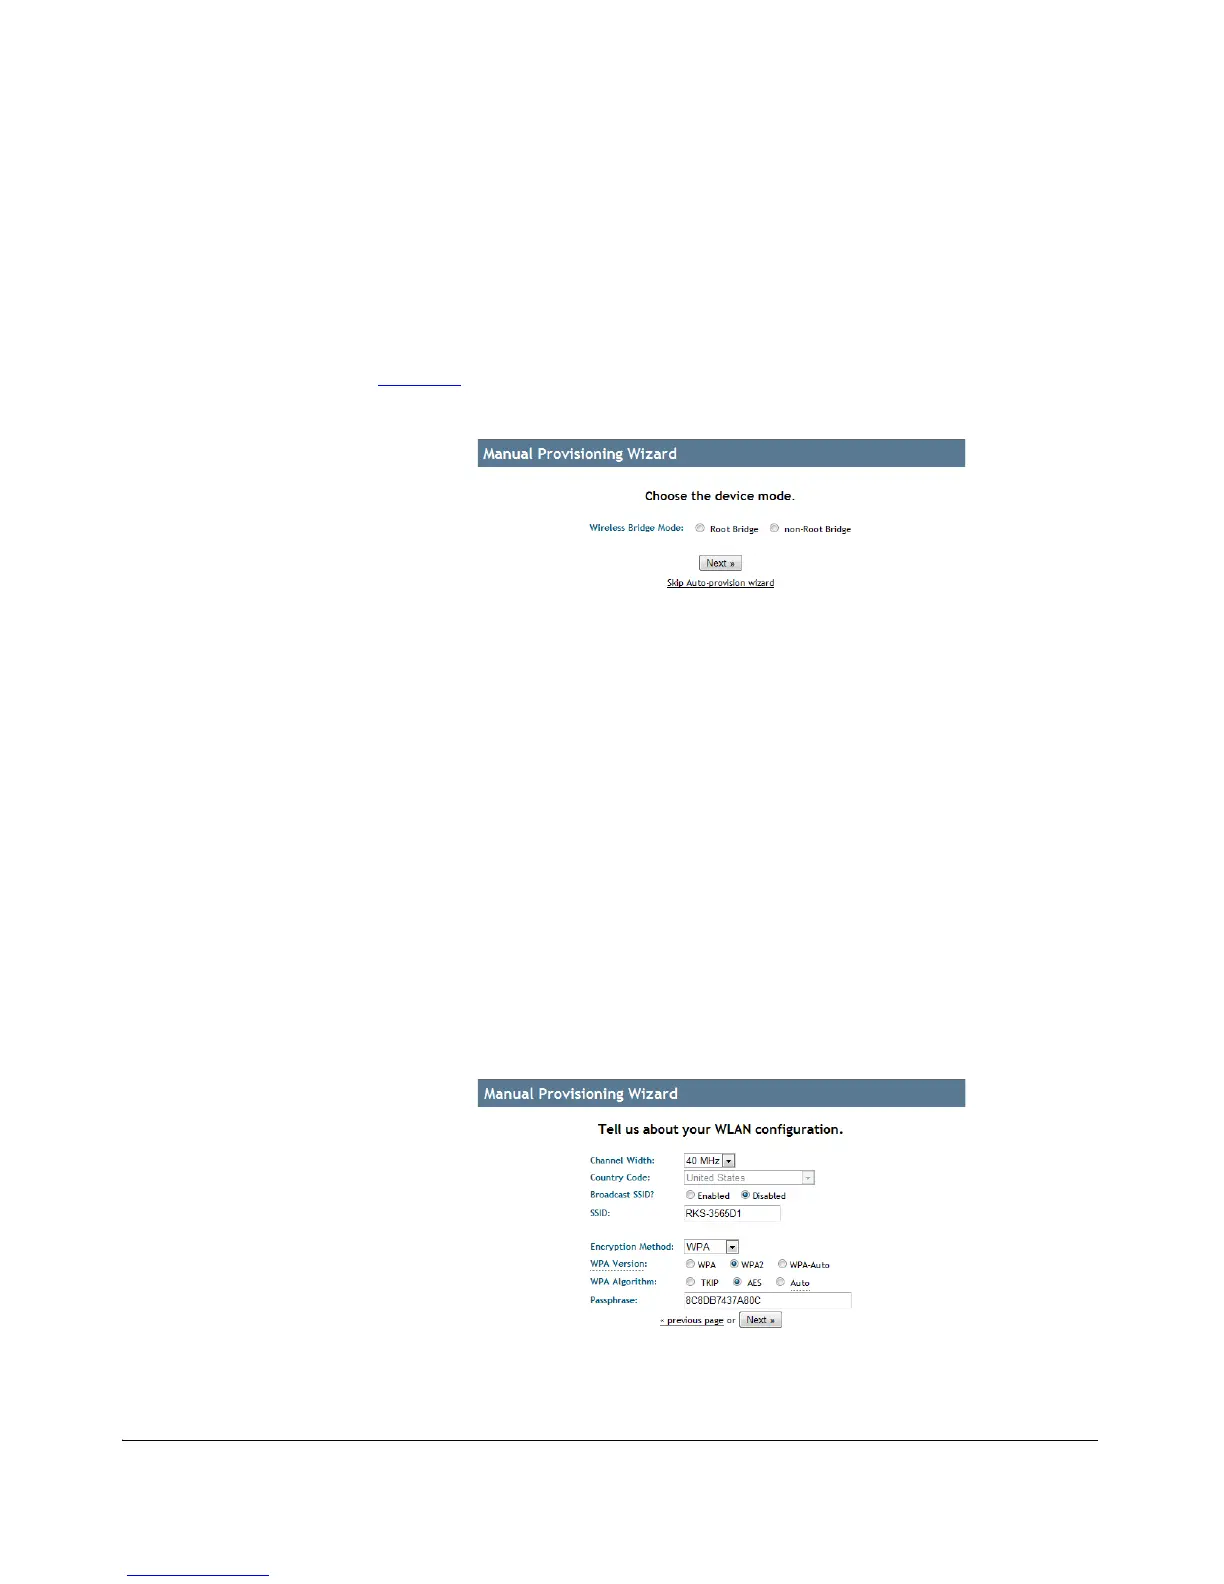
4. If the unit has not yet been provisioned (factory default state), the Manual
Provisioning Wizard launches automatically immediately after login, as shown in
Figure 16
.
Figure 16. Manual Provisioning Wizard
5. Select Root Bridge or Non-Root Bridge and click Next to continue.
6. Adjust settings on the WLAN configuration page if necessary. You may want to
change the SSID and Passphrase to something easy to remember at this point--
you can change them again after installation for increased security.
7. Set the Country Code to your location.
8. Write down the SSID, encryption settings and Passphrase, as these values will need
to be identical so that the Root and Non-Root Bridges can communicate with each
other.
9. Click Next to continue. The “Your Setup” configuration summary page appears.
10.Click Reboot to confirm changes and reboot the bridge. Once the reboot is
complete, the manual provisioning is complete.
Figure 17. WLAN Configuration options