47
Installing the Wireless Bridge
Optimizing the Distance, Orientation and Channel
4. Ensure that antenna connectors are firmly tightened, and apply weatherproofing
tape to the antenna connectors to help prevent water from entering the connec-
tors.
5. Reconnect the Wireless Bridge to the power source.
CAUTION: If you are not connecting external antennas to the Wireless Bridge, make
sure that the metal caps remain installed and securely fastened to protect the interface
from elements, such as water or dirt.
You have completed connecting the external antenna to the Wireless Bridge.
Optimizing the Distance, Orientation and
Channel
Once you have completed the physical installation of both (all) bridges, complete the
following tasks to optimize the wireless link(s):
■ Setting the Distance
■ Aiming
■ Channel Optimization
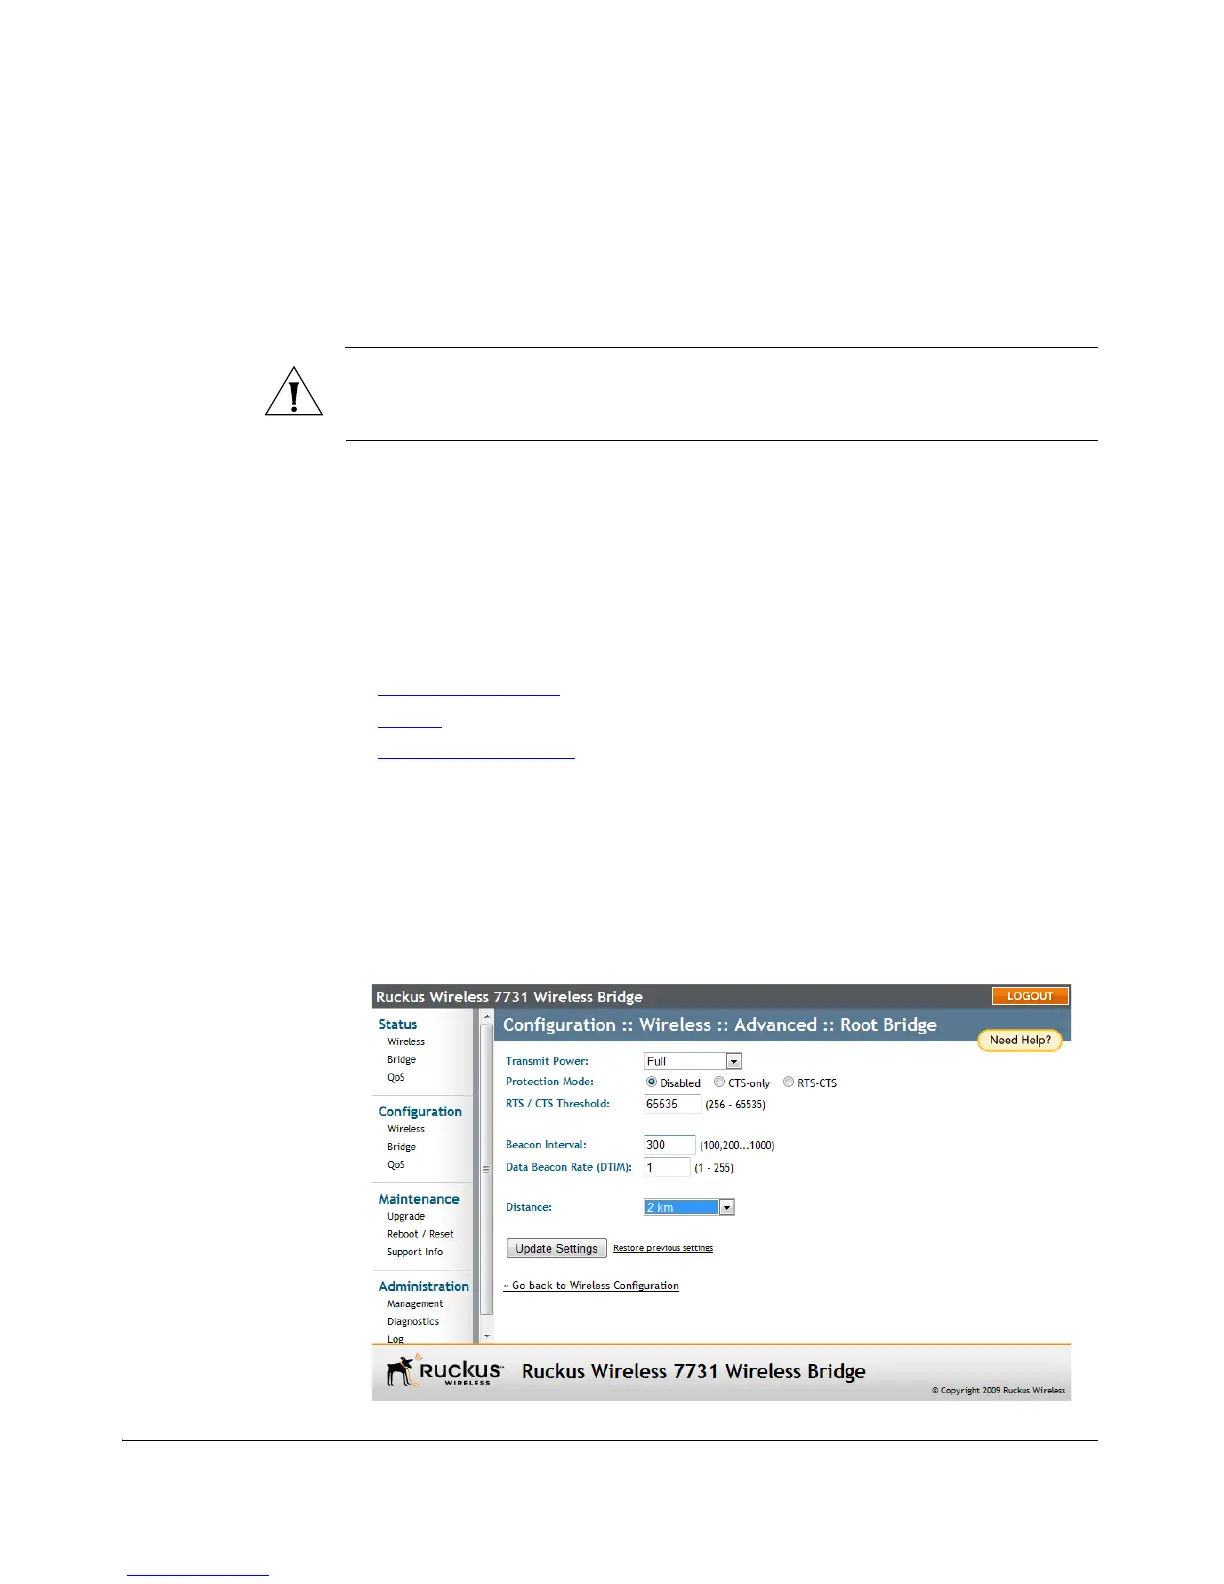
Setting the Distance
1. On the Root Bridge Web interface, go to Configure > Wireless > Advanced, and
select the approximate distance from the drop-down menu.
2. Click Update Settings to confirm your changes.
Figure 44. Setting the distance between bridges