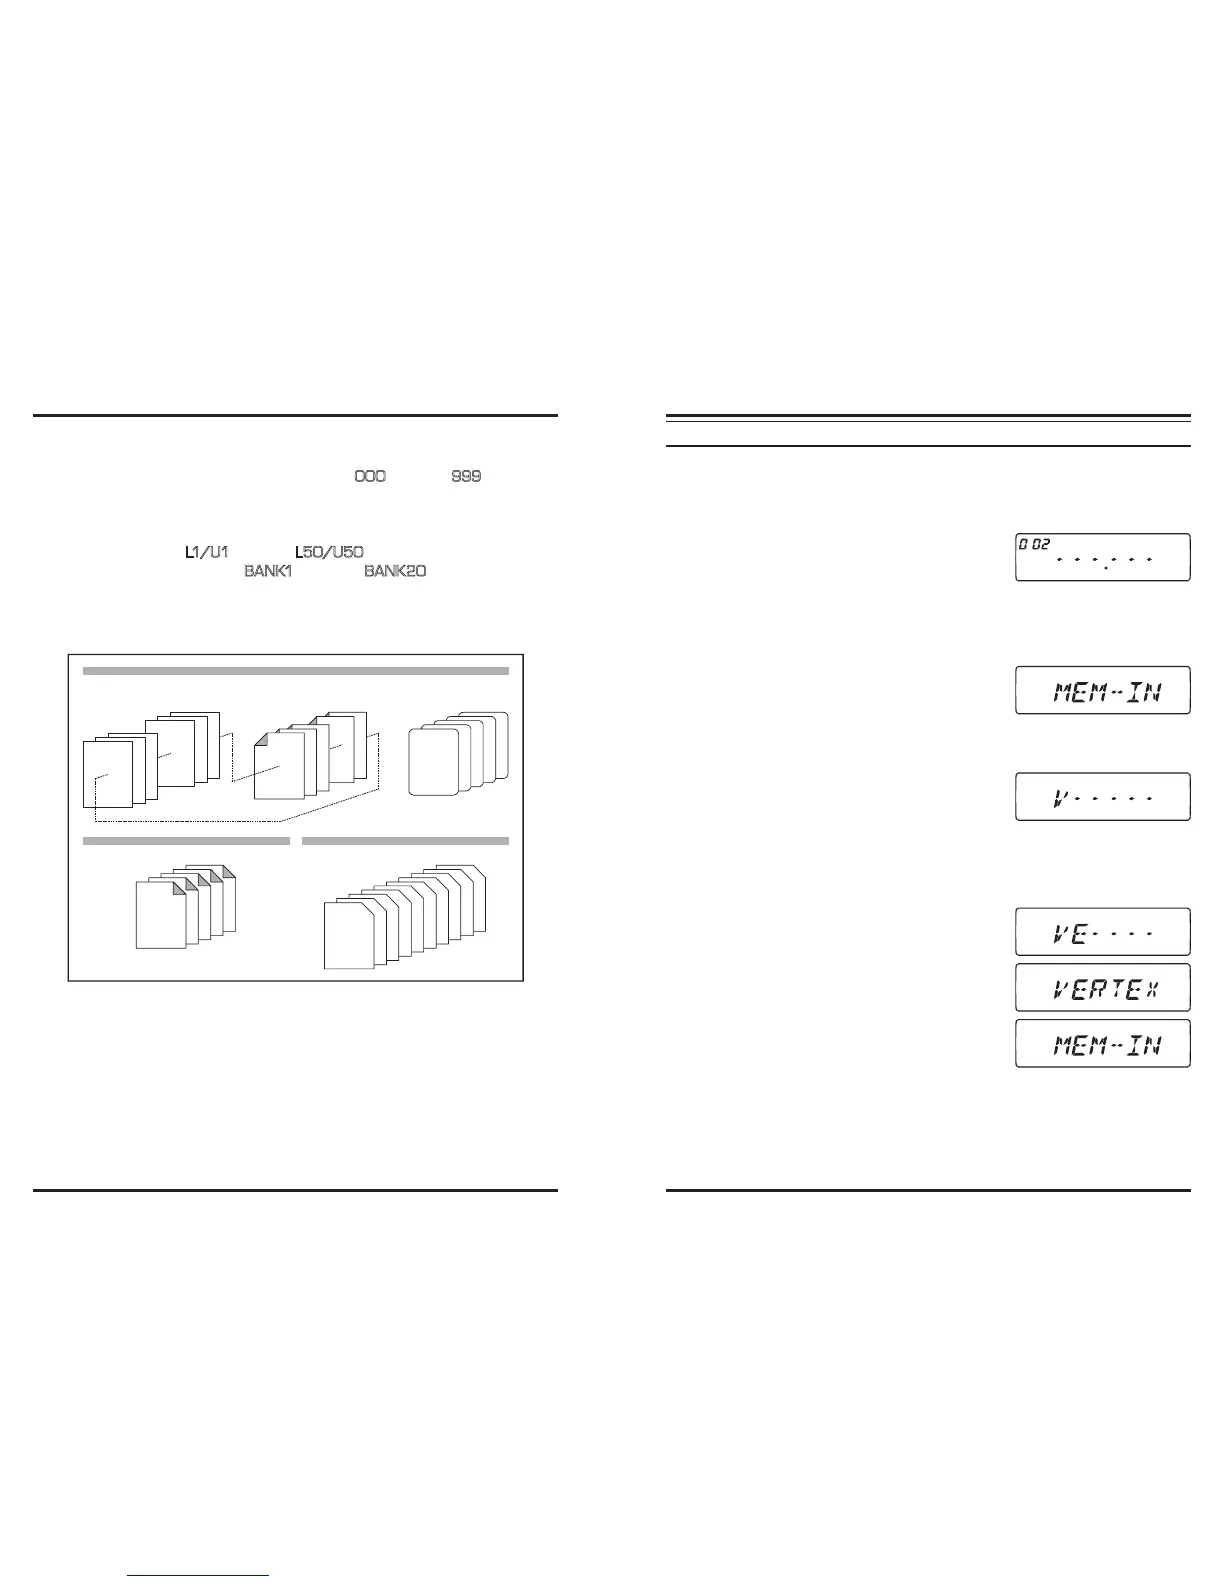
The transceiver provides a wide variety of memory system resources. These include:
“Regular” Memory Channels, which includes:
1000 “Standard” memory channels, numbered “
000
” through “
999
.”
5 Home channels, providing storage and quick recall of one prime frequency on
each operating band.
50 sets of band-edge memories also known as “Programmable Memory Scan”
channels, labeled “
L1/ U1
” through “
L50/U50
.”
20 Memory Banks, labeled “
BA NK1
” through “
BANK20
.” Each Memory Bank
can be assigned from the “Standard” Memory Channels.
5 “Hyper-Memory” Channels
10 “Weather Broadcast” Channels
WX10
WX9
WX8
WX7
WX6
WX5
WX4
WX3
WX2
WX1
HOME Channels
(5 channels)
L50/U50
L49/U49
L3/U3
L2/U2
L1/U1
000
999
998
003
002
001
Standard Memory Channels
(1000 channels)
PMS Memory Channels
(50 Sets)
1-HP
2-HP
3-HP
4-HP
5-HP
850 MHz Band
430 MHz Band
250 MHz Band
350 MHz Band
144 MHz Band
Regular Memory Channels
Hyper Memory Channels
(5 channels)
Weather Broadcast Channels
(10 channels)
R
EGULAR
M
EMORY
C
HANNEL
O
PERATION
Memory Storage
1. Select the desired frequency, while operating in the VFO mode. Be sure set up any de-
sired CTCSS or DCS tones, as well as any desired repeater offset. The power level
may be also be set at this time, if you wish to store it.
2. Press and hold in the [
V/M
(
MW
)] key for 1/2 second.
A memory number will appear (blinking) on the dis-
play.
3. Within ten seconds of pressing the [
V/M
(
MW
)] key, use the
DIAL
knob or the micro-
phone’s [
UP
]/[
DWN
] buttons to select the desired memory channel for storage (if the
channel is already occupied by data stored previously, the “channel frequency” nota-
tion will appear on the display).
4. To attach an alpha/numeric name “Tag” to the memo-
ry, press and hold in the [
V/M
(
MW
)] key for 1/2 sec-
ond, then proceed to the next step; otherwise press the
[
V/M
(
MW
)] key momentarily to save the entry and exit to normal operation.
To Append an Alpha-numeric “Tag” to a Memory
1. After pressing and holding in the [
V/M
(
MW
)] key in
step 4 above, rotate the
DIAL
knob to select the rst
character in the name you wish to store, the press the
[
BAND
(
SET
)] key momentarily to move on to the next character. Letters, numbers,
and symbols are available for storage.
2. Again rotate the
DIAL
knob to select the desired letter, number, or symbol, then press
the [
BAND
(
SET
)] key momentarily to move on to the next character’s slot. If you
make a mistake, press the microphone’s [
DWN
] but-
ton to move back to the previous character’s slot, then
re-select the correct letter, number, or symbol.
3. Repeat the above step to program the remaining let-
ters, numbers, or symbols of the desired label. A total
of six characters may be used in the creation of a la-
bel.
4. When you have completed the creation of the label,
press and hold in the [
BAND
(
SET
)] key for 1/2 sec-
ond to save the label and exit to normal operation.