English
5
27
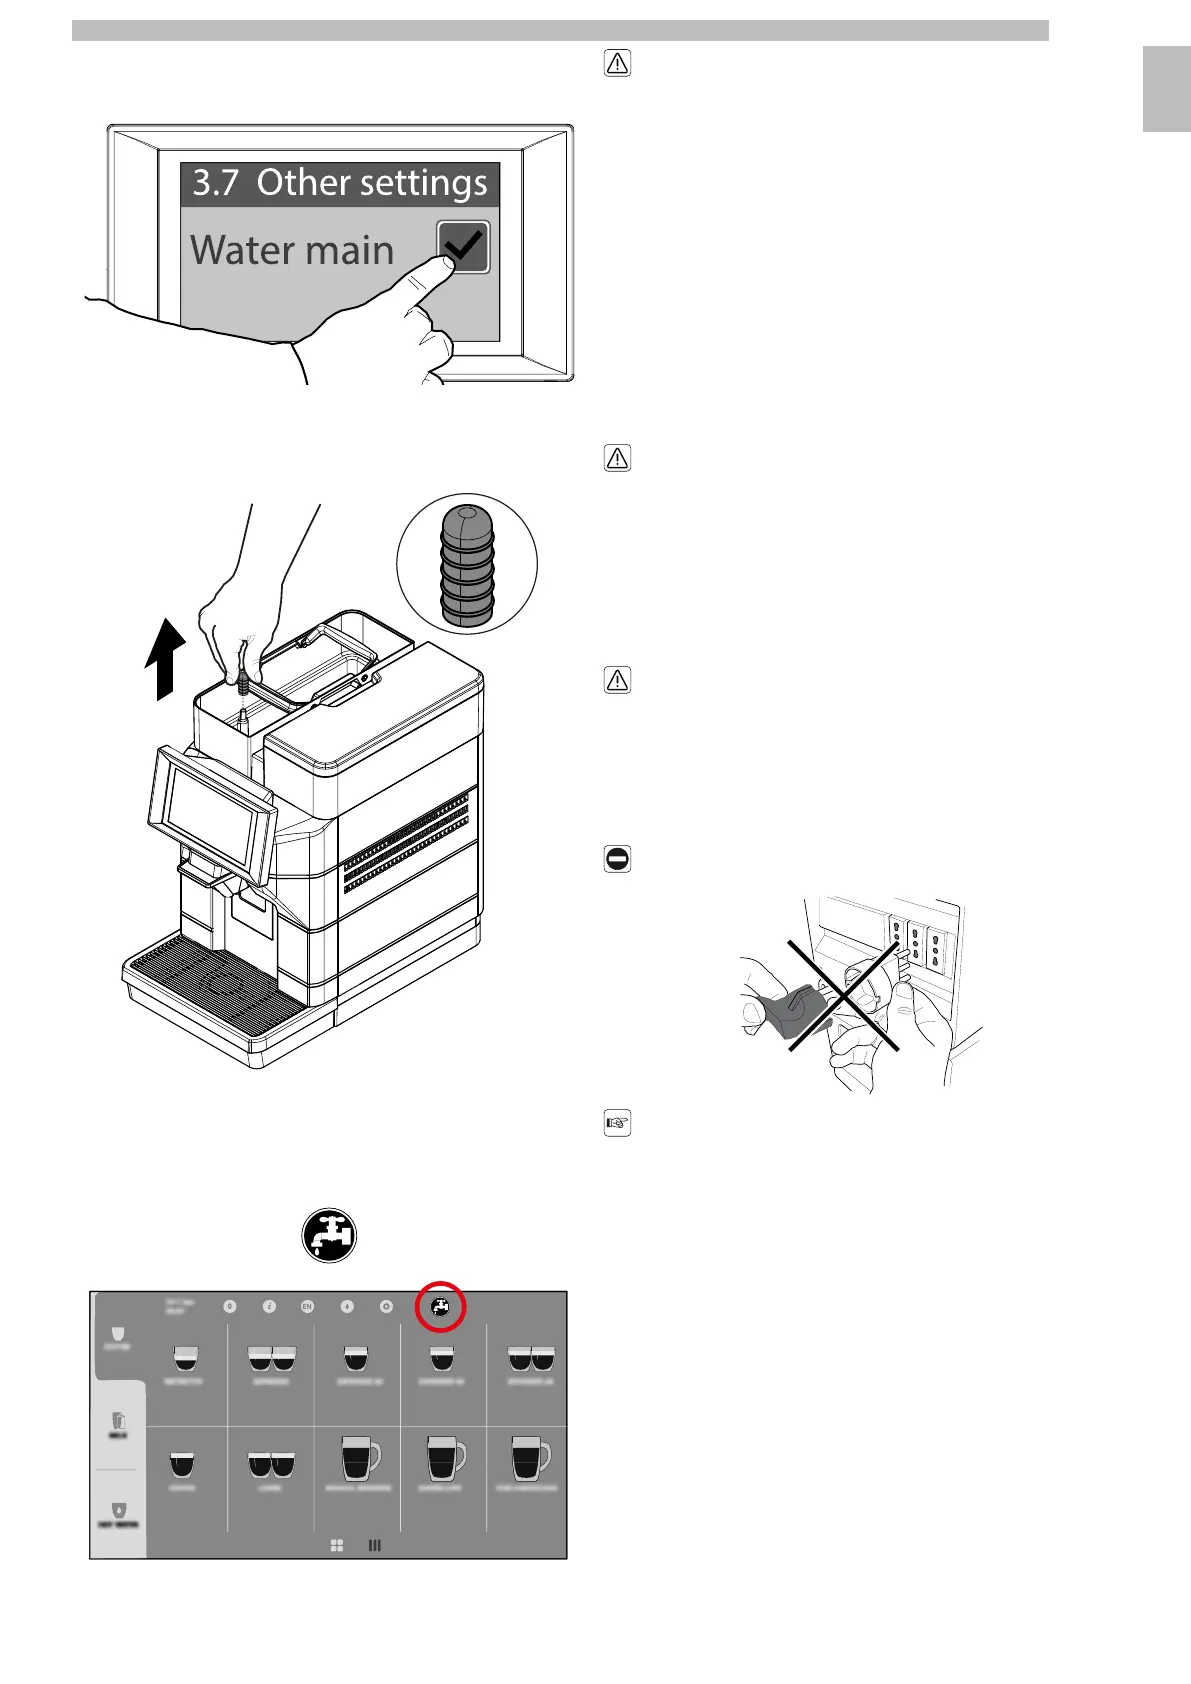
Enterthepasswordofthetechnicalprofile.Select"Machinesettings",then"Other
settings". Enable "Water main".
55555
Removethelidfromthewatertank.Removethecapfromthewatertank.Keep
the cap just removed for future use of the machine set to water tank.
55555
Reinsertthewatertankcover.Refittheprotectioncoverasdescribedinsection
"Closing the Upper Lid". Save the settings and exit the programming menu.
5
Atthispointthemachineissetforoperationviathewatermainsandtherelevant
icon appears in the top right-hand corner of the ready-for-use screen.
5555555
Donotremovethewatertankwhilethe
machine is switched on.
55
Themachinedoesnotrecognisethepresenceofthetank,onlythewaterlevel.In
thecaseofoperationusingthewatermains,thesolenoidvalveopenswhenthe
waterlevelisbelowtheminimum.Ifthewatertankisnotpresent,thewaterfills
thetopcovertank,flowsdownthedrainandblocksthesolenoidvalve.Atthis
point, themachinenolongerrunson thewatermains.Youcancontinue tousethe
machine butit mustbe setto watertank. Toreset themachine fromwater mainto
water tank,disablethe"Watermain"item intheprogrammingmenuitem"Machine
settings",sub-item"Othersettings"andreinsertthepreviouslyremovedcapinto
thewatertank.Fillthewatertankwithfreshdrinkingwater;donotexceedthe
level (MAX) indicated on the tank.
55
A technician is required to restore the water mains.
55
5.4Connection to the Electric Network
5
Thisoperationmustonlybeperformedby
specialisedtechnicalpersonnelorbythe
service provider.
55
TheMaintenanceTechnician,whoisinchargeoftheappliance'sinstallation,shall
make sure that:
5
•
the power supply system complies with the safety instructions in force;
5
•
the voltage corresponds to that indicated on the appliance data plate.
55
Incaseofdoubt,donotproceedwiththe
installationandaskqualifiedandauthorised
personnel to accurately check the system.
5
Do not use adapters or multi-sockets.
5555
Makesurethatthepowercordplugis
easily reachable after installation.
55