Page 13 of 69
Navigating the Software
This section will guide you through the features of the Logic software. This is a great first step to take to
familiarize yourself with the features of the software. When no Logic device is connected, the software will
work in demo mode, which is virtually identical to how it will function when a device is connected. The
demo will help you become familiar with the software before your Logic device arrives.
Navigating the Logic Software
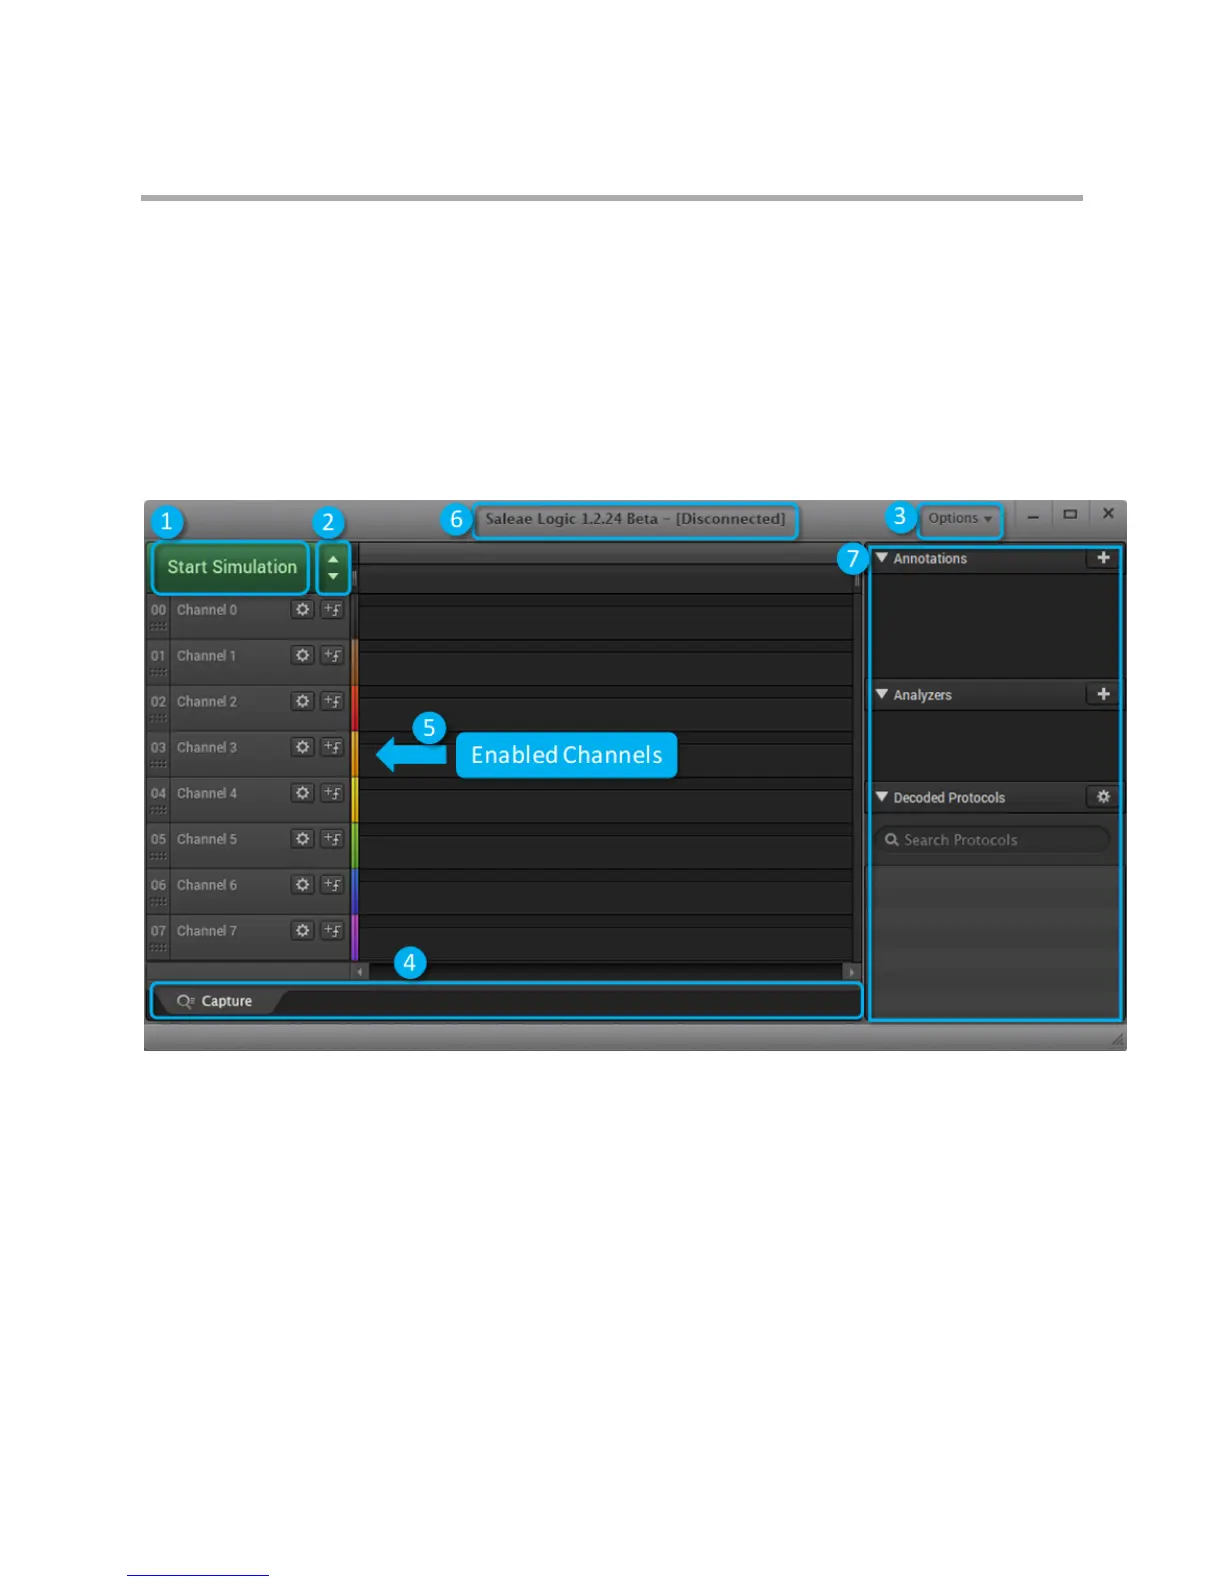
The Logic software user interface consists of the following basic sections.
1. The Start Simulation or Start Button Generates simulation data, as if the logic analyzer was
collecting real world data. If a Saleae Logic was connected to the PC, then this button would say
Start. More information on simulation data can be found in _______. After the capture has started,
you can stop it before it finishes, which will retain the data to that point. If the Start button is gray and
cannot be clicked, that means you are not on the capture tab (See #4). Ensure you are on the
capture tab so you can take a capture.
2. Device Settings Button Opens the Device Settings window. This window allows you to modify
capture settings, such as sampling rate, capture duration, enabled channels (digital and analog),
voltage, and performance.
 Loading...