Do you have a question about the Samsung i7 and is the answer not in the manual?
| Optical Sensor Size | 1/2.5" |
|---|---|
| Sensor Type | CCD |
| Digital Zoom | 5x |
| ISO Sensitivity | Auto, 80, 100, 200, 400, 800, 1600 |
| Optical Sensor Resolution | 7.2 MP |
| Display Type | LCD |
| Supported Flash Memory | MMC, SD Card |
| Storage Media | SD, SDHC, MMC |
Install camera driver for PC connection.
Basic steps to capture an image.
Connect camera to PC for data transfer or charging.
Ensure the camera is powered on.
Locate camera as removable disk in PC.
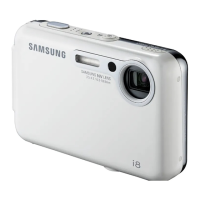
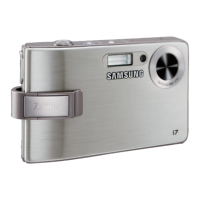
Identify parts on the front and top of the camera.
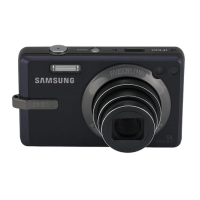
Identify parts on the back of the camera.
Identify parts on the bottom of the camera.
Status indicators for AC adapter charging.
Icons showing battery charge level on LCD.
Number of shots based on image size and memory card.
Configure camera date and time settings.
Select the display language for the camera menus.
Calibrate the touch screen for accurate input.
Selecting and using different shooting modes.
Using the automatic shooting mode for ease.
Using manual control in program shooting mode.
Reduce camera shake effects in low light.
Record video clips with sound.
Select optimal settings for various shooting situations.
Automatic face detection for focus and exposure.
Turn camera on/off and manage auto power-off.
Take pictures or record movies/voice.
Quick pictures of people or lock buttons.
Set delay for automatic picture taking.
Select between Center AF and Multi AF.
Highlight a part, rest becomes B&W.
Adjust color intensity of the image.
Add decorative borders to still images.
Create depth-of-field effects by blurring background.
Combine multiple shots into one image.
View stored still photographs.
Play stored video clips.
Extract still images from movie clips.
Edit movie clips directly on the camera.
Listen to recorded voice files.
Listen to short voice notes attached to images.
Switch between playback and recording modes.
View multiple images, zoom, and control volume.
Change the resolution of pictures.
Rotate stored images by degrees.
Extract and save a part of an image.
Apply color effects like B&W, Sepia, Red, etc.
Highlight a part, rest becomes B&W.
Adjust the overall brightness of an image.
Adjust color intensity of the image.
Add a grainy effect for a classic look.
Adjust the difference between light and dark parts.
Remove red-eye effect from captured images.
Add text boxes to make images look like cartoons.
Add decorative borders to still images.
Create depth-of-field effects by blurring background.
Combine multiple shots into one image.
Settings for Effect, Music, Interval, Play Mode, Protect, Delete, DPOF, Copy To Card.
Settings for Size, Layout, Type for PictBridge printing.
Configure continuous image display settings.
Set display duration for each image in slide show.
Apply unique screen effects to slide show images.
Set background music for slide show.
Select between one-time or repeat playback.
Lock specific photos from accidental deletion.
Choose individual images for deletion.
Delete all unprotected images.
Set print quantity for individual images.
Set print quantity for all pictures.
Specify paper size for printing.
Connect camera and printer via USB.
Print pictures directly from camera to printer.
Specify how many copies of each image to print.
Adjust sound volume levels for camera operations.
Select sound for camera startup.
Enable/disable beep sounds for operations.
Select sound for taking pictures.
Enable/disable sound when focus is achieved.
Select the camera's display language.
Configure how image files are named.
Add date/time to images.
Set and imprint date/time on photos.
Adjust the brightness of the LCD screen.
Control the AF assist lamp.
Select the image displayed on startup.
Briefly display captured image after shooting.
Set camera to turn off automatically after inactivity.
Turn off LCD monitor automatically when idle.
Adjust touch pen sensitivity for the LCD monitor.
Choose NTSC or PAL output for external monitors.
Prepare memory card for use by erasing data.
Restore all camera settings to default values.
Transfer multimedia files to the camera.
Play back MP3 audio files.
Play back video and audio files.
View text files with MP3 background music.
Control volume for multimedia playback.
Control playback of media files.
Lock camera buttons during playback.
Adjust sound equalizer settings.
Browse and select media files.
Configure MP3 playback options.
Configure PMP playback options.
Set repeat and shuffle options for playback.
Customize the MP3 player interface.
Set display duration for slide show images.
View stored images as a continuous slideshow.
Take pictures while listening to MP3s.
Delete media files from the memory card.
Search movie clips by time or frame.
Enable 3D sound effects for multimedia playback.
Automatically scroll text for viewing.
Play MP3 background music during text viewing.
Set language for text files based on OS.
Get travel info from Samsung website.
Access the tour guide feature.
Icons for navigating tour information.
Common memory card related errors.
Error when memory card is write-protected.
Error when no memory card is inserted.
Error when no images are stored.
Error related to file integrity or format.
Warning for low battery capacity.
Tips for shooting in dark conditions.
Issue with exceeding print limits in PictBridge.
Error related to file format compliance.
Troubleshooting steps for power issues.
Troubleshooting steps for unexpected power off.
Troubleshooting for automatic power off.
Troubleshooting steps when flash fails to operate.
Steps to correct date/time display issues.
Troubleshooting for unresponsive camera buttons.
Troubleshooting memory card errors.
Troubleshooting playback issues.
Adjusting settings for correct color reproduction.
Troubleshooting overexposed images.
Troubleshooting external display connection.
PC specifications needed for software installation.
Software for PC connectivity and card reader function.
Software for playing MPEG-4 movie clips.
Program to convert media files for camera playback.
Install codec for movie playback on PC.
Steps to establish PC connection.
Access camera storage as a disk drive.
Transfer images from camera to PC.
Steps to convert media files.
Transfer images from camera to PC using software.
View stored images with the software.
Edit still images using the software.
Edit movie clips, add narration, music.
Troubleshoot USB connection issues.
Troubleshoot PC recognition problems.
Troubleshoot file transfer errors.
Troubleshoot issues with USB hubs.
Troubleshoot conflicts with multiple USB devices.
Resolve "Unknown Devices" or "!" errors.
Troubleshoot issues caused by security software.
Troubleshoot PC not recognizing camera on front USB.
Troubleshoot PC movie playback issues.
Steps to install codecs for Windows.
Steps to install codecs for Mac.
Install DirectX for software compatibility.
Troubleshoot PC freezing issues.
Troubleshoot PC freezing during startup.
Troubleshoot deletion/extraction errors.