Troubleshooting_ 78
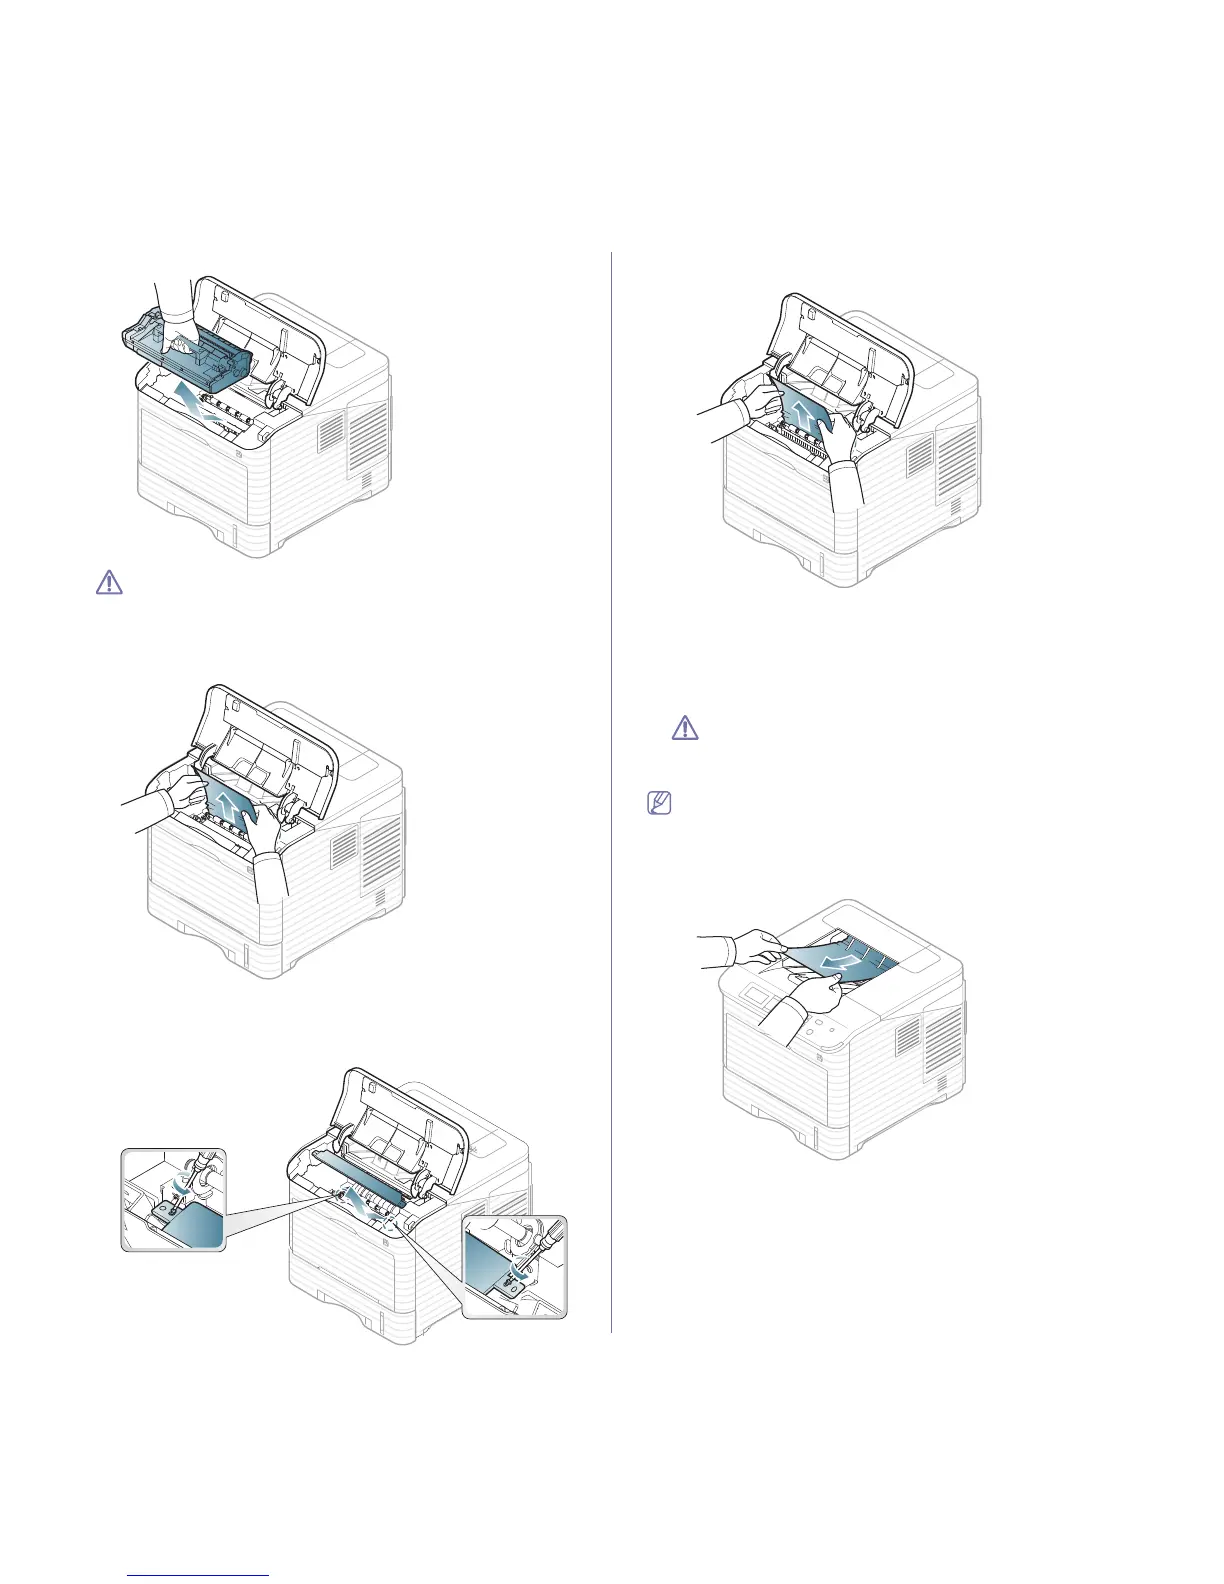
2. Pull the imaging unit out.
• Do not touch the green surface of the imaging unit.
• To
prevent damage to the imaging unit, do not expose it to light
for more than a few minutes. Cover it with a piece of paper, if
necessary.
3. Remove the jammed
paper by pulling in the direction shown. To avoid
tearing the paper, pull it out gently and slowly.
If you do not see the jammed paper or if there is any resistance when
you pull, stop and go to the next step.
4. Unscrew the tw
o screws on the guide envelope (steel plate) and lift up
the guide envelope.
5. Remove the jammed paper by pulling in the direction shown. To avoid
tearing the paper, pull it out gently and slowly.
If the paper does not move when you pull, or if you do not see the paper
in this area, check inside the machine (see "In the exit area" on
page 78).
6. Pl
ace the guide envelope (steel plate) and screw back the two screws.
7. R
einsert the imaging unit and toner cartridge.
8. Ope
n and close the top cover to resume printing.
If the top cover is not completely closed, the machine will not oper-
ate.
In the exit area
Click this link to open an animation about clearing a jam.
1. Ope
n and close the top cover. The jammed paper is automatically
ejected from the machine.
2. R
emove the jammed paper by pulling in the direction shown. To avoid
tearing the paper, pull it out gently and slowly.
If you do not see the jammed paper or if there is any resistance when
you pull, stop and go to the next step.
3. Open the rear cover.