87
www.seuservice.com
TEST MODE WRITING
POSITION
ADJUST
SELECT
RESET
R BG
PIC-ADJ
SET
P
ADJUST MODE
ADJUST MODE
ADJUST MODE
ADJUST MODE
ADJUST MODE
ADJUST MODE
WRITING
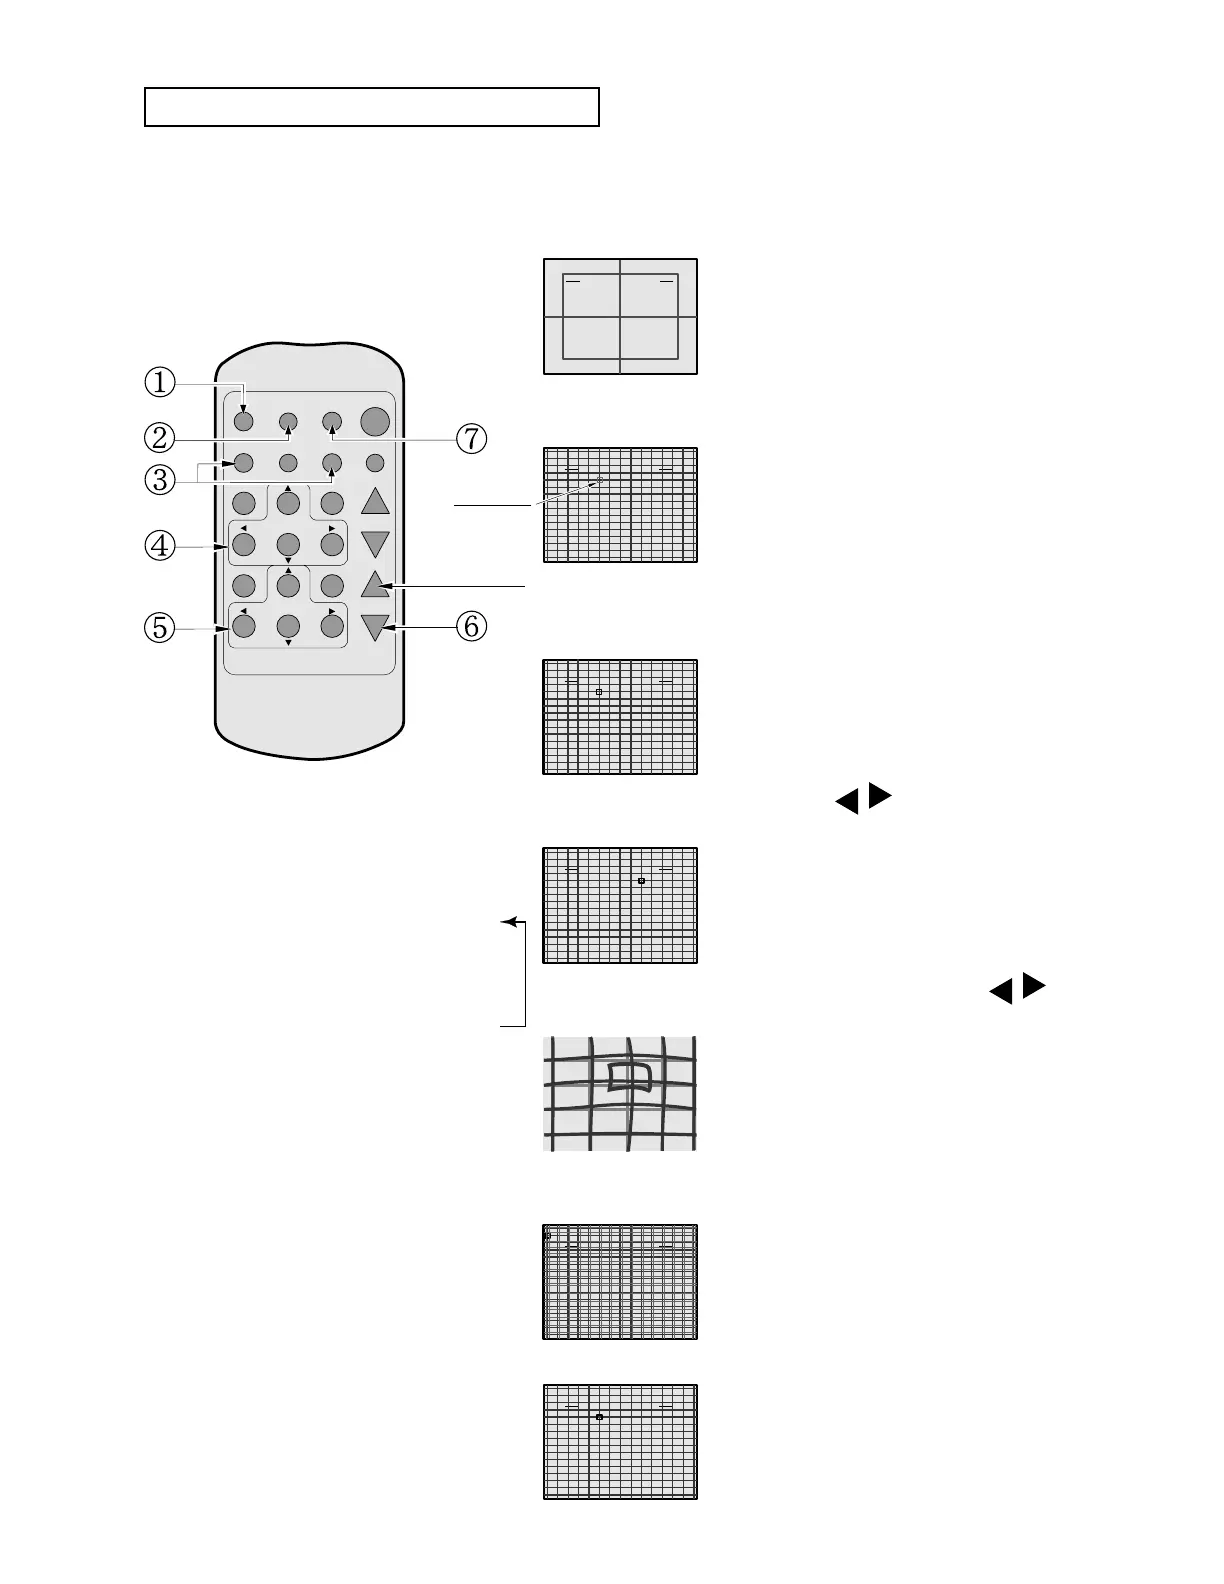
In the POINT CONVERGENCE adjustment, each of red, green and blue images is partially
moved for color matching. The adjustment may be necessary when the Game Board is replaced
or changed, or screen size is changed. Be sure to perform automatic color matching before
starting the adjustment.
(7) Press the WRITING button (for storing and nish).
(1) Keep pressing the TEST button for
approximately 3 seconds.
The screen changes to ADJUST MODE from
the Game mode and displays the green test
pattern.
(3) Using either R or B button, select the desired color
to be adjusted.
(Note 2)
By using the G button, the
green color can also be selected.
The selected color is displayed by
superimposing on green. The MARKER will
be in the color selected.
The MARKER moves in the direction of the
button's arrow. However, the movable point
is predetermined.
Although the direct vicinity of the
MARKER's center moves most
conspicuously, make adjustment by paying
attention to the periphery area also. Shown
left is the magnied MARKER periphery.
WRITING is displayed and the adjustment
data is stored. After the data is stored, the
Game Board screen returns.
If the test pattern is not displayed in the
periphery of the screen, adjustments can be
made by pressing the SELECT button to
superimpose the test pattern and the Game
Board's CRT test screen.
(6) Press the SELECT button as necessary to
superimpose Game Board images.
(Note 3)
(5) Make adjustment by using the
ADJUST buttons.
The crosshatch test pattern appears and the
MARKER indicating the adjustment point is
displayed.
(4) By using the
POSITION buttons,
move the MARKER to the position to be adjusted.
(2) Press the MODE button twice to have the POINT
ADJUSTMENT mode.
(Note 1)
MARKER
DO NOT PRESS.
(Note 1) When the MODE button
is repeatedly pressed, the
adjustment modes will circulate
as follows:
STATIC ADJUSTMENT MODE
LINE ADJUSTMENT MODE
POINT ADJUSTMENT MODE
(Note 2) When either of the COLOR
SELECT buttons (R, B) is
pressed, if the desired color to
be adjusted disappears, press
that particular button again.
(Note 3) By repeatedly pressing the
SELECT button, only the
Projector's TEST pattern screen
and the screen superimposing
the Game Board Test pattern
can be alternately displayed.
POINT CONVERGENCE ADJUSTMENT