CHECKING THE IMAGE BEFORE
FORWARDING
This function requires the hard disk drive.
When "Received Data Image Check Setting" is enabled in the system settings (administrator), you can select the
received data from the list and forward it to the addresses recorded in the address book. When this function is enabled,
follow the steps below to forward the received image.
* The factory default setting is disabled.
Depending on the size of the received data, part of the image in the image check screen on the touch panel may not appear.
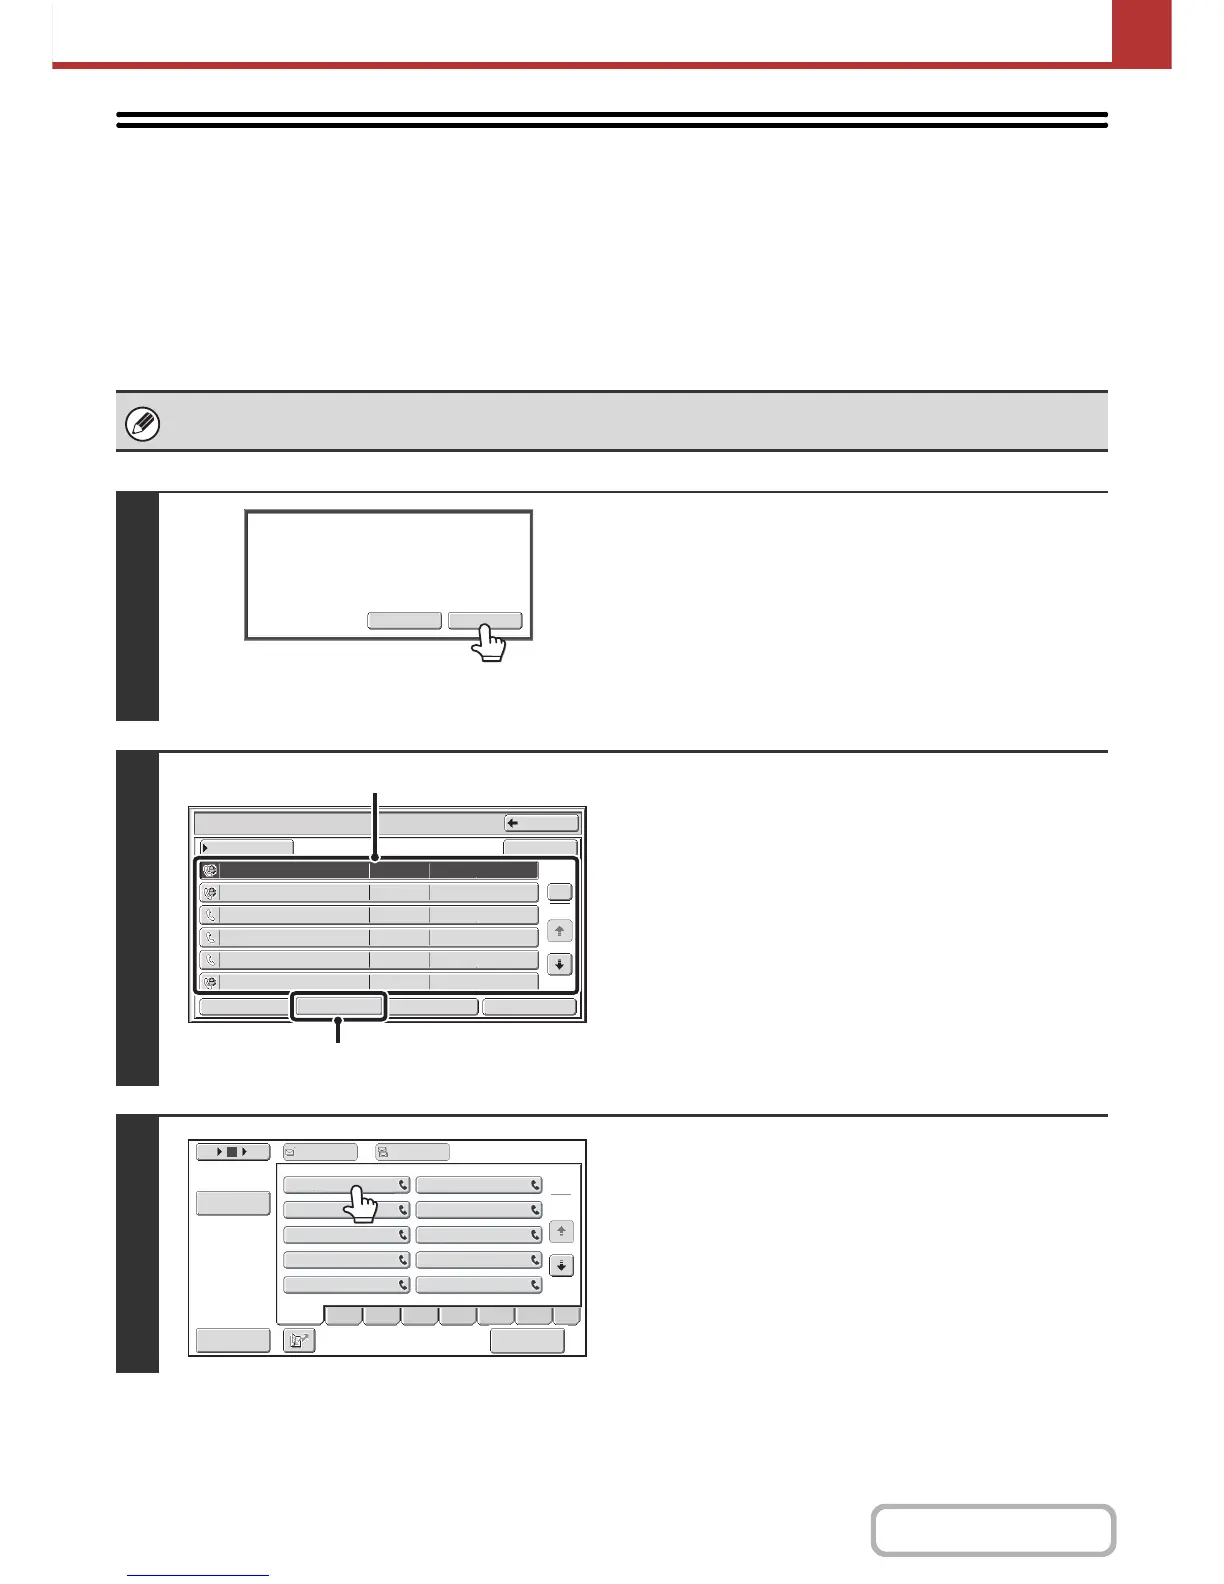
1
When an image is received, a
confirmation prompt will appear. Touch
the [Yes] key.
If this message appears while you are configuring settings of
any type and you touch the [Yes] key, the settings that you are
configuring will be canceled. If this message appears in another
mode, you will return to the base screen of image send mode
after checking the image.
2
Select the received image
(1) Touch the key of the received image that
you want to check.
Multiple received images can be checked.
(2) Touch the [Forward] key.
• To show thumbnails of the received images, touch the
[Thumbnail] key.
• The receieved image can be checked by touching the
[Image Check] key.
This function requires the hard disk drive.
☞ IMAGE CHECK SCREEN (Page 5-118)
3
Touch the Forward Destination from the
address book to select it.
Multiple forwarding addresses can be checked.