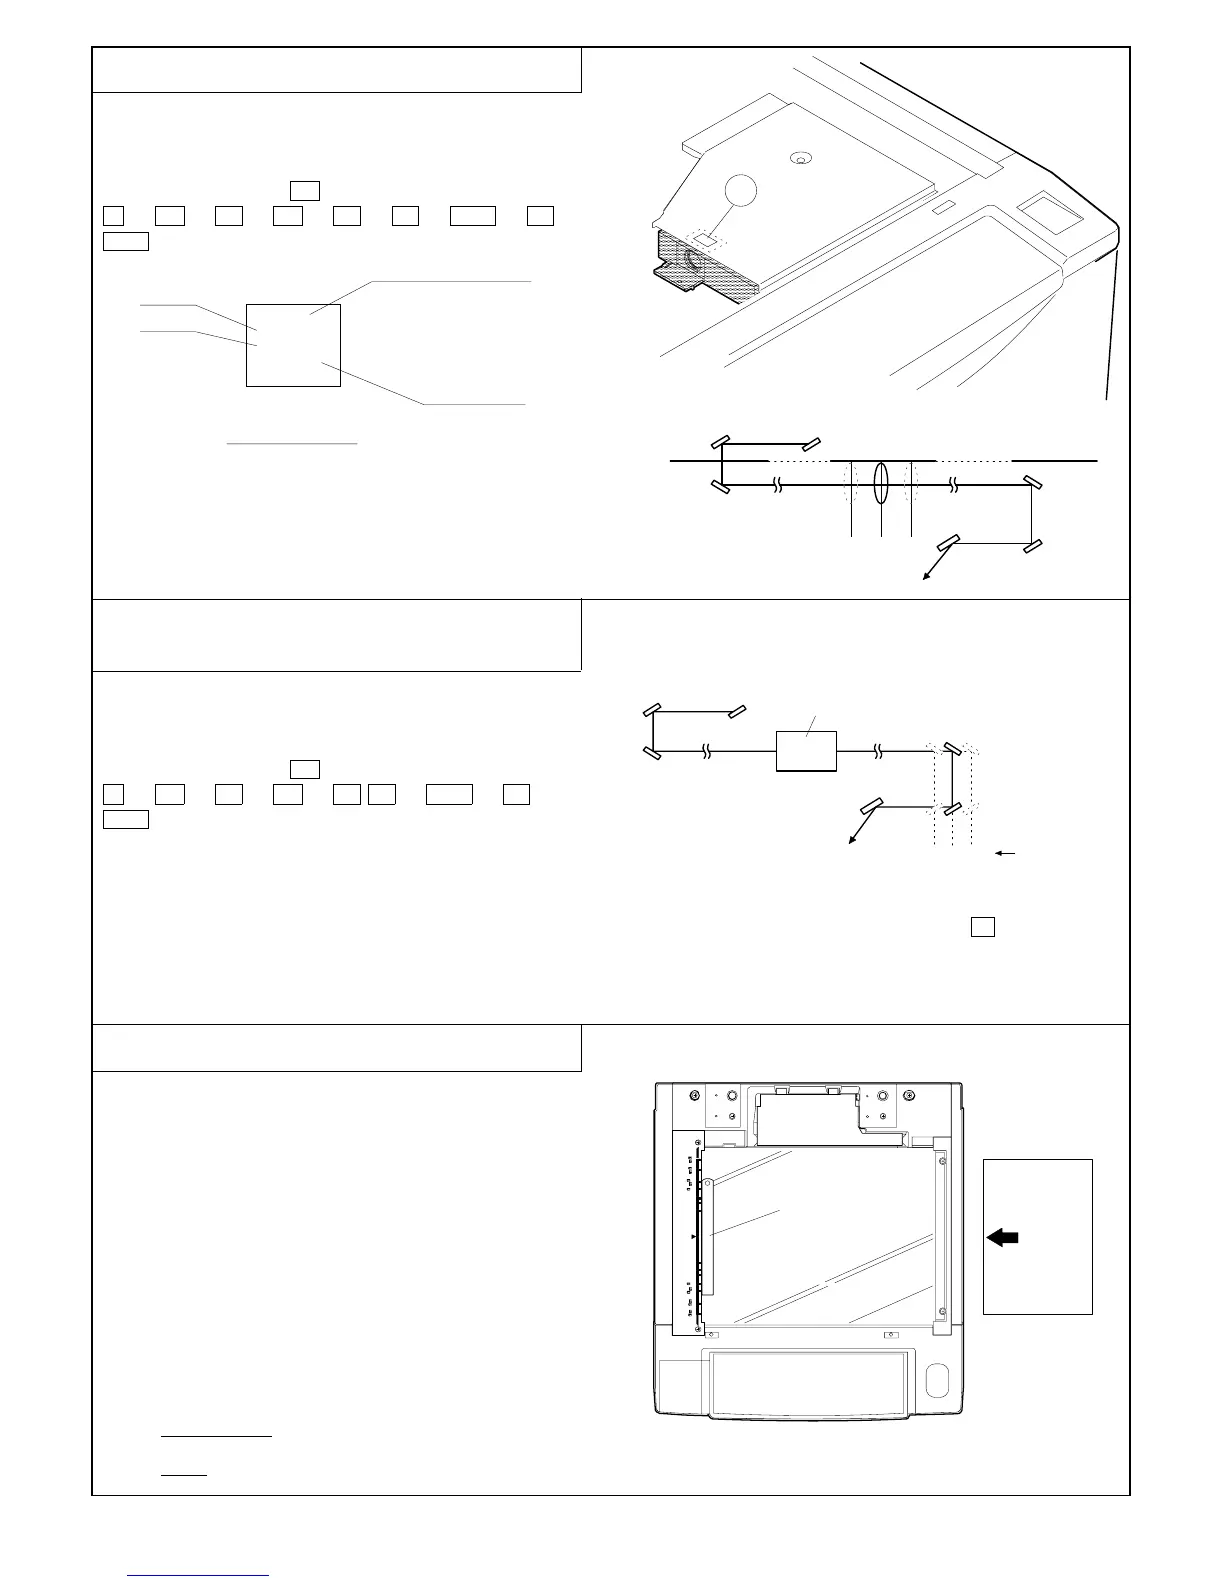
(1) Adjusting the Reference Position of Lens
A reference value depending on lens characteristics must be input
for adjusting the reference position of lens.
(This value determines the home position of lens).
(Procedure)
Perform Simulation 48-01 =↵ .
C → =↵ → 0 → =↵ → 4 → 8 → PSW → 1 →
PSW causes a preset value or "40" to → be shown on the copy
quantity indicator.
Substitute the value (irregularity of distance between original and
lens ⇒ –3.9 to +3.9) on the label applied on A shown in the right
figure, for "0-L" of the expression "O-L" is the value on label.
40 – [(0 – L) x 5] = reference value for correction
and type the result.
Eg.: If the result (reference value for correction) is 1.2 ;
40 – (1.2 x 5)= 34 value to be input
(2) Adjusting the Reference Position of 4. and 5.
Mirror
A reference value corresponding to lens characteristics must be
input also for adjusting the reference position of 4. and 5. mirror.
(This value determines the home position of 4. and 5. mirror base).
(Procedure)
Perform Simulation 48-01 =↵ .
C → =↵ → 0 → =↵ → 4 8 → PSW → 1 →
PSW causes a preset value or "42" to be shown on the copy
quantity indicator.
Substitute the value described above for "0-i" of the expression
42 x [(0 – i) x 5]= reference value for correction and type the result.
Eg.: If the result (reference value for correction) is 2.4 ;
42 – (2.4 x 5) = 32 value to be input
If the preset reference value is larger than the mid value "42",
the 4. and 5. mirrors are set further away from lens.
If the preset reference value is smaller than mid value "42",
the mirrors are set closer to lens.
* To select inputs for No.4/5 mirror reference position and the lens
reference position adjustment [7]-3-(1), use ➡ key (scrol dis-
play key). The previously set figures are displayed on the LCD.
1
39
40 41
79
A
58 50
42
Original
lens
Drum
Preset value
Mid value
901024
O. L
O. i
P. NO
+
1.2
+
2.4
120
TOPCON0
(0-i)
Manufacturing date
Preset value
Label contents
(0-L)
(3) Adjusting the Longitudinal Magnification
This adjustment must be done while the mirror bases A, B and C
are in parallel with each other and the lens is focalized.
• When the lens home position sensor (LHPS) is moved or
replaced.
• When the lens is replaced.
• When the mirror base is moved or replaced.
• When the main PWB is replaced.
• When self diag U2 occurs.
• When RAM in the main PWB is replaced.
1 Set a scale on the original table as shown in the right figure.
2 Take a full-size copy of the scale using an A4-size(11" x 8.5")
paper.
3 Compare the image on the paper with the scale.
4 Determine the correction factor for longitudinal magnification ac-
cording to the following expression:
Correction factor for longitudinal magnification
=
(original size − copy size)
original size
x 100 (%)
Eg.: Correction factor for longitudinal magnification
=
(100 − 99)
100
x 100 = 1
Scale
Paper
A4 (1" x 8½")
7 – 8