Accessing the connection compartment through the rear
110-0084.9 / 15 NXAIR / ≤ 40 kA 147
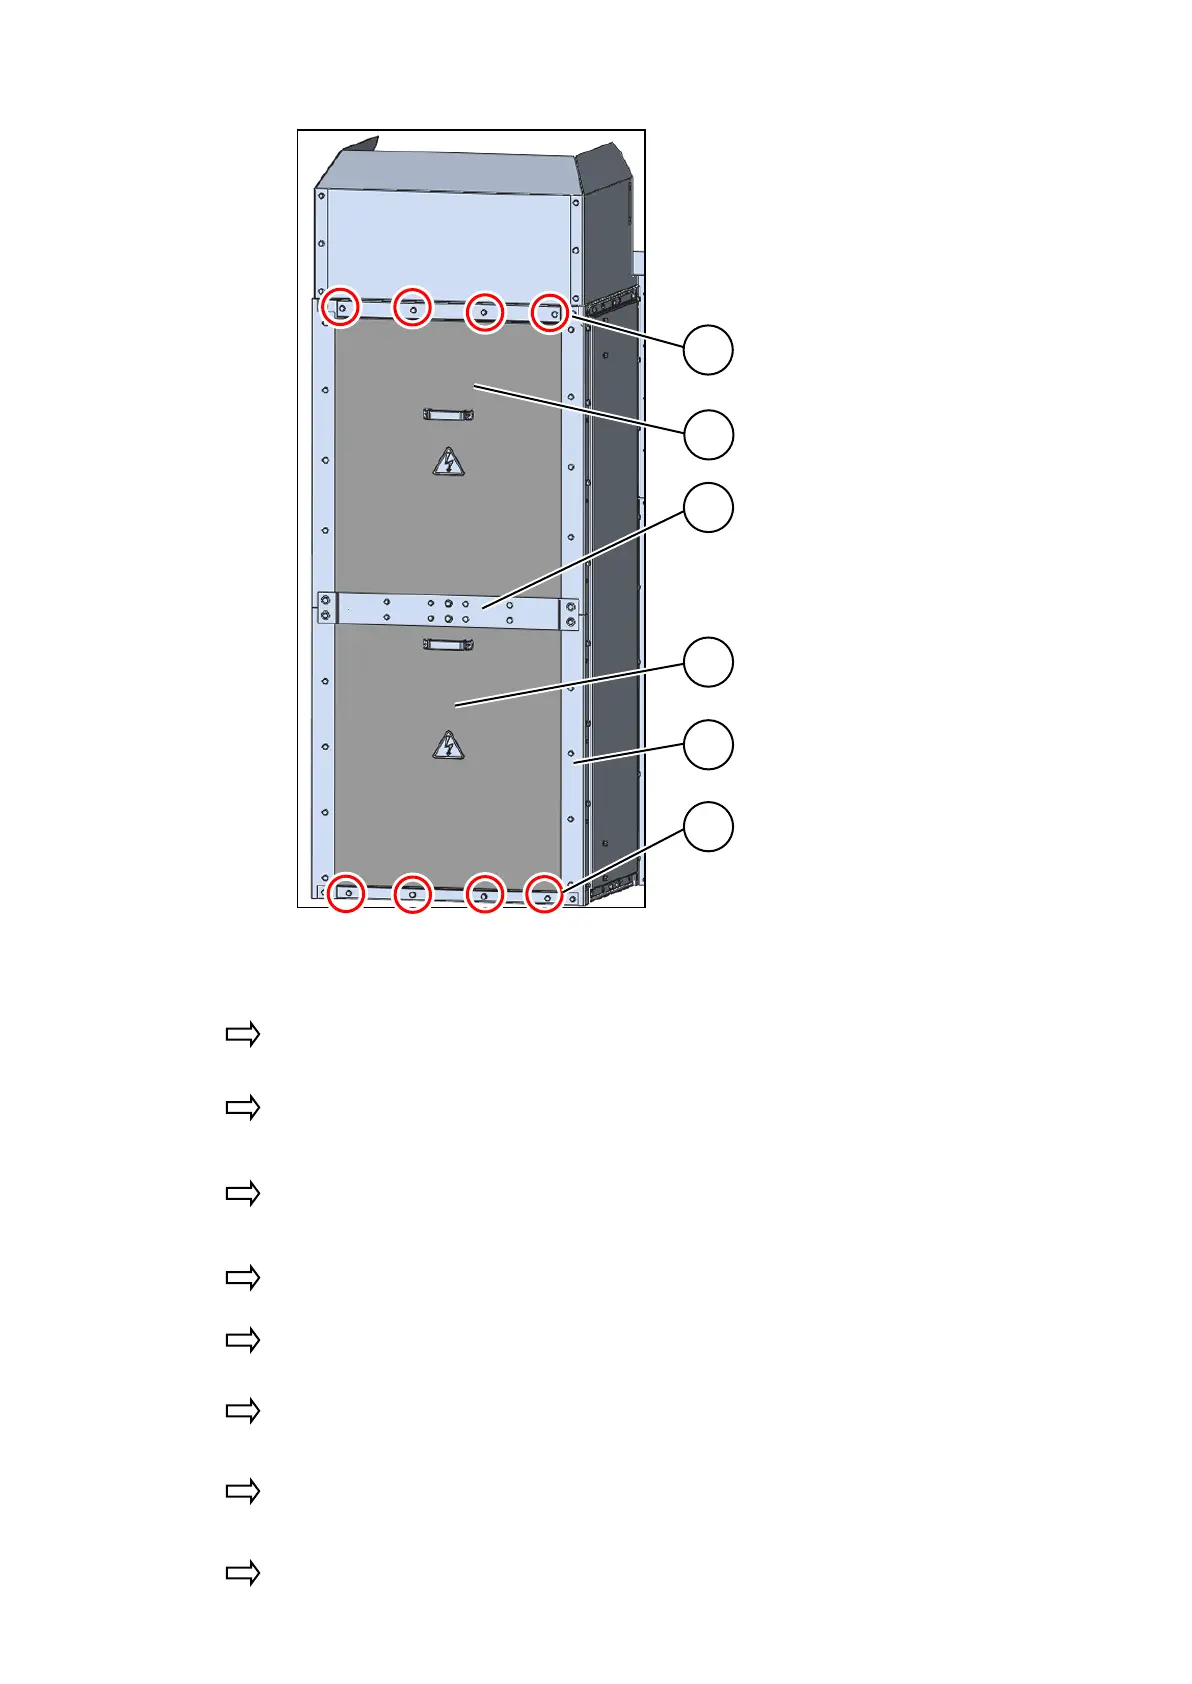
Fig. 216: Rear ledges and rear walls on
connection duct
Bolted joints for
upper rear wall
Upper rear wall with handle
Lower rear wall with handle
Bolted joints for
lower rear wall
Remove the connecting elements from the horizontal ledge (3):
• 12 / 14 bolts M8x20 with contact washers
Remove the horizontal ledge, and store it together with the associated connecting elements.
Remove the connecting elements from one of the vertical ledges (5):
• 9 / 19 bolts M8x20 with contact washers and plain washers size 8
acc. to ISO 7093
Remove the vertical ledge, and store it together with the associated connecting elements.
Proceed in the same way with the other vertical ledges.
Loosen the connecting elements of the lower rear wall at the panel base (6):
• 4 / 6 bolts M8x20 with contact washers
Remove the lower rear wall (4). To do this, lift the rear wall by the handle, and pull it out. Store
the rear wall.
Loosen the connecting elements of the upper rear wall in the upper area (1):
• 4 / 5 bolts M8x20 with contact washers
 Loading...