EasyManuals Logo

Simplex 4100ES Installation & Maintenance

Simplex 4100ES
164 pages
To Next Page IconTo Next Page
To Previous Page IconTo Previous Page
Page #111 background imageLoading...
Page #111 background image
8-4
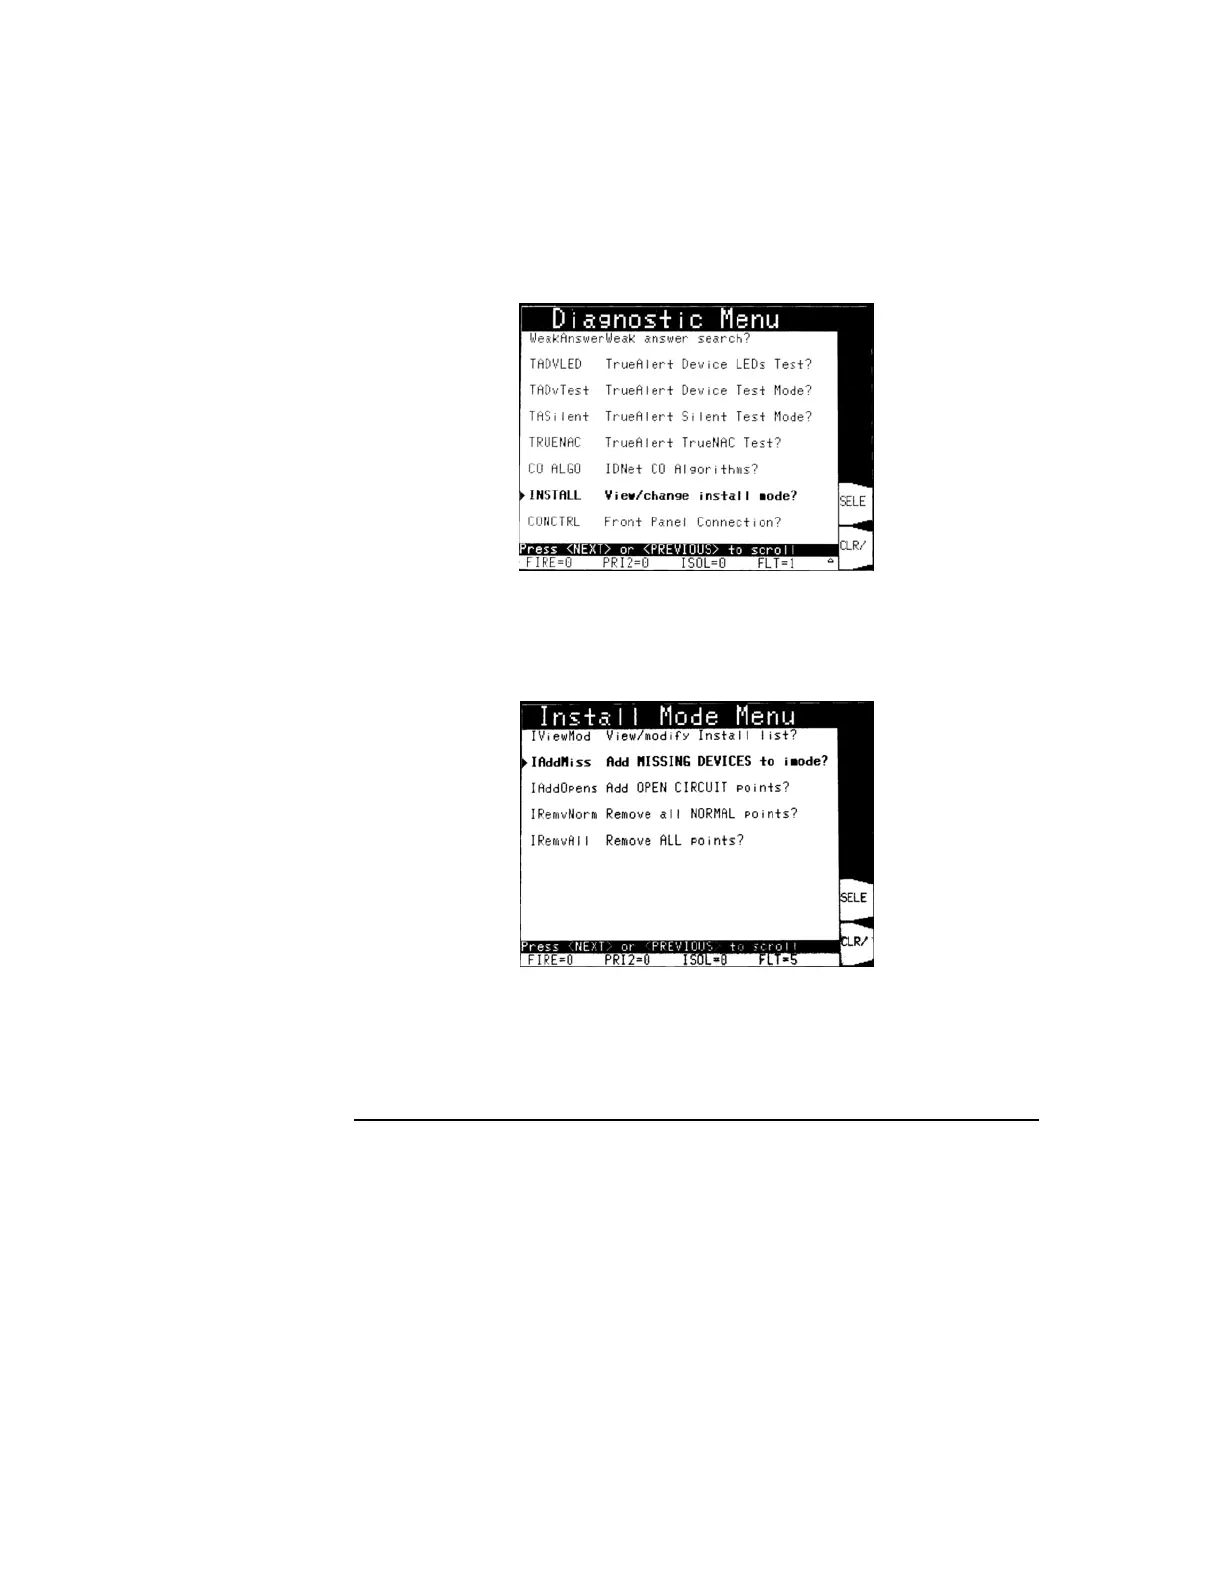
In the Diagnostic menu screen, scroll down to the Install Mode option as in Figure 8-6.
There are many diagnostic options, so using <PgDn> to jump a screen at a time will be
faster. Press the <SELE> softkey to select it.
Figure 8-6. Install Mode Option on Diagnostic Menu Screen
In the Install Mode menu, move the highlight to the ADD MISSING option as in Figure
8-7 below, and press <SELE> to select this option.
Figure 8-7. Add Options on the Install Mode Menu Screen
The panel will take a few seconds to search for all missing devices and add them to the
Install Mode list. Note that the fault count has changed from 5 in Figure 8-7 above to just
1 in the Figure 8-8 below. The single remaining fault is the Install Mode fault.
Adding Devices to Install Mode, Continued

Table of Contents

Other manuals for Simplex 4100ES

Questions and Answers:

Question and Answer IconNeed help?

Do you have a question about the Simplex 4100ES and is the answer not in the manual?

Simplex 4100ES Specifications

General IconGeneral
TypeFire Alarm Control Panel
DisplayLCD
Battery BackupYes
Model4100ES
ManufacturerSimplex
Communication ProtocolOptional Ethernet
Signaling Line Circuits (SLCs)Up to 10
Notification Appliance Circuits (NACs)Up to 10
Agency ListingsUL, FM, CSFM, MEA
Max Relay Circuits20
Communication PortsEthernet
Operating Temperature32°F to 120°F (0°C to 49°C)
HumidityUp to 93% RH, non-condensing

Related product manuals