12 Brake System Service
Brake Caliper and Disc Replacement
12 - 4
System Description
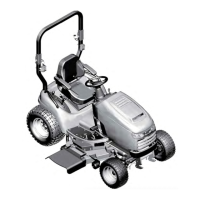
The Legacy tractor is equipped with a single disc style
braking system that is mounted on the transmission.
Both rear wheels and transaxles are braked from this
system when the brake pedal is pressed.
Brake Caliper and Disc Replacement
1. Park the tractor on a level surface.
2. Place blocks in front of and behind the front wheels.
3. Turn the ignition key switch to the OFF position,
remove the key, set the parking brake, and turn the
PTO switch off.
4. Disconnect the negative (-) battery cable
(see Section 7, ELECTRICAL SYSTEM SERVICE).
5. If desired, remove the mower deck and any other
accessories (see Section 6, COMMON SERVICE
PROCEDURES).
6. Disconnect spark plug wires (gas engines only) to
prevent the possibility of accidental starting while the
brake system is being serviced.
7. Elevate the rear and remove the left rear wheel (see
Section 6, COMMON SERVICE PROCEDURES).
8. Remove the nut (C, Figure 2) and capscrew (A) that
secures the linkage (B) to the bracket (D).
9. Remove the klip ring and washer (D, Figure 3) from
the mounting bracket (E).
10. Remove the nut and lockwasher (A), then remove the
capscrew and washer (C) from the bracket (B).
11. Carefully remove all the brake caliper components
and disc. Be sure not to pry or pound on the disc.
12. Assemble in reverse order, refer to Figure 4.
13. Perform brake linkage adjustment (see Section 4,
ADJUSTMENTS).
Figure 2. Disconnect Brake Linkage
A. Capscrew C. Nut
B. Linkage D. Bracket
C
 Loading...
