13 Engine Removal & Installation
Briggs & Stratton - Engine Installation
13 - 32
Briggs & Stratton - Engine Installation
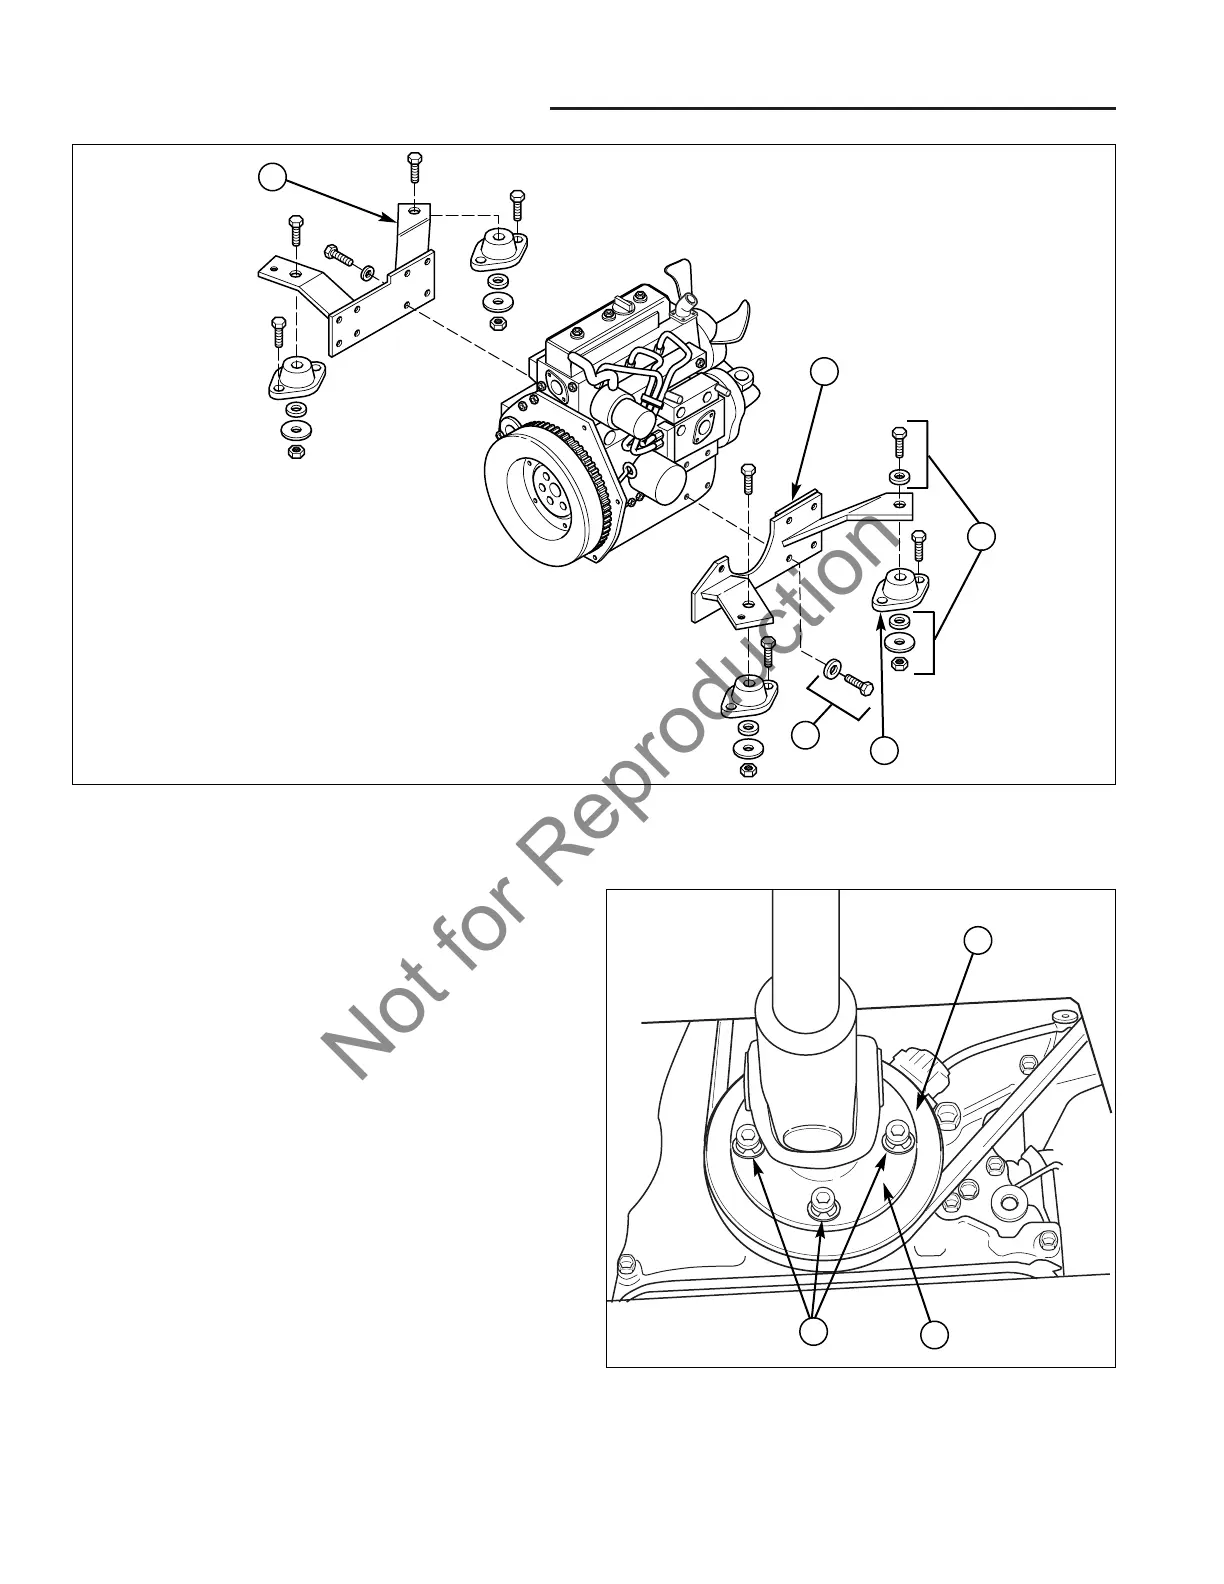
1. Install the left (B, Figure 39) and right (C) mounting
brackets to the engine with the original hardware (E),
and tighten securely.
2. Connect a suitable lifting device to the lift rings on the
engine, and raise the engine. Position the engine
over the front of the tractor, and slowly lower into
position.
NOTE: As the engine is being lowered, guide the engine
fan into the radiator shroud, ensure that the fan does not
contact the radiator core as it is being moved.
3. Align the left (B) and right (C) engine brackets to all
bracket mounts (D), and install the original hardware.
Tighten this hardware securely.
4. Slide the rear of the drive shaft onto the Hydrostatic
Unit input shaft. Raise the drive shaft front flange (B,
Figure 40) into position on the engine pulley (C), and
install the original hardware (A). Tighten the hard-
ware securely.
Figure 39. Engine Installation
A. Engine Mounting Hardware C. Engine Mount (RIght Bracket) E. Engine Bracket Hardware
B. Engine Mount (Left Bracket) D. Engine Mount (Rubber)
C
B
D
E
A
Figure 40. Drive Shaft Installation
A. Drive Shaft Mounting Hardware
B. Drive Shaft Flange
C. Engine Pulley
C
B
A