13 Engine Removal & Installation
Briggs & Stratton - Engine Removal
13 - 30
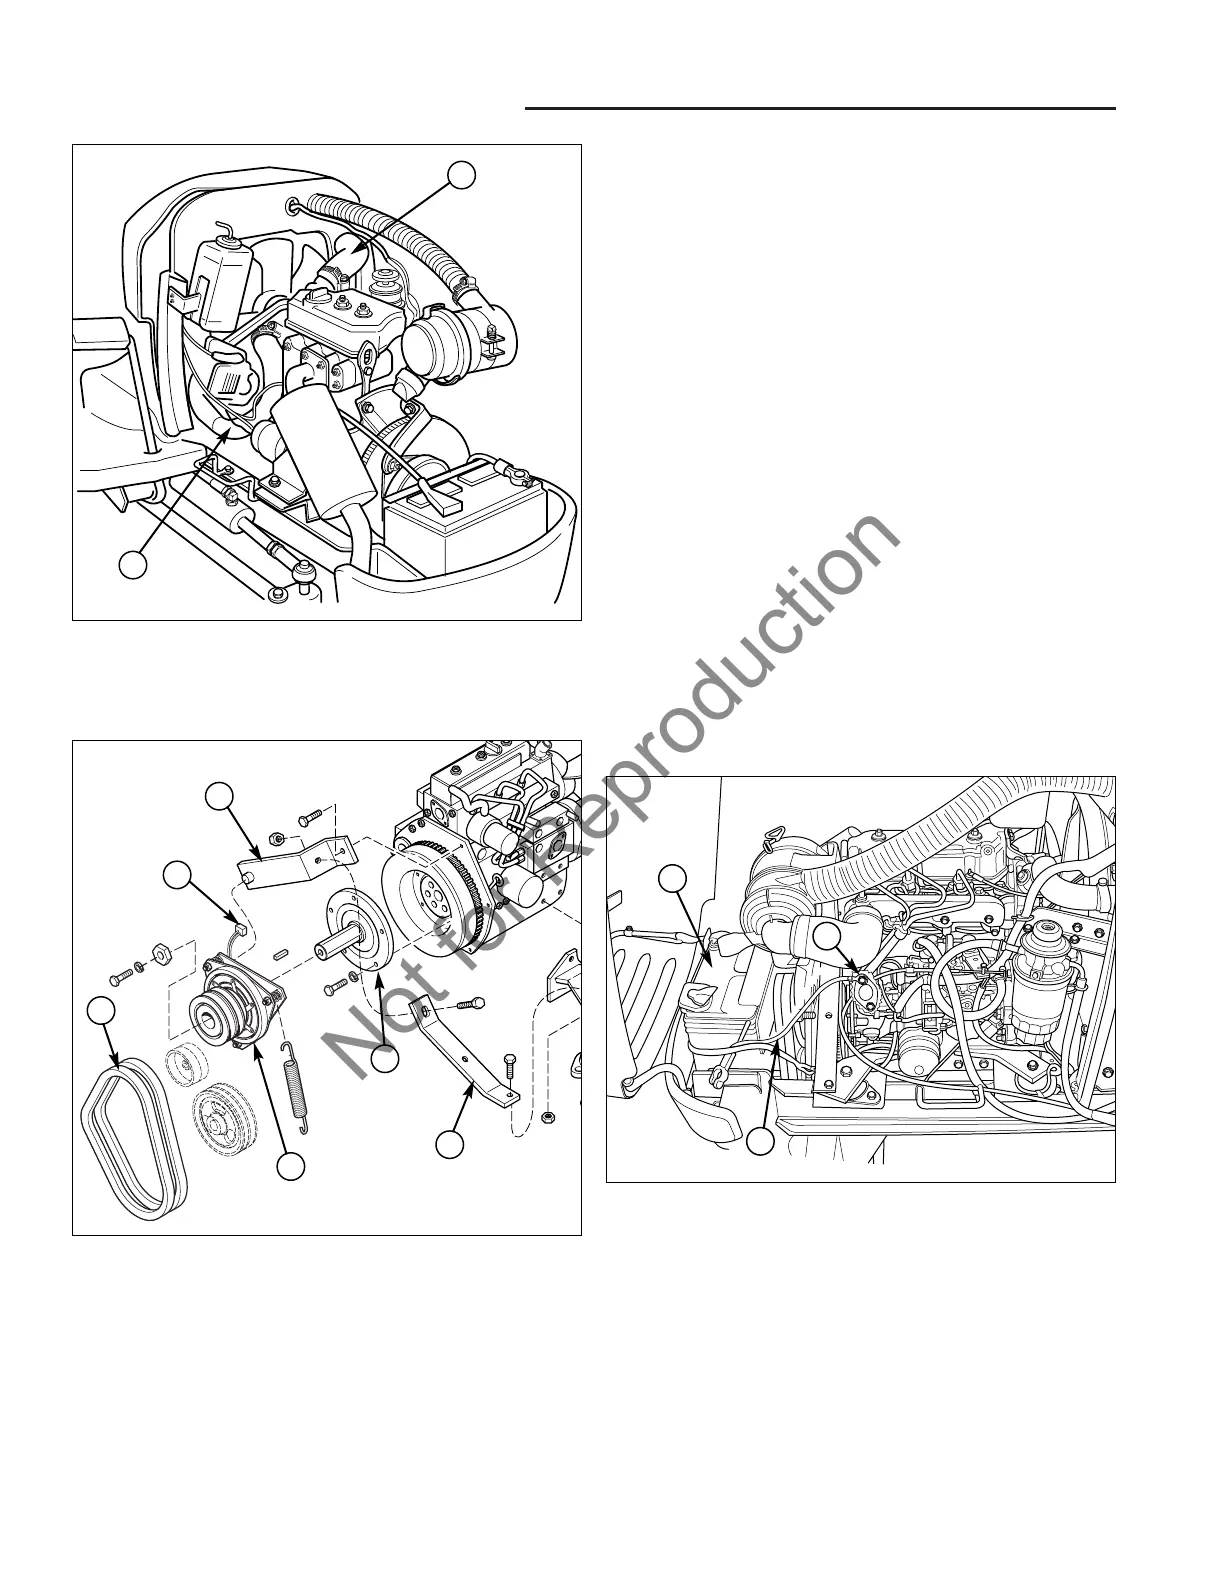
13. Loosen the clamps securing the upper radiator hose
(A, Figure 34) to the engine and radiator, and remove
the hose.
14. Loosen the clamps securing the lower radiator hose
(B) to the engine and radiator, and remove the hose.
15. Disconnect the negative battery cable (C, Figure 36)
from the left front of the engine block (B).
16. Unplug the PTO clutch (A, Figure 35) from wiring har-
ness connector.
NOTE: The PTO belts are a matched set and must be
replaced as a set. If the belts are being removed for
inspection, make sure they are reinstalled in the their
original pulley groove and rotational orientation.
17. Remove the PTO belt set (B), PTO clutch assembly
(C), and stub shaft (D), guard (E), and clutch stop
bracket assembly (F) from the engine (Refer to
Section 16, "PTO Clutch Service" if additional infor-
mation is required).
Figure 34. Engine Component Removal – Front
A. Radiator Hose (Upper)
B. Radiator Hose (Lower)
Figure 35. PTO Clutch Removal
A. Electrical Connector D. Stub Shaft
B. Belt Set E. Guard
C. PTO Clutch Assembly F. Clutch Stop Bracket
A
B
C
D
F
A
B
E
Figure 36. Engine Component Removal – Front
A. Battery
B. Engine Block Ground Location
C. Negative Battery Cable
A
C
B