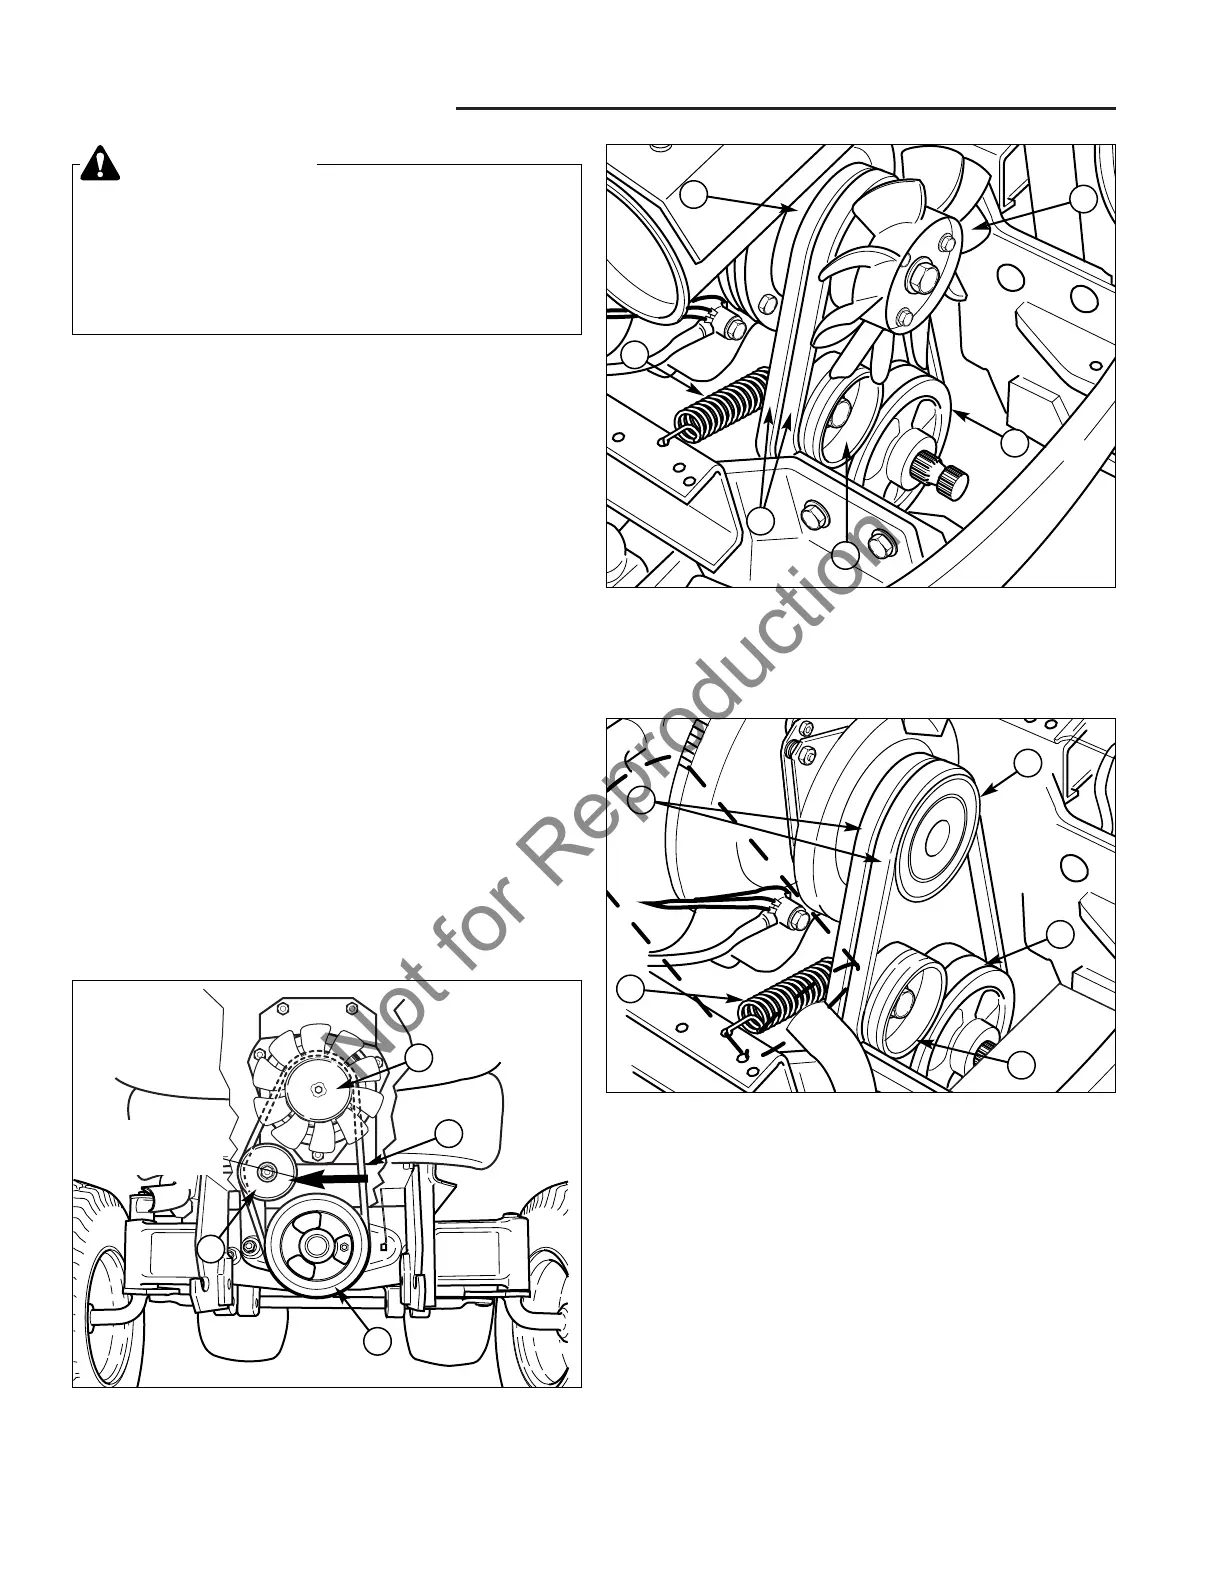
5 Belt Replacement
Tractor PTO Belt Replacement
5 - 2
PTO Belt Replacement
NOTE: The PTO belts are a matched set and must be
replaced as a set. If the belts are being removed for
inspection, make sure they are reinstalled in the their
original pulley groove and rotational orientation.
1. Park the tractor on a level surface. Disengage the
PTO, turn off the engine, and set the parking brake.
Remove the key.
2. Tilt the hood forward.
3. Use a spring puller or a small rope loop to remove
the idler arm spring (A, Figure 2 and 3) or release the
tension that is on the idler pulley (D, Figure 1) and
PTO belts (D, Figure 2 and 3).
Note: Check idler pulley for smooth rotation. Pulley
should be square to the belts.
4. Remove the belts (D, Figure 2 and 3), one at a time,
from the lower PTO pulley (E), idler pulley (C), PTO
clutch pulley (B), and the fan (F).
5. Replace the new belts (D), one at a time, on the
lower pulley (E), idler pulley (C), PTO clutch pulley
(D), and the fan (F, Figure 2).
Figure 1. Install PTO Belt
A. PTO Clutch Assembly C. Lower PTO Pulley
B. PTO Belts D. Idler Pulley
B
Tension
on belt
A
D
C
Figure 3. PTO Assembly (Diesel Engine Models)
A. Spring D. PTO Belts
B. PTO Clutch Pulley E. Lower PTO Pulley
C. Idler Pulley
E
F
B
A
D
C
Figure 2. PTO Assembly (Gas Engine Models)
A. Spring D. PTO Belts
B. PTO Clutch Pulley E. Lower PTO Pulley
C. Idler Pulley F. Fan
B
D
A
C
E
WARNING
Before beginning any service work, turn the PTO
off, set the parking brake, turn the ignition switch
off, remove the key. Disconnect the spark plug
wire (gas engines only), and disconnect the
negative battery cable.
6. Replace the idler arm spring (A, Figure 2 and 3) or
reapply the tension back onto the idler pulley (D,
Figure 1) and belts (B).