Sinterit LISA X User Manual | 38
STOP!
• Be careful not to damage the heating module.
• Do not clean the laser protective glass under running water.
• Do not clean the laser protective glass above the print chamber.
• Note any remaining lint on the surface of the glass after cleaning.
You will need: 2 x cotton cloth, 2% salicylic spirits (ethanol solution) or another ethanol-based cleaning solution.
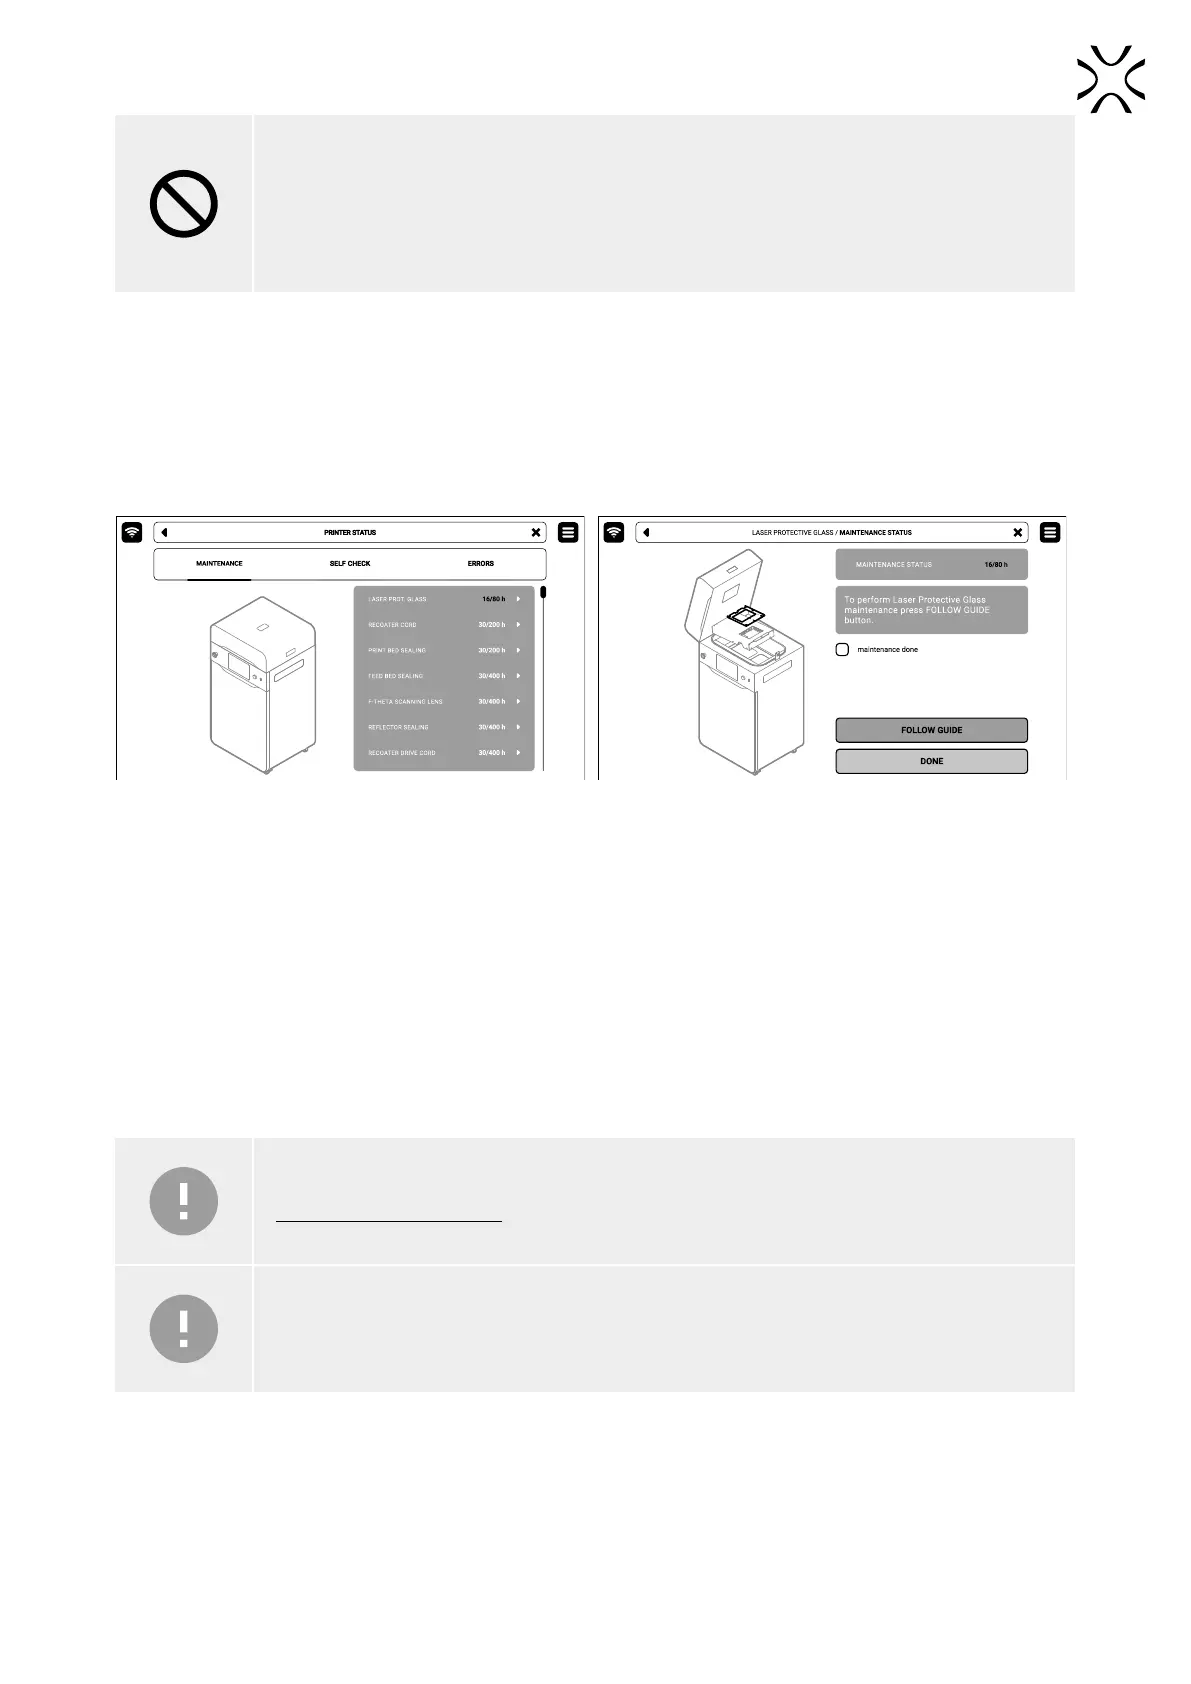
1. On the PRINTER STATUS tab, select the Laser protective glass position (g. 12.6).
2. The laser protective glass maintenance tab will appear on the screen. You can use the step-by-step guide (press
FOLLOW GUIDE) or perform the cleaning yourself.
3. In this case, mark MAINTENANCE DONE once you have completed the cleaning procedure, and then the DONE button.
The timer will reset to zero (g. 12.7).
Fig. 12.6 Select Laser protective glass position
to start the maintenance.
Fig. 12.7. The screen of the maintenance
of the laser protection glass.
4. Choose UNLOCK LID on the screen.
5. Push on the lid and pull it up using the lid handle. Remember, you only have 10 seconds to open it before the lock
activates again.
6. Remove the split pin from the heating module.
7. Lower the heating module.
8. Unscrew two quick release nuts. Make sure you hold the laser protective glass, otherwise it may fall.
9. Take the laser protective glass out.
10. Delicately wipe the glass on both sides with a cotton cloth soaked in 2% salicylic spirit (ethanol solution) or another
ethanol-based cleaning solution. You may also use cleaning wipes provided in Dedicated Powder Tools.
IMPORTANT!
Do not use isopropyl alcohol to clean the laser protective glass.
IMPORTANT!
Cleaning the laser protective glass after printing from rubber-like materials requires the use of
agents containing isobutanol and methyl ethyl ketone, xylene and toluene.
11. Wipe the glass again on both sides with a dry cotton cloth.
12. Slide the metal tabs of the laser protective glass into the mounting brackets below the laser module.
13. Lock the laser protective glass in place by mounting and tightening the two quick release nuts.
14. Lift the heating module.
15. Reinsert the heating module split pin.
16. Good job. The maintenance timer will reset to zero.