Sinterit LISA X User Manual | 40
12.4 REPLACING RECOATER CORD
You will need: 2 mm allen key, brush or compressed air, new Recoater cord.
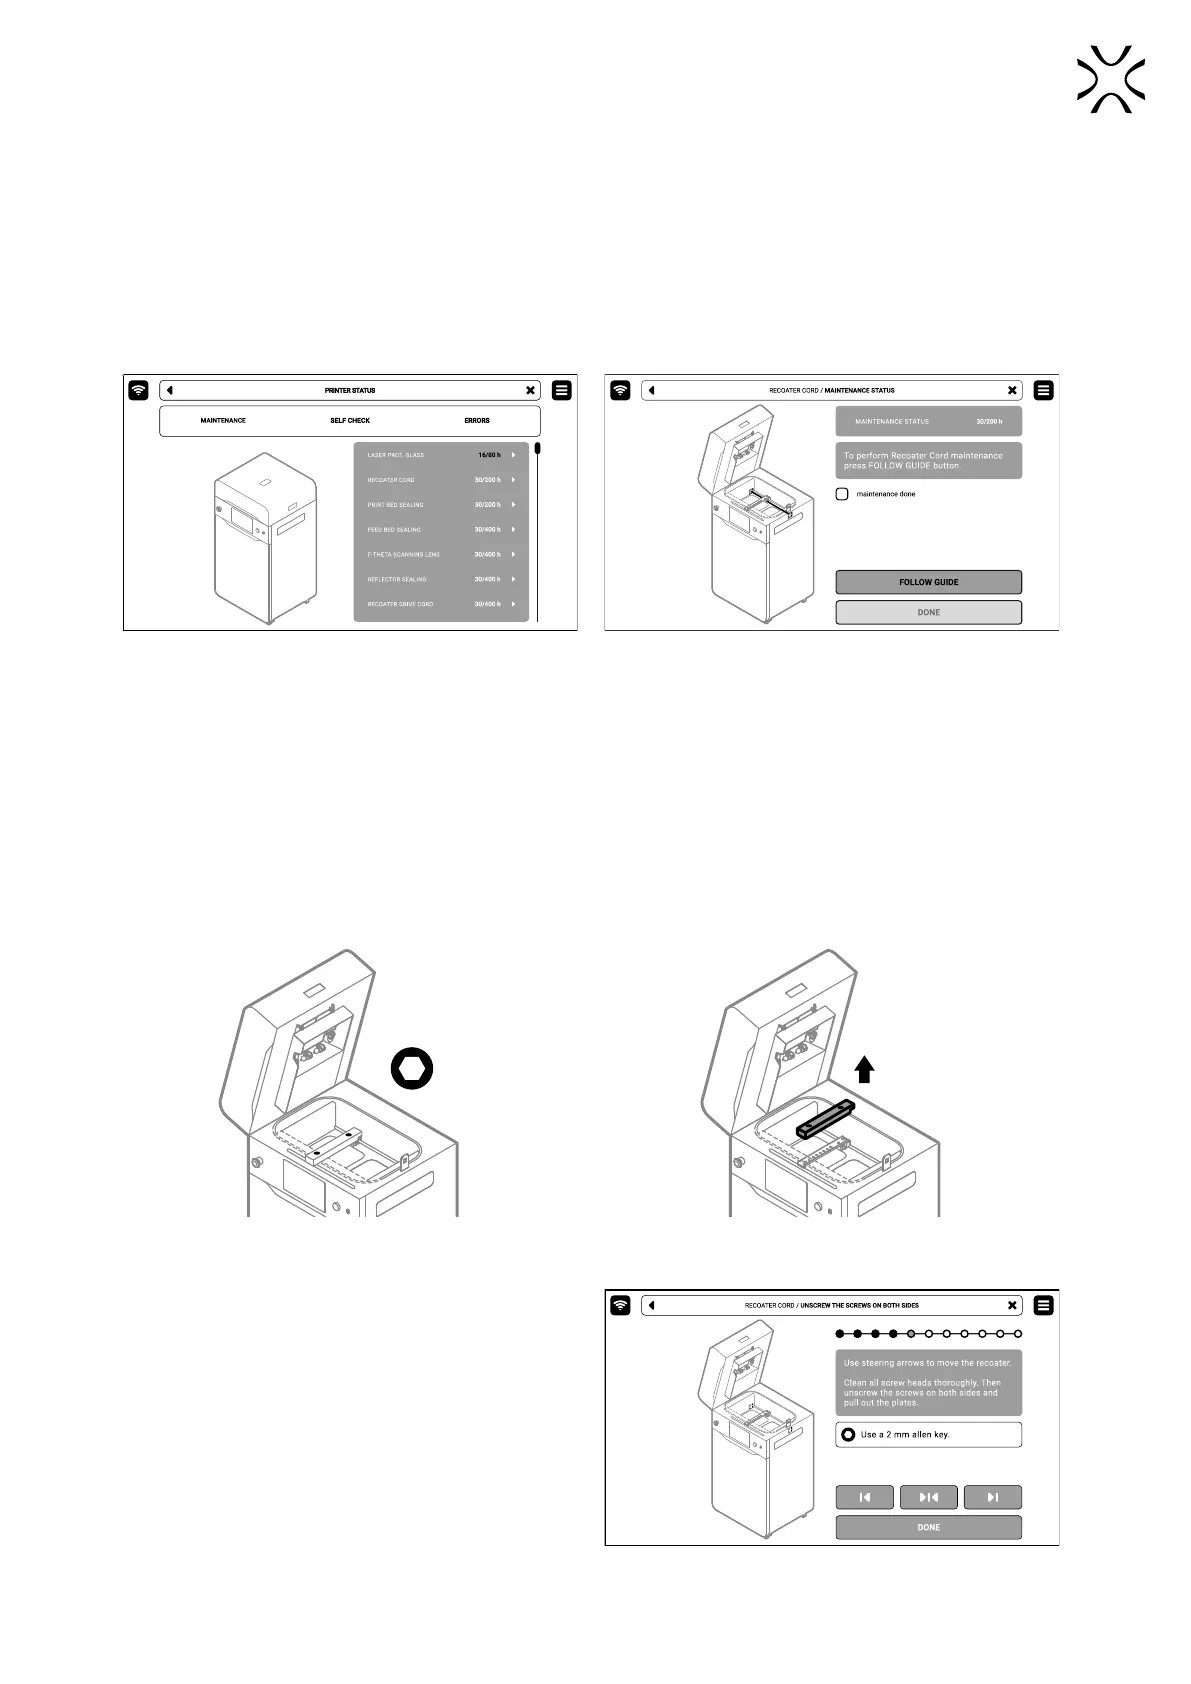
1. On the PRINTER STATUS tab, select the Recoater CORD position (g. 12.9)
2. The Recoater cord maintenance tab will appear on the screen. You can use the step-by-step guide (press FOLLOW
GUIDE) or perform the replacement yourself.
3. In this case, mark MAINTENANCE DONE once you have completed the procedure, and then the DONE button. The
timer will reset to zero (g. 12.10).
Fig. 12.9 Select the Recoater CORD position
to start the maintenance.
Fig. 12.10 The screen of the maintenance
of the Recoater cord.
4. Choose UNLOCK LID on the screen.
5. Push on the lid and pull it up using the lid handle. Remember, you only have 10 seconds to open it before the lock
activates again.
6. Clean the print chamber if needed.
7. Use the steering arrows to position the Recoater between the Beds.
8. Using a 2 mm allen key, unscrew both screws on the Recoater cover and take off it (g. 12.11).
9. Gently remove the black cover from Recoater (g. 12.12).
Fig. 12.11 Set the Recoater and remove the screws
from the Recoater cover.
Fig. 12.12 Remove the black Recoater cover.
10. Clean all screw heads thoroughly.
11. Using a 2 mm allen key, unscrew the screws on the
Recoater cord mounting plate on the left and right side
(g. 12.13).
12. If access to the screws is problematic, use the steering
arrows to move the Recoater in the right direction.
Fig. 12.13 Unscrew the screw of the Recoater cord.