Sinterit LISA X User Manual | 27
8. Removing and cleaning the printout
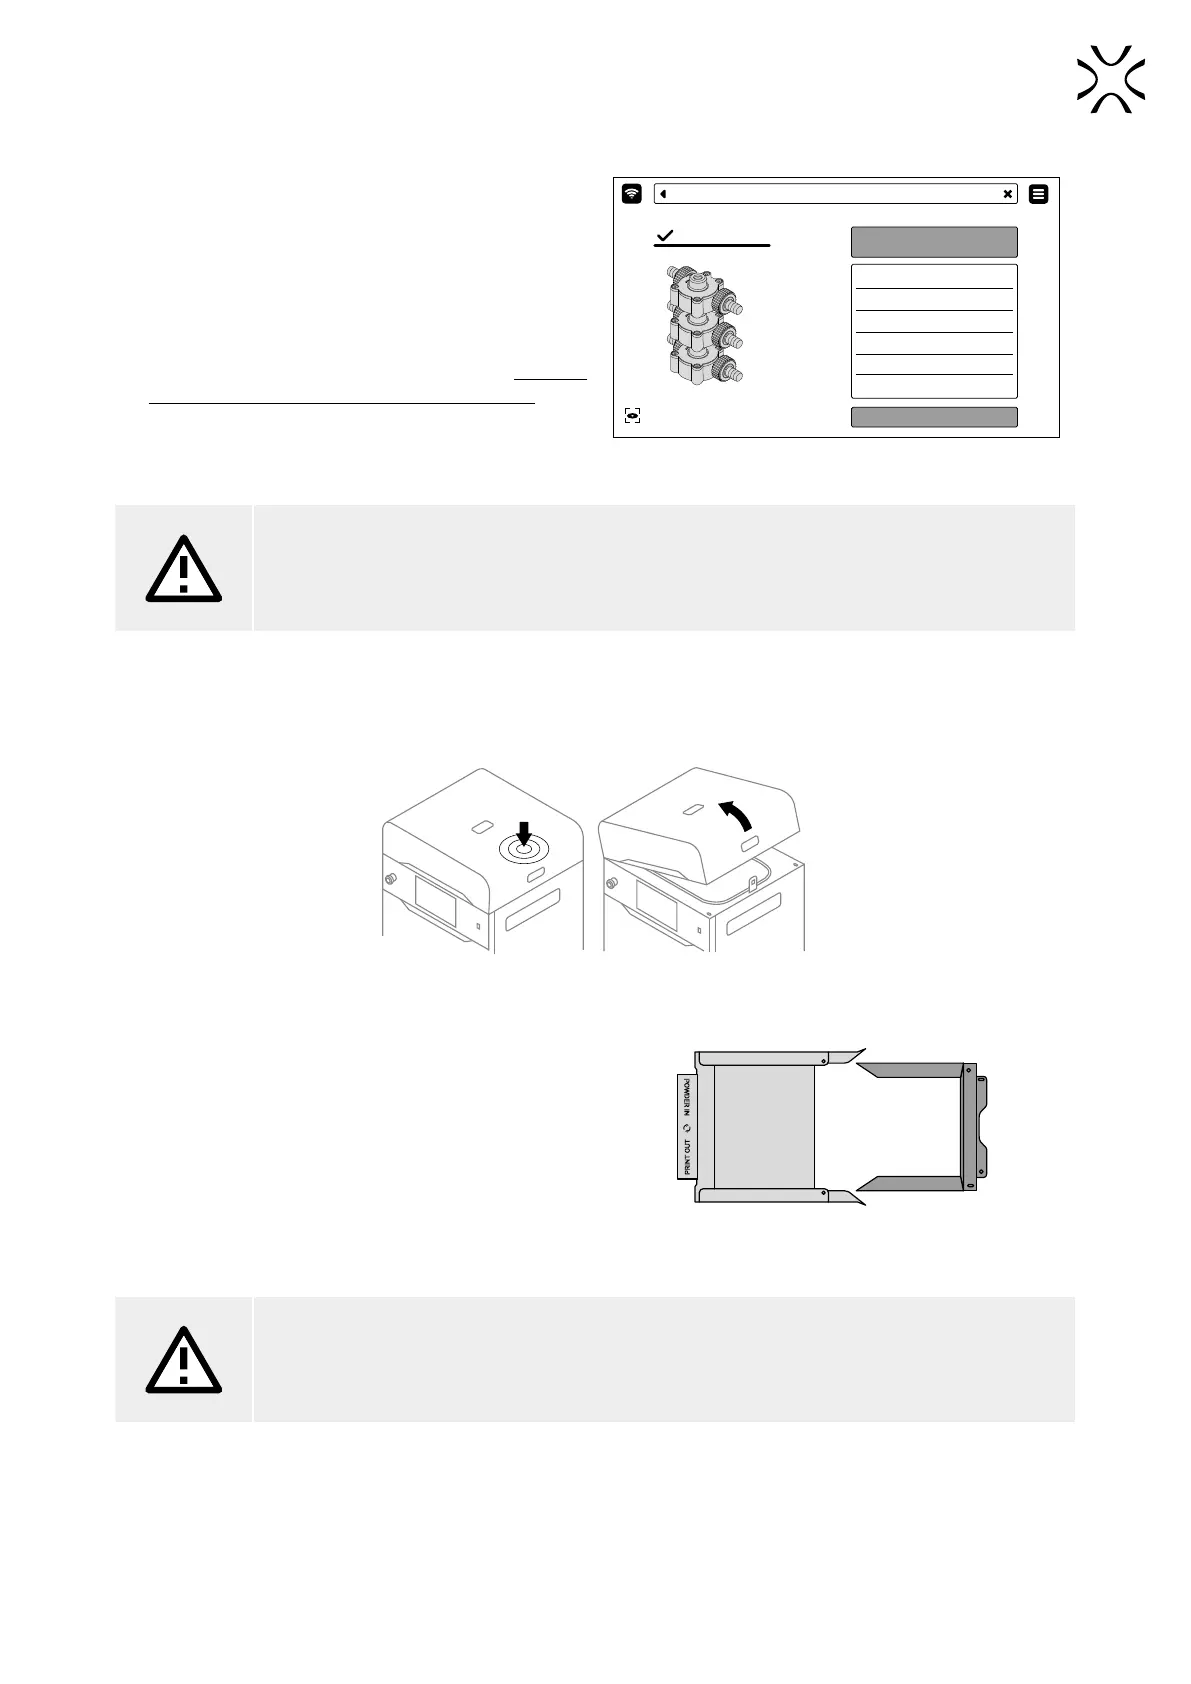
1. Once the screen displays a message saying FINISHED
(g. 8.1) the printing process is over. Choose the
REMOVE PRINTOUT button to retrieve it from the print
chamber.
2. After the print is nished, the screen may show a
message saying MAINTENANCE TIME. It contains
information on required maintenance to certain
components of the printer in the near future. For more
information, see Chapter 12. Basic maintenance. If the
message hasn’t appeared, it means that no components
require any maintenance. Press GOT IT.
REMOVE PRINTOUT
PRINTING
MODEL NAME PUMP_01
MATERIAL PA12
INERT GAS NO
REMAINING TIME 0h:0m
LAYER 1543/3455
PRINTER TEMPERATURE
CAMERA VIEW
150°C
FINISHED (100%)
Fig. 8.1 The screen informs the user that the printing is nished.
ATTENTION!
Remember to regularly perform printer maintenance as instructed. Exceeding the designed lifetime
of printer components may negatively impact printouts quality and cause damage to the device.
3. Press UNLOCK LID on the screen to release the electrolock and allow the printer to be opened. Remember, you only
have 10 seconds to open it before the lock activates again.
4. Push on the lid and pull it up using the handle (g. 8.2).
Fig. 8.2 Lifting the printer lid.
5. Make sure no miscellaneous items remain in the print
chamber and press POSITION BEDS.
6. Place the folded IO BOX inside the print chamber. Make
sure its elements are arranged like in the picture (g.
8.3.)
Feed Bed Print Bed
Fig. 8.3. The proper arrangement of the IO BOX,
allowing the user to remove the nished printout.
ATTENTION!
While placing the IO BOX in the chamber, make sure you do not accidentally damage its components.