Sinterit LISA X User Manual | 45
12.6 REPLACING FEED BED SEALING
ATTENTION!
Always wear appropriate personal protective equipment when working with
powder: clothing, goggles, mask, and gloves. You will nd a suitable kit in
the Dedicated Powder Tools package.
You will need: 2,5 mm allen key, ATEX/INTERTEK vacuum cleaner, compressed air, metal spatula, plastic spatula, scissors,
new berglass rope.
1. On the PRINTER STATUS tab, select the Feed Bed SEALING position.
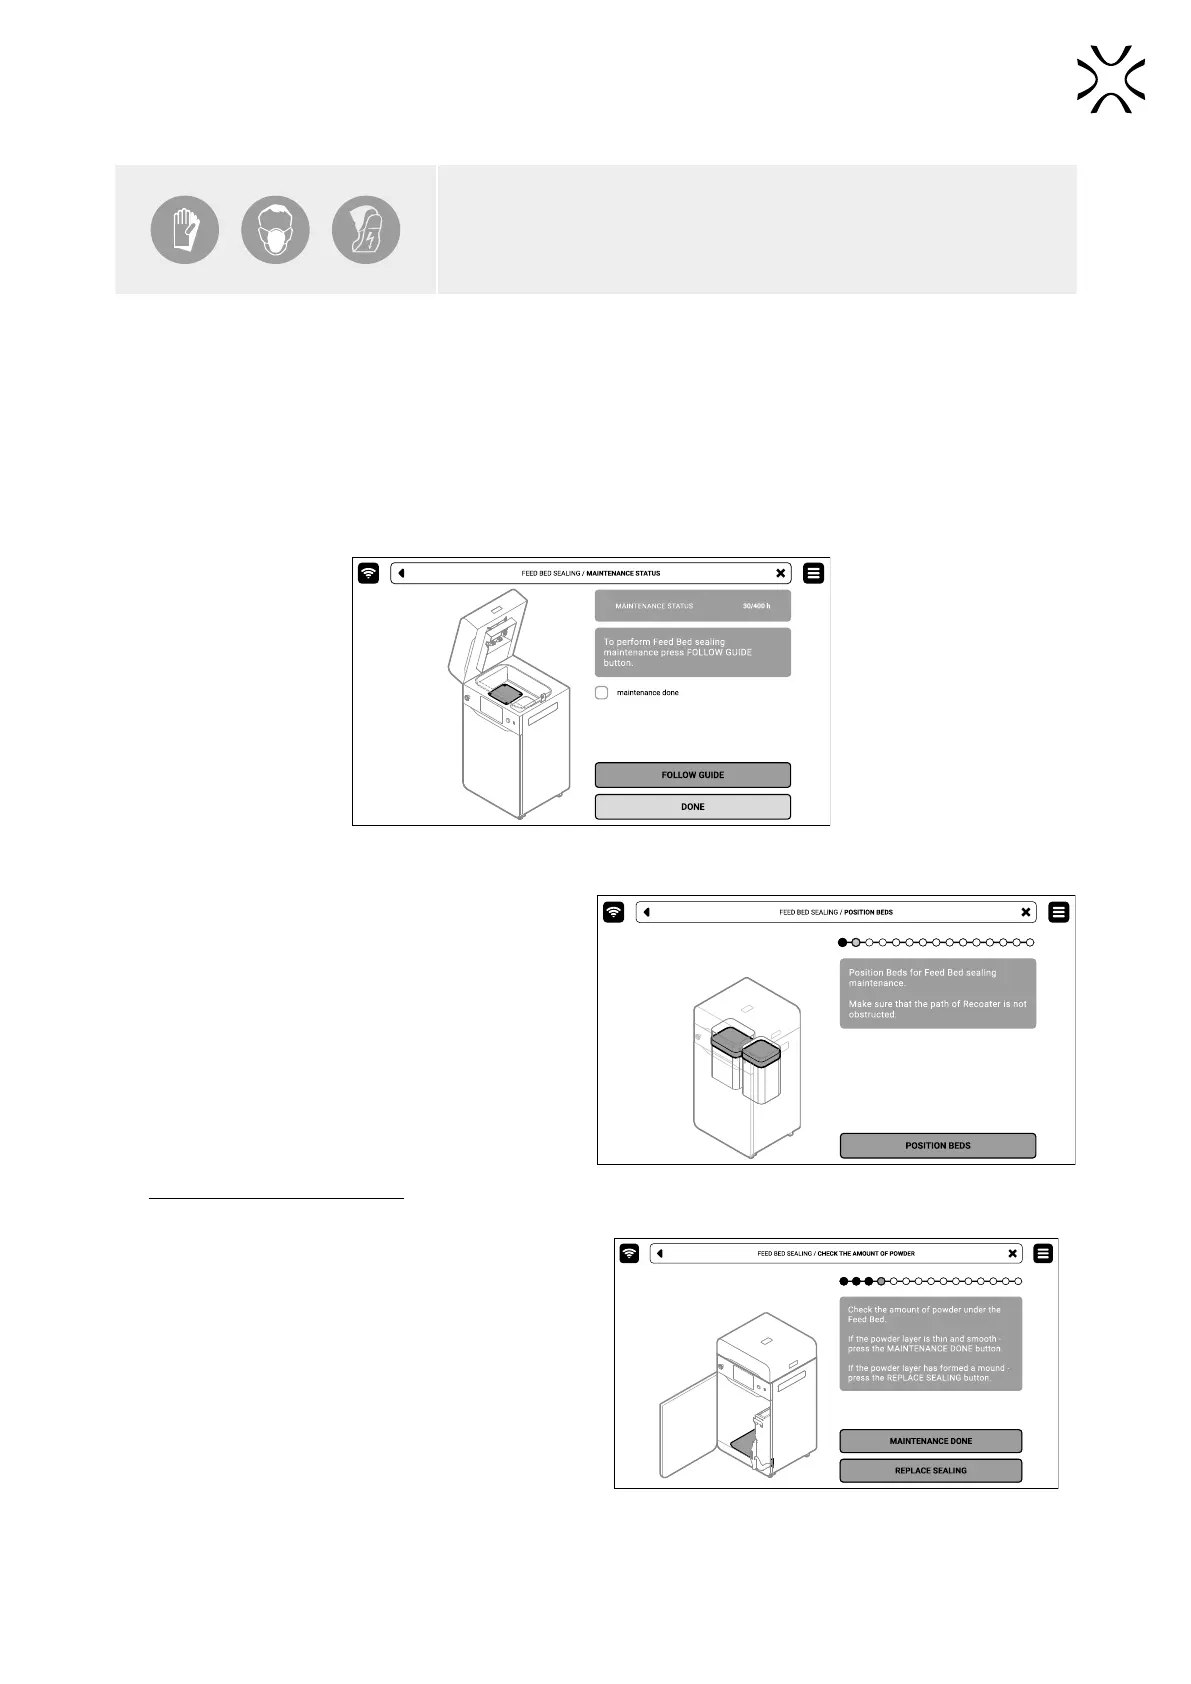
2. The Feed Bed sealing maintenance tab will appear on the screen. You can use the step-by-step guide (press FOLLOW
GUIDE) or perform the replacement yourself.
3. In this case, mark MAINTENANCE DONE once you have completed the procedure, and then the DONE button. The
timer will reset to zero (g. 12.30).
Fig. 12.30 The screen of the maintenance of the Feed Bed sealing.
4. Choose UNLOCK LID on the screen.
5. Push on the lid and pull it up using the lid handle.
Remember, you only have 10 seconds to open it before
the lock activates again.
6. Make sure the print chamber is free of any unwanted
items that may interfere with moving the Recoater.
Clean the print chamber if needed.
7. Press POSITION BEDS to begin the positioning process
of the Beds (g. 12.31).
8. Once the positioning process is nished,
both Beds should be at maximum at the top.
Remember! Do not close the lid!
Fig. 12.31. POSITIONING BED screen.
9. Press UNLOCK DOOR on the screen and open the
printer door.
10. Check the amount of powder under the Feed Bed.
If the powder layer is thin and smooth - press the
MAINTENANCE DONE button (g 12.32).
11. If the powder layer has formed a mound - press the
REPLACE SEALING button (g. 12.32).
Fig. 12.32 Check the amount of powder under the Beds.