50
Scanner Operations Downloading Firmware
fully functional but may not benefit from the additional features available in the update. Selecting
Details in the upper-right corner opens a list of what is included in the update.
z To update the firmware:
1. Power on the Display Device.
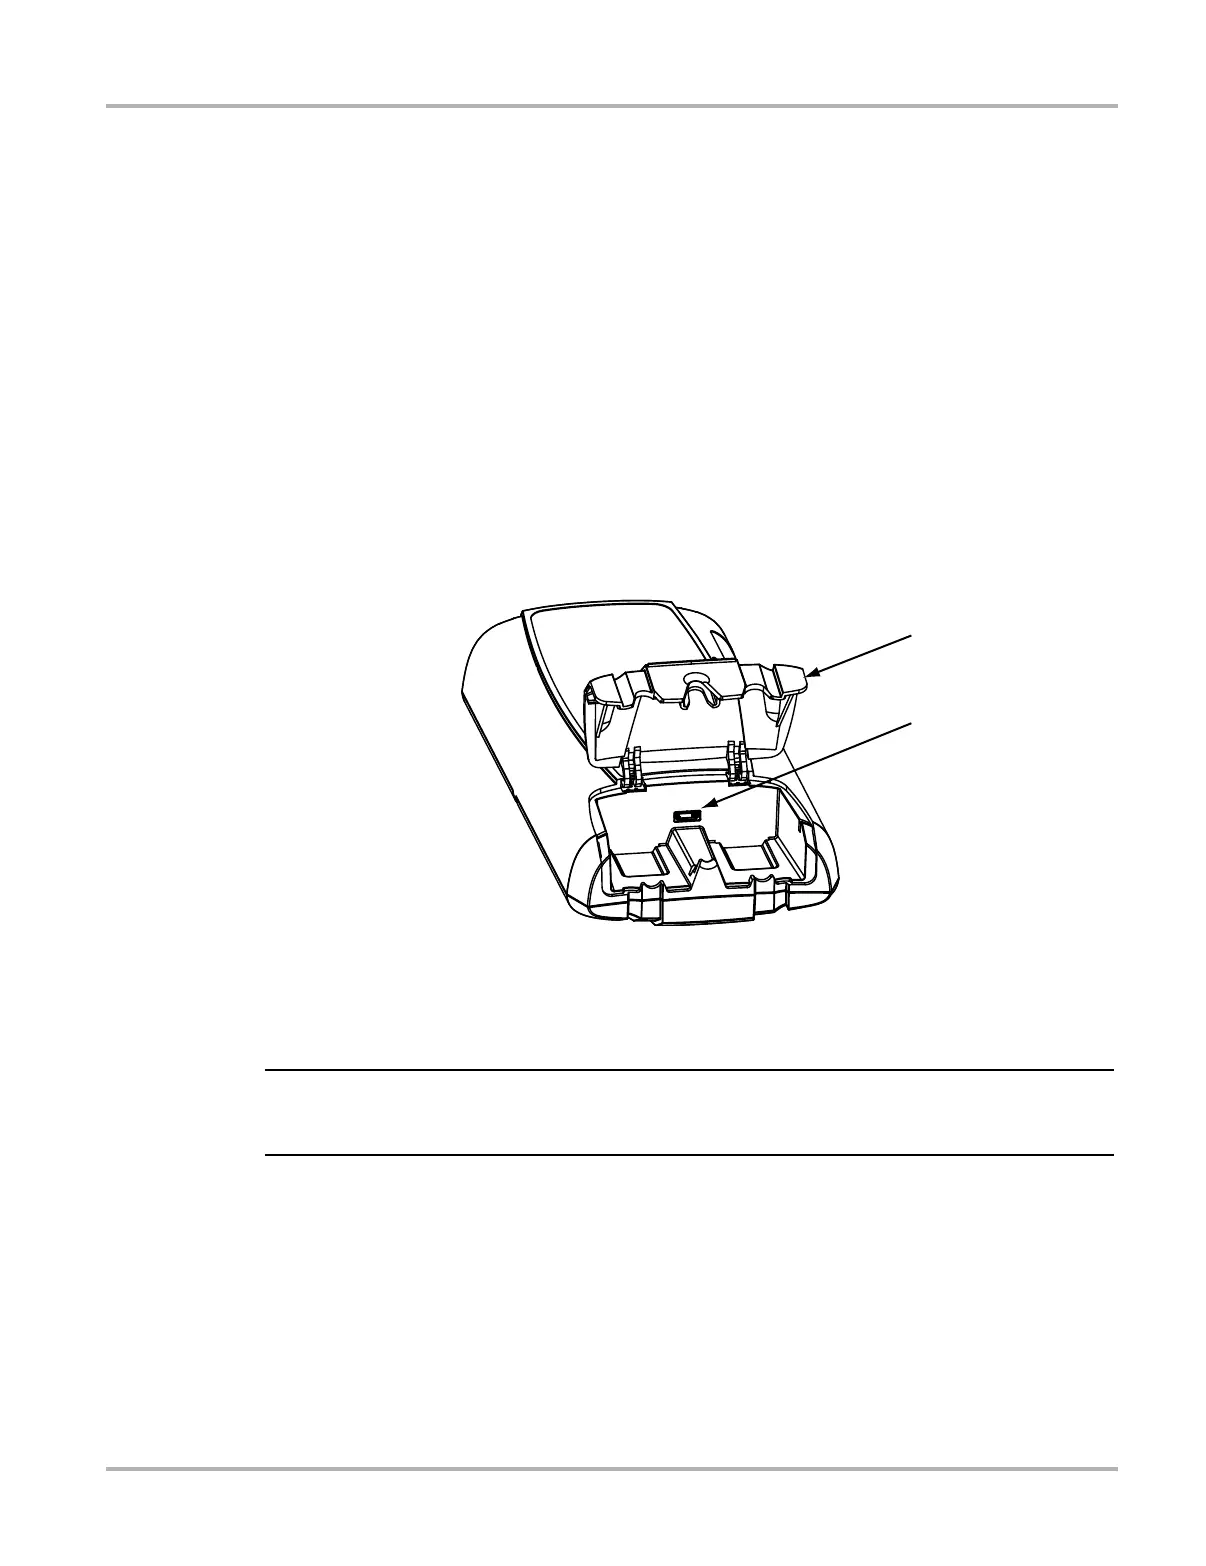
2. Connect the Scan Module to the Display Device as follows (
Figure 5-33):
a. From the bottom of the Scan Module, gently lift up and out on the sides of the handgrip to
free it from housing.
b. Open the hinged cover on the base of the Scan Module to expose the USB port.
c. Plug the small end of the USB cable into the USB port on the Scan Module.
d. Plug the large end of the USB cable into one of the ports on the side of the display device.
1— Hinged cover
2— USB port
Figure 5-33 Scan Module service port
i The Scan Module and Display Device must be connected with the USB cable to update the
firmware. The USB cable powers the Scan Module so there is no need to connect to a vehicle.
3. Select Scanner from the Display Device Home screen.
4. Select OK when the firmware update notification displays (
Figure 5-32).
The update begins and installation progress is tracked on the screen (
Figure 5-34).