13
Getting Started Powering Up
3.1.2 VERDICT Toolbar
Operation of the buttons located on the VERDICT toolbar are described in the table below:
Menu Button Options
The Menu button on the VERDICT Toolbar at the base of the display screen opens a list of basic
operations and features. Menu options vary by module and may include:
• Safety Information—opens the Important Safety Instructions document, which should be read
and understood prior to using the VERDICT Diagnostic Platform.
• File—allows you to print or save the data being viewed.
• Edit—allows you to configure alarms when viewing Scanner data.
• Tools—allows you to perform certain maintenance operations and adjust tool settings.
• Help—allows you to view supporting documentation.
Selecting a menu item opens a submenu of choices, and some submenus also open an additional
menu. A right arrowhead (c) indicates additional choices are available. Touch an item to select it.
File
Use to print or save a copy of the data currently being viewed. Selecting opens a submenu:
• Save—available from the SCAN MODULE, opens an additional submenu with these options:
– Screenshot—saves a graphic image of the current screen
– Collected Data—saves a recording of all the data currently in the buffer plus the number
of frames designated after the trigger event (see "Properties‚" on page 45).
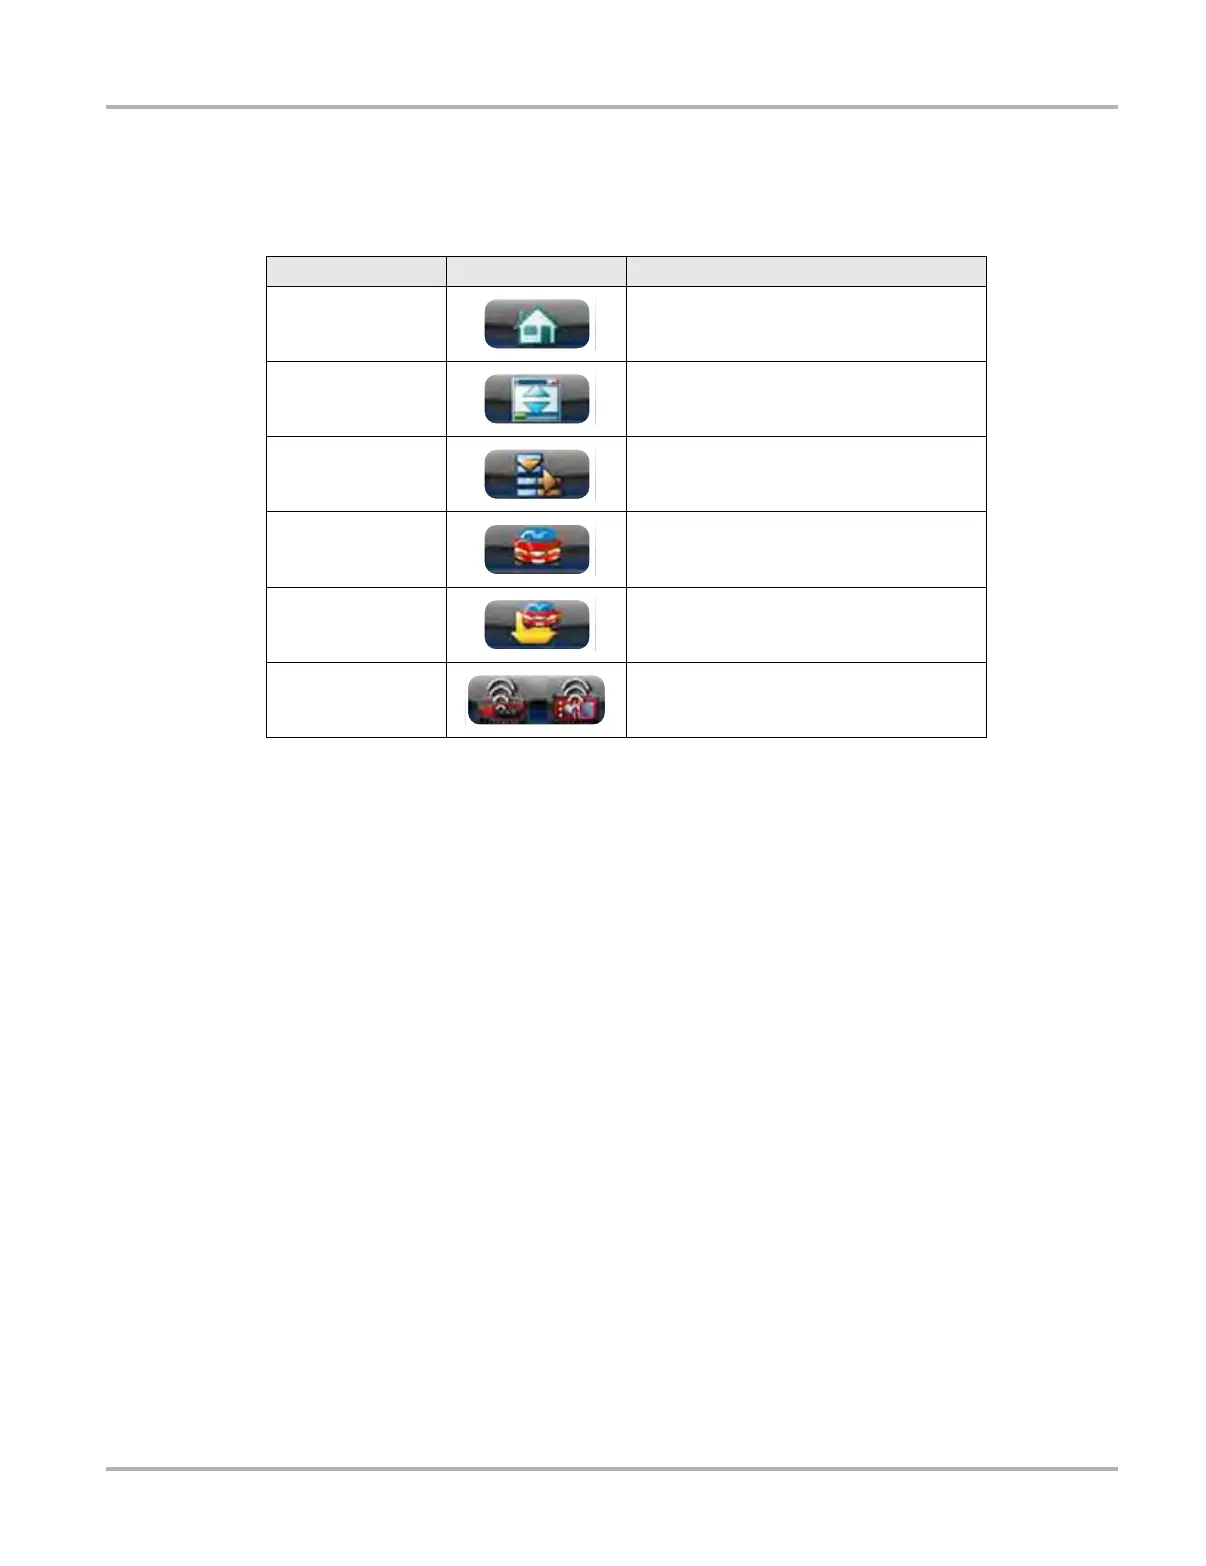
Table 3-2 Module buttons
Name Button Description
Home
Touching this button returns you to the
VERDICT Home screen from any test.
Windows Toolbar
Touching this button opens and closes the
standard Windows toolbars at the top and
bottom of the screen.
Menu
Touching this button opens a menu that
provides information on the screen being
viewed.
Change Vehicle
The currently identified vehicle is shown to
the right of the buttons, touching allows you
to change the identified test vehicle.
View Record
Touching the button opens an editable
worksheet of vehicle records.
Hardware Status
Indicates the wireless connectivity status of
the SCAN MODULE and the Data
Acquisition Device.