ILCE-9
d-830-100-11 (1)
C:\d830100111\d830100111ILCE9UC2\01GB-ILCE9UC2\090COM.indd
2019/02/19 10:01
GB
200
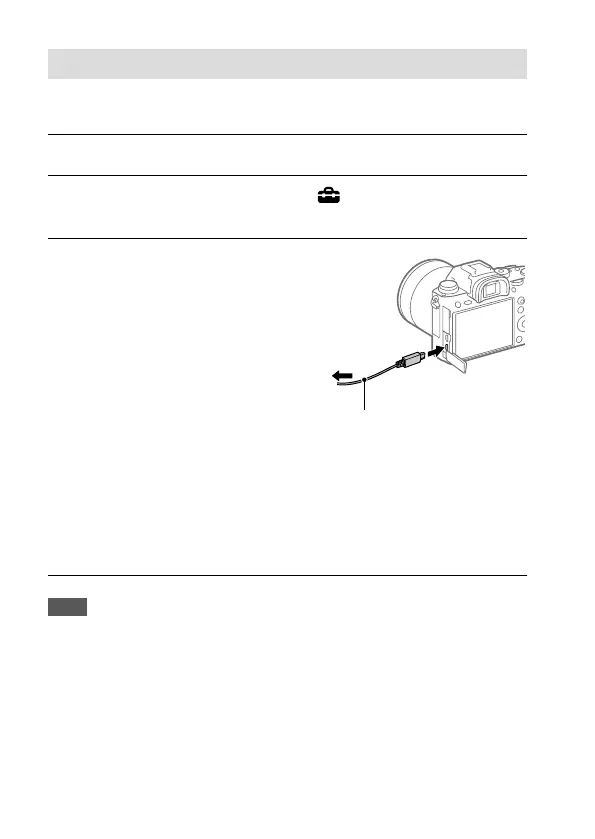
Connecting to a computer
1
Insert a sufficiently charged battery pack into the camera.
2
Turn on the camera and the computer.
3
Check that [USB Connection] under (Setup) is set to
[Mass Storage].
4
Connect the camera to the
computer using the micro USB
cable (supplied).
• When you connect the
camera to the computer for
the first time, the procedure
for recognizing the camera
may start automatically on
the computer. Wait until the
procedure is finished.
• If you connect the product
to your computer using
the micro USB cable when
[USB Power Supply] is set to
[On], power is supplied from
your computer. (Default setting:
[On])
To the Multi/Micro
USB Terminal
Micro USB cable (supplied)
To a USB
terminal
Note
• Do not turn on/off or restart the computer, or wake the computer from sleep
mode when a USB connection has been established between the computer
and the camera. Doing so may cause a malfunction. Before turning on/
off or restarting the computer, or waking the computer from sleep mode,
disconnect the camera from the computer.