8.4.1.
Using a Clampmeter
In order to locate a short you can use a clampmeter. You need physical access to the two-wire, or at least
parts of it, since the clampmeter directly measures on the individual wires in the cable.
Procedure 8.1. Using a clampmeter for short finding
1. Run a short test on the Ranger Converter 3000.
2. Set the clampmeter to "50 Hz mode" or equivalent. Setting it to "Wide Range" or similar modes might
not work out.
3. Now start measuring the two-wire from the controller and out. You measure the two-wire by placing the
clampmeter around one of the wires in the two-wire path. Now measure the other one. Always measure
both wires separately. Sometimes one wire will have a problem and the other will be OK.
When the measurement on the clampmeter is substantially lower than what you see in the controller
display, you've passed the point of the short.
8.4.2.
Locating the Short
Before trying to locate the short in your system, make sure you have the following:
• Clampmeter.
• An "as-built" drawing (or equivalent knowledge) of the cable layout for the two-wire path. Notably you
need to know of all branches and loops.
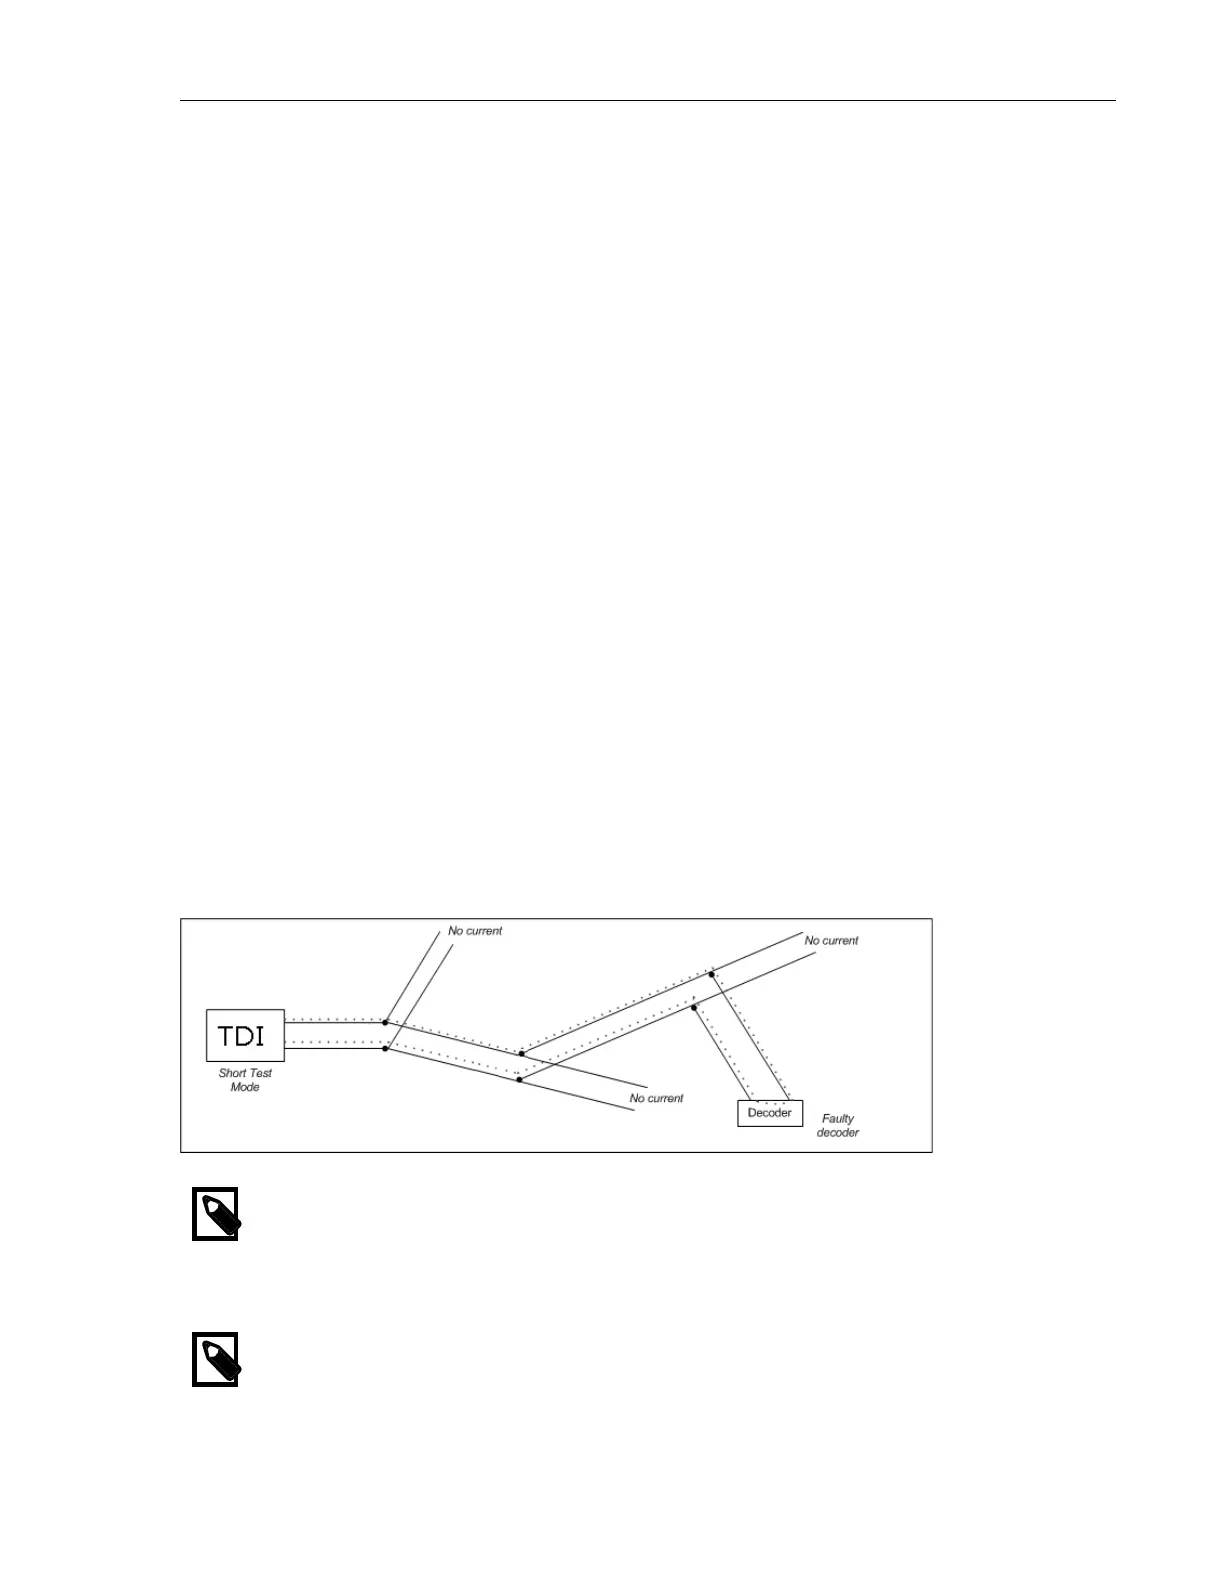
The overall rule of thumb when looking for a short is that the current will move from the controller directly
to the short and back. This means that you can "follow the current" and eventually be led to the short:
Figure 8.4. Faulty station
Note
If your installation loops back to the Ranger Converter 3000 you must open the loop, or you
won't know which way the current is running around the loop and troubleshooting will be
almost impossible.
Note
We do not recommend using loops since troubleshooting these can be a complex process.