OPERATION OF THE MJB4
MJB4 - Operation Rev07 05-10 17
3
Stage – Theta Motion
This is the small micrometer screw on the right side
of the alignment stage. The maximum turning range
is ±5°.
Separation Lever
The separation lever is on the left side of the
alignment stage. For wedge error compensation, it
must always be set to the contact position (CONT).
This lever moves the substrate from the contact
position to the alignment distance. The separation
lever only works if the contact lever is in the rear
position.
The alignment distance is set using the knurled knob
next to the separation lever on the right. After setting
the distance, tighten the knob until it is snug.
The maximum alignment distance between the
mask and substrate is 50 µm.
Contact Lever
The contact lever is also located on the left side of
the alignment stage.
Pulling this lever back activates wedge error
compensation and automatically connects the
vacuum for chuck and substrate.
Variable Thickness Setting
The variable thickness setting is located on the front
side of the alignment stage.
It sets the contact position between the mask and
substrate. It must be reset for different mask and
substrate thicknesses. The thickness setting can
also be used for higher contact pressure.
Turning the setting knob clockwise moves the Z-axis
downward and turning it counterclockwise moves
the Z-axis upward.
• 1 revolution corresponds to 150 µm
• More instructions on this setting can be read in
section 3.4.7. "Setting the Mask Substrate Thick-
ness".
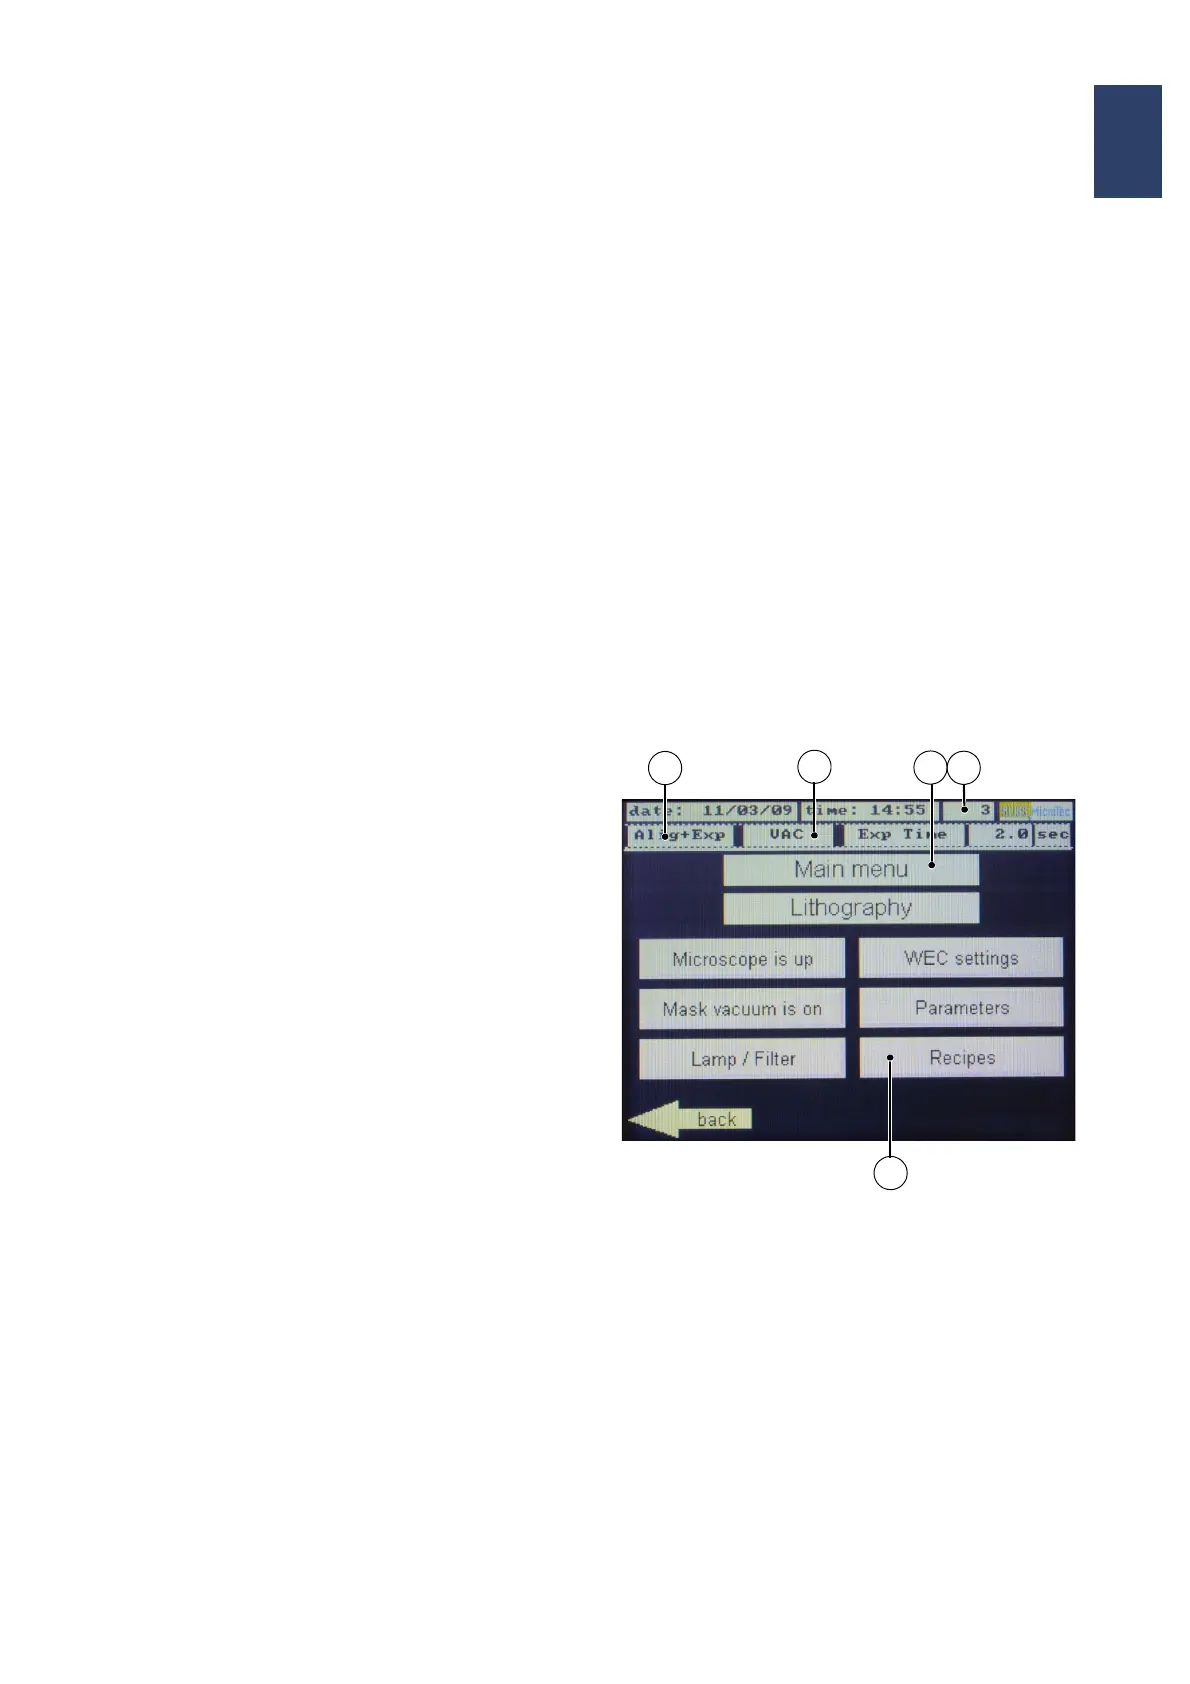
3.2.2. Display/Touch Screen
Instructions, confirmations and other information
appear on this screen depending on the situation.
When pressing the displayed buttons directly at the
touch screen, programming and operation can be
performed.
The messages in the display always show the
ACTUAL status of settings, e.g:
If the microscope is in the operating position,
“Microscope is down” appears in the main menu.
Pressing this button moves the microscope upwards
and the display button changes to “Microscope is
up.”
The arrows in the lower right and left of the display
toggle through the program menu. The marking of
the arrows shows the access to the next program
step
Main Menu
1 Selected program mode
2 Set parameters
3 Screen name
4 Screen number
5 Menu selection
Note:
After 30 minutes without action the monitor is
switched off (screen saver). Touching the panel
switches it on again.
3
2
4
1
5