27
8303460000 Rev A IA672-04-01-Rev. I
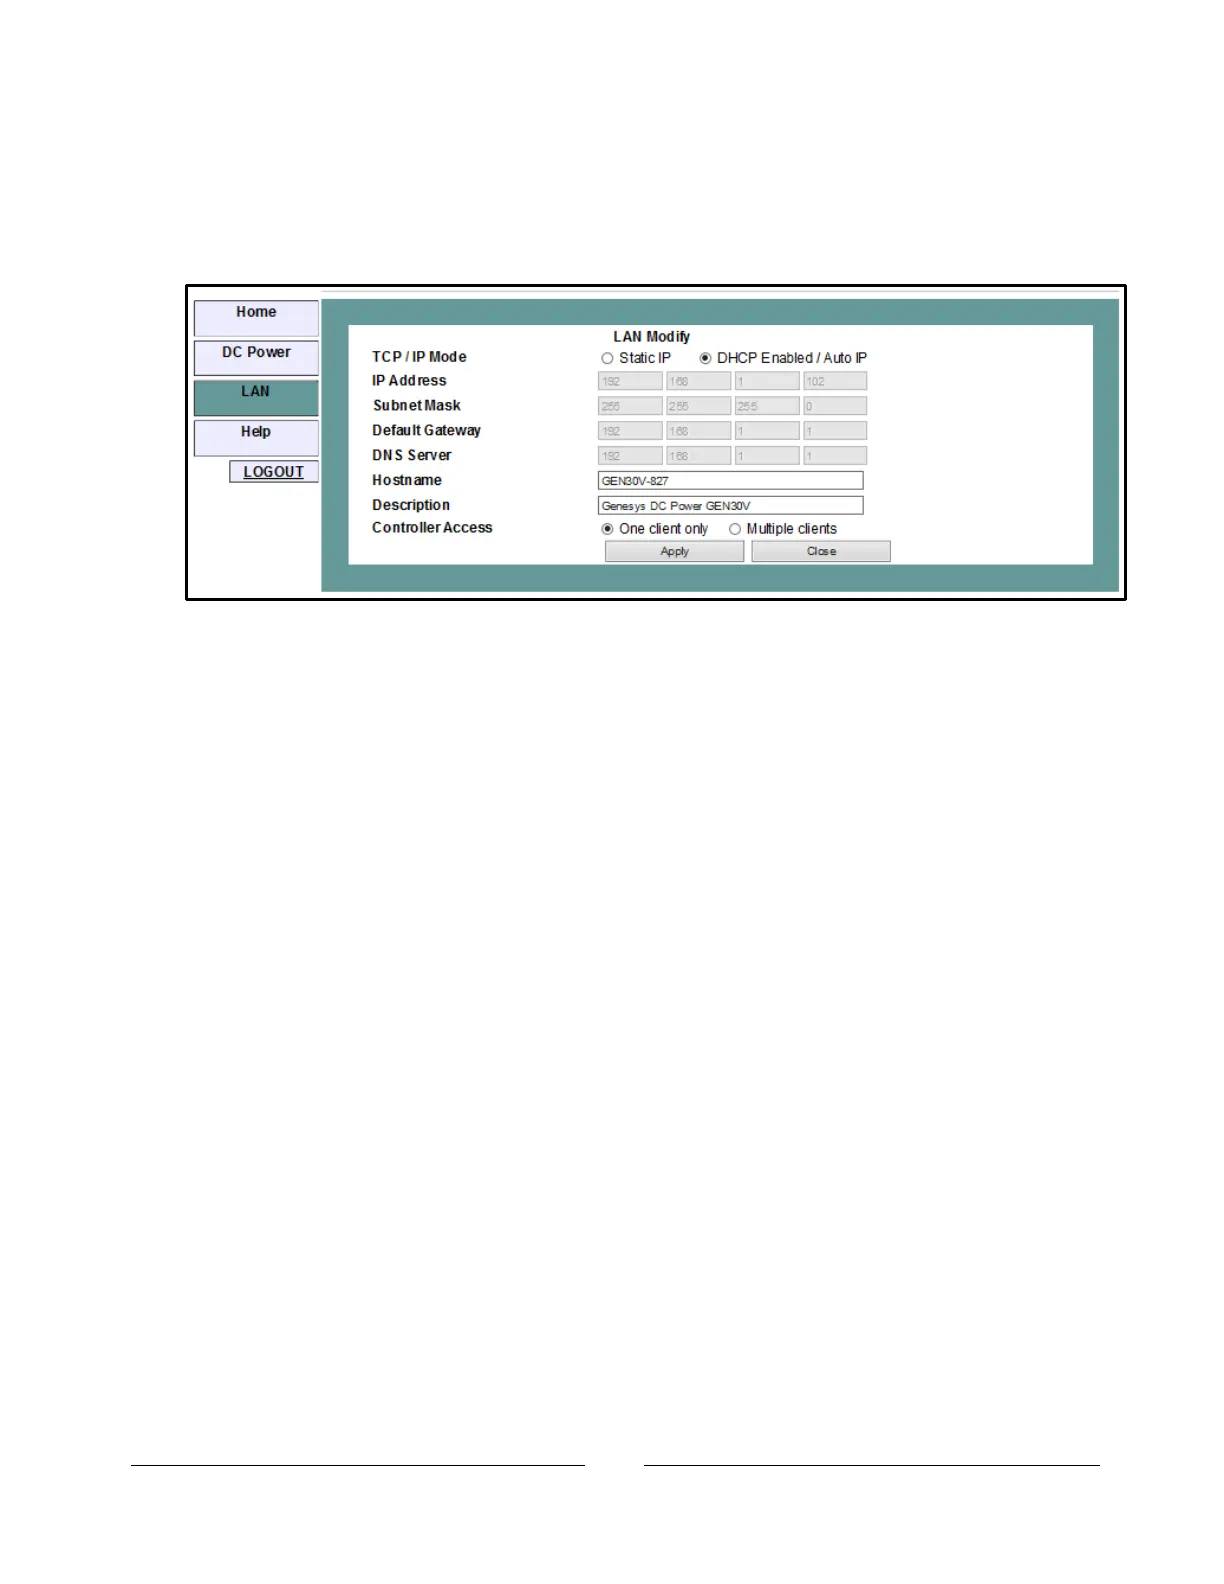
6.6.2. LAN Configure Modify Page
The “Modify” button on the “LAN Configure” page allows you to change the LAN
settings. You must be logged-in as ‘admin’ to enable the button.
DHCP Enabled / Auto IP
This is the default setting for the Genesys™ LAN.
When the DHCP Enabled / Auto IP radio button is selected, only the following
settings may be changed. The disabled settings (grayed) are set by the network’s
DHCP server.
Hostname: the hostname may be used instead of the IP address to make a
connection if the network supports the DNS service for name translation. You
may enter a custom name that describes the power supply in a meaningful way.
To restore the hostname to the factory default,
clear the hostname text box and click “Apply”
Description: the description may be viewed on the web Home page. It is also
advertised as the power supply’s service name if your network supports the
DNS-SD protocol. You may enter a custom description that describes the power
supply in a meaningful way.
To restore the description to the factory default,
clear the description text box and click “Apply”
Controller Access: Select the security feature for “One client only” or “Multiple
clients”. The multiple client setting is needed to allow more than one controller
connection at a time and to enable UDP socket connections. See section 9.3 for
details.
Apply: Click this button to save the new settings. A pop-up box will ask you to
close or refresh the page. Your ‘admin’ log-in will be logged-out.
Close: Click this button to return to the LAN Configure Page shown in
section 6.6.1