26
8303460000 Rev A IA672-04-01-Rev. I
6.6. LAN Page
When the “LAN” tab is clicked, the following web page opens. This page, and its
sub-pages, allow you to view and configure the power supply’s LAN settings.
You must login as ‘admin’ to change any settings. See section 6.4 for login.
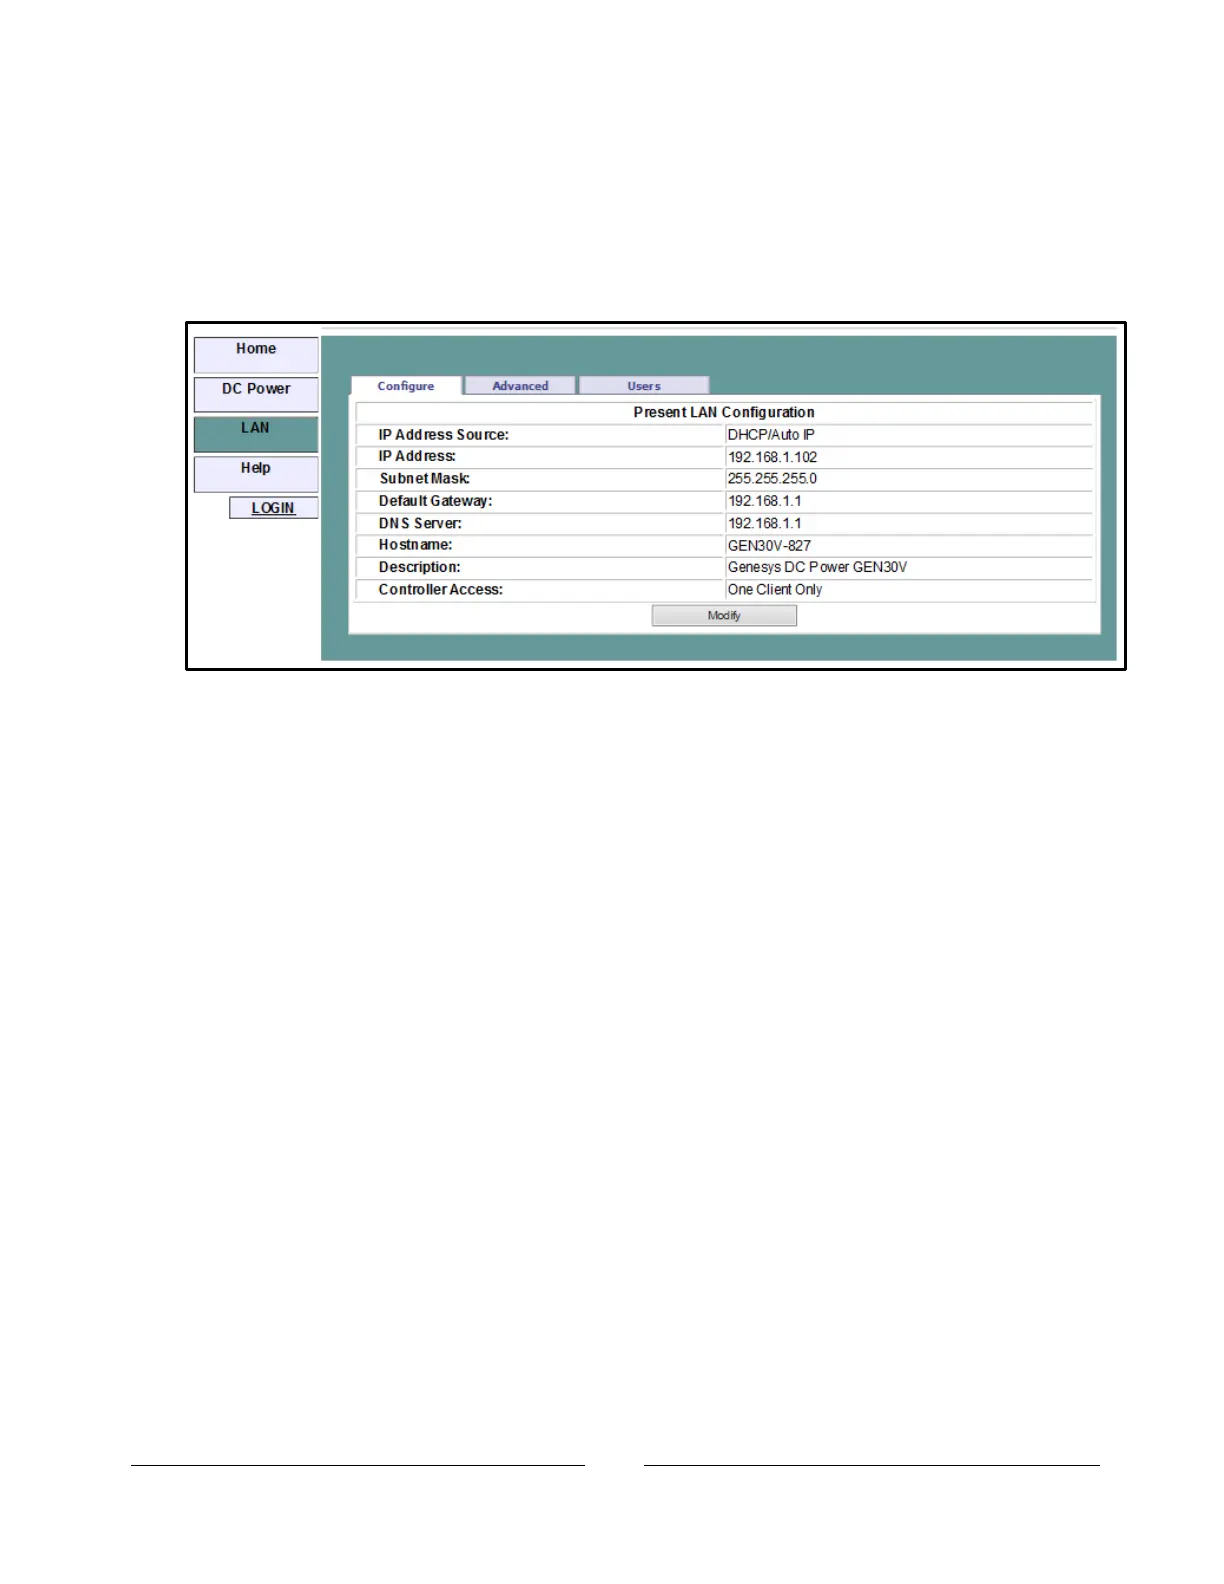
6.6.1. LAN Configure Page
When the “LAN” tab is selected, the “Configure” panel opens:
The following settings are shown on the “LAN Configure” web page:
IP Address Source: Displays the way the IP address was selected. Choices are
DHCP/Auto-IP and Static IP
IP Address: Displays the IP address assigned to the power supply through either
DHCP, Auto-IP or Static IP sources
Subnet Mask: Displays the subnet mask assigned to the power supply through
either DHCP, Auto-IP or Static IP
Default Gateway: Address of the network router to allow the power supply to
communicate outside the local subnet
DNS Server: Address of the server running the Domain Naming Service. This is
used for hostname addressing
Hostname: The power supply hostname may be used instead of the IP address to
create a communication link. The default hostname is derived from the model and
serial number (see the hostname in section 4.5) or it may be changed in the “LAN
Configure Modify” web page
Description: By default, this is “Genesys DC Power <GEN...>”, but it may be
changed in the “LAN Configure Modify” web page. See section 4.6.
Controller Access: The “One Client Only” setting is the default setting for the
highest networking security. This setting allows only one VISA or TCP socket to be
open at a time and it disables the connectionless UDP sockets. See section 9.3.
Modify: After logging in (see section 6.4), click this button to modify the settings as
shown in the next section