70
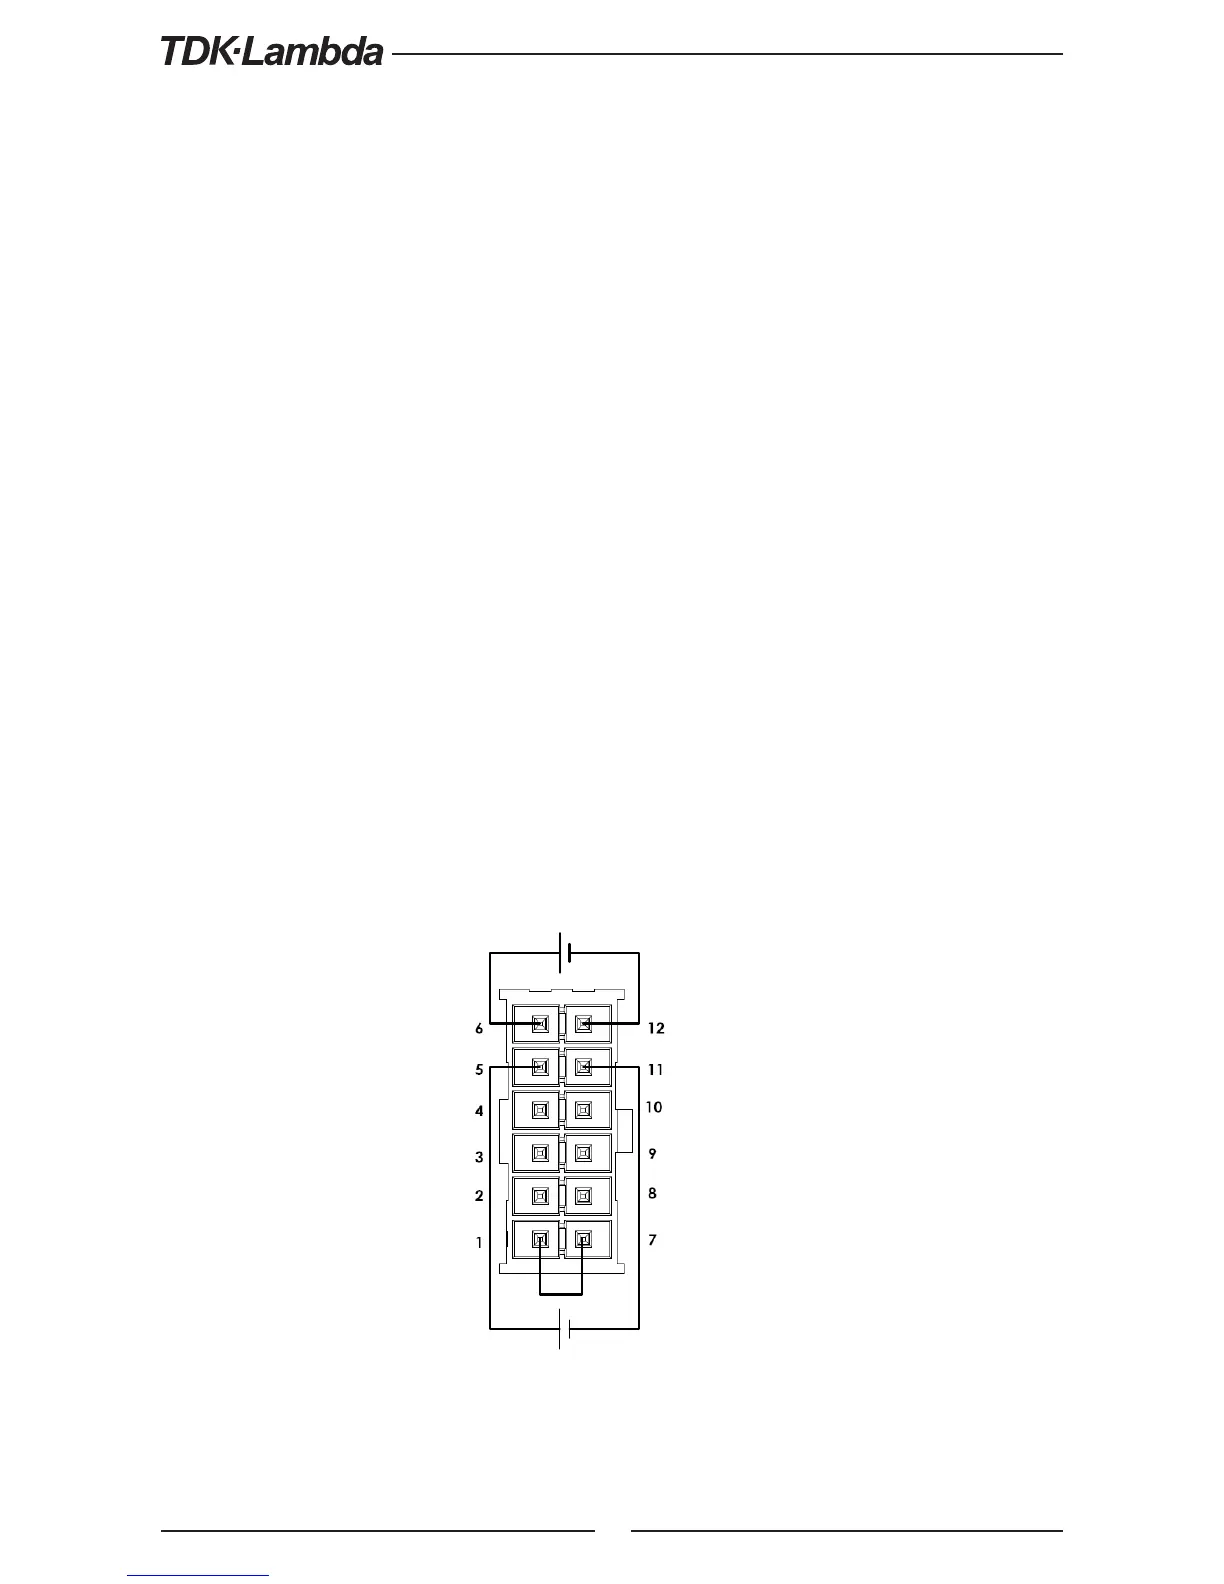
Fig.6-1: J1-Remote Voltage Programming Connection
Output Current
Programming
Output Voltage
Programming
6.4 Remote Voltage Programming of Output Voltage and Current
Remote Programming settings are as follows:
1. For Voltage Analog Programming wiring refer to Fig.6-1.
2. Short pins J1-1 to J1-7.
3. Press MENU button. MENU (GREEN) LED illuminates. “Set” message appears on Voltage display.
4. Press Voltage Encoder. “ Ot” message appears on Voltage Display and “CRR” appears on
the current display.
5. Press Voltage Encoder to select programming of the Output Voltage, or press Current Encoder
to select programming of the Output Current.
6. The selected function appears on the Voltage display. Parameter “F
.
” or “E
.
O” or “E
.
re”
appears on the Current display.
7. Rotate and press the Current Encoder to select “E
.
O”.
8. “ Ot” message appears on Voltage Display and “CRR” appears on the Current display.
9. Rotate Voltage Encoder until “r G” appears on display. Press on the relevant Encoder.
10. “rAG” appears on Voltage display and “5” (5V) or “10” (10V) appears on Current display.
11. Rotate and press the Current Encoder to select the desired programming Voltage range.
12. Press MENU button twice to return display to it’s previous state. MENU LED turns OFF
CAUTION:
To maintain the isolation of power supply and prevent ground loops, use an isolated programming
source when operating the power supply via remote analog programming at J1 connector.