8
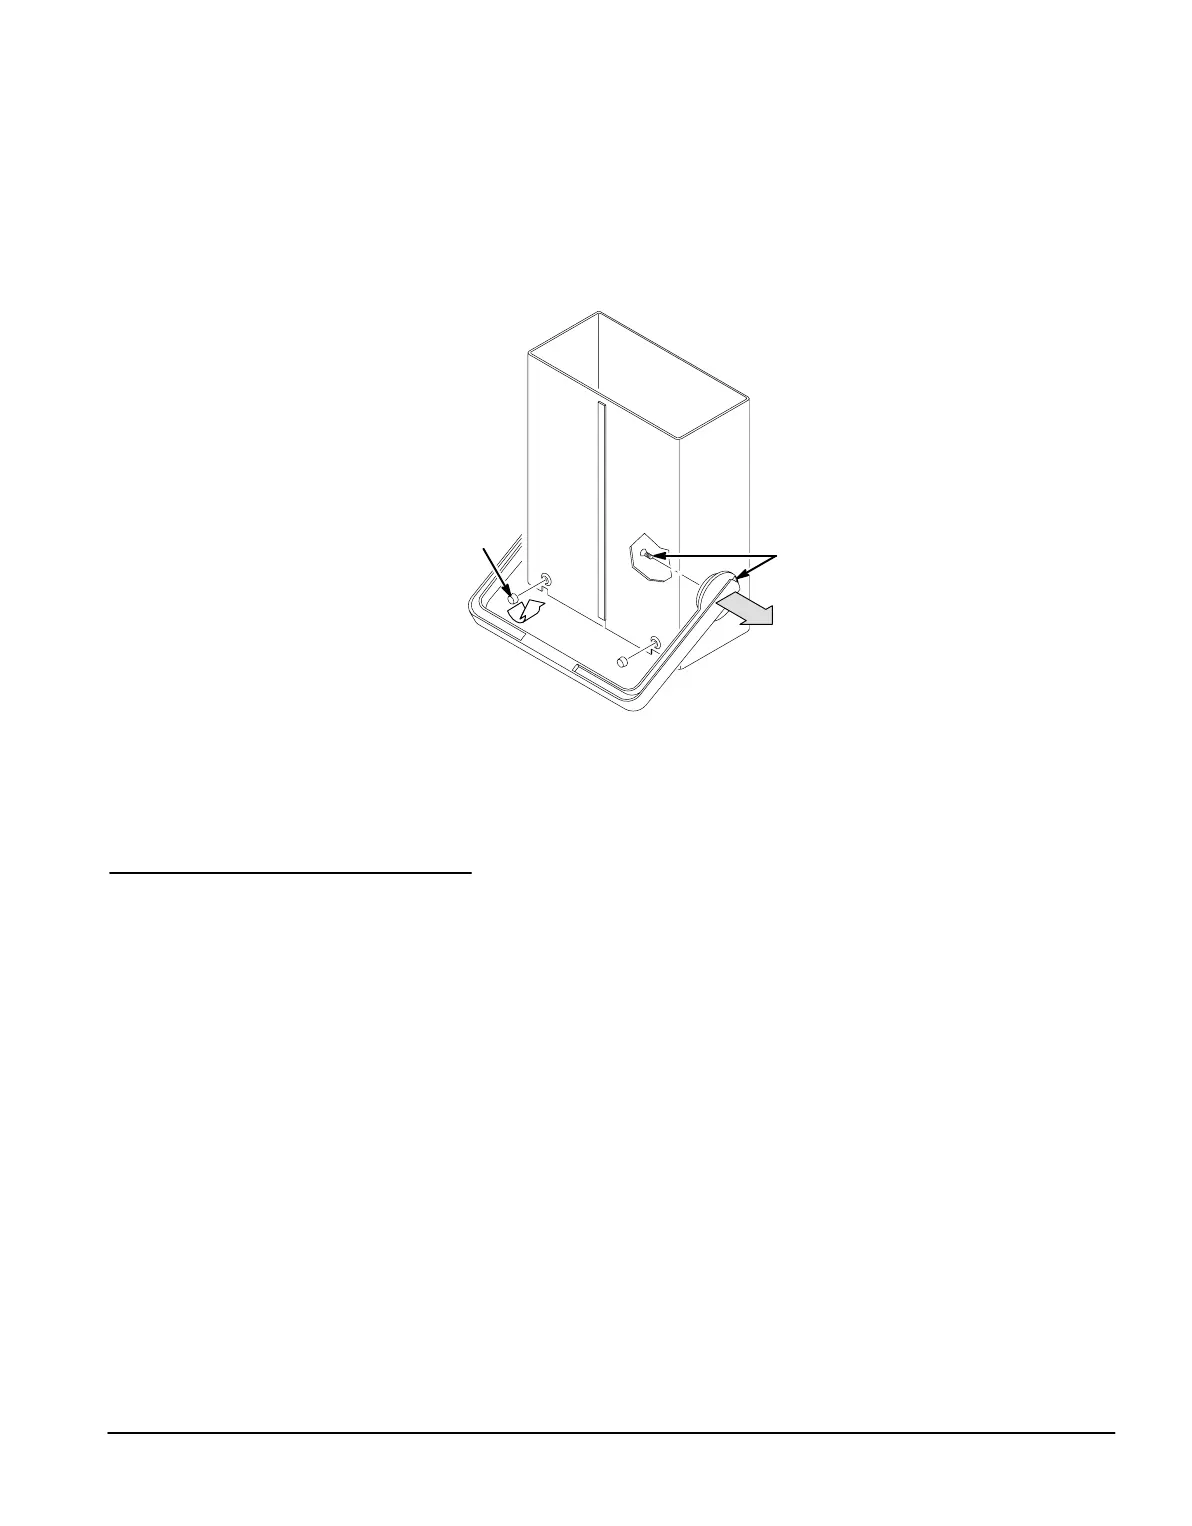
4. Remove the handle and front feet from the cabinet:
a. Using a #T20 TorxĆdrive screwdriver, remove the two screws retainĆ
ing the cabinet handle, and remove the handle (see Figure 6).
b. Remove the two front feet from the cabinet by placing a screwdriver
or pair of needleĆnose pliers under the rubber foot from the outside
and prying the pressmount foot from the hole in the cabinet.
Front foot:
Rotate
and remove.
Handle assembly:
Remove the internal
screws and pull out
handle hubs to
remove.
The following steps describe how to install the instrument into the rack
adapter.
1. Install the instrument rear cover and cabinet into the rack adapter.
a. Place the rear of the rack adapter on a smooth work surface so the
chassis is standing face up.
b. On the rack adapter, loosen (but do not remove) the four screws
with lock washers and the four screws with nylon washers that
secure the rear cabinet support in position. See Figure 7.
c. Slide the rear cabinet support to the rear of the rack adapter.
d. Temporarily remove both front support brackets from the rack adaptĆ
er front panel by removing the two screws with washers from each
bracket.
 Loading...

