BRAVO – Wireless Alarm Control Panel
12
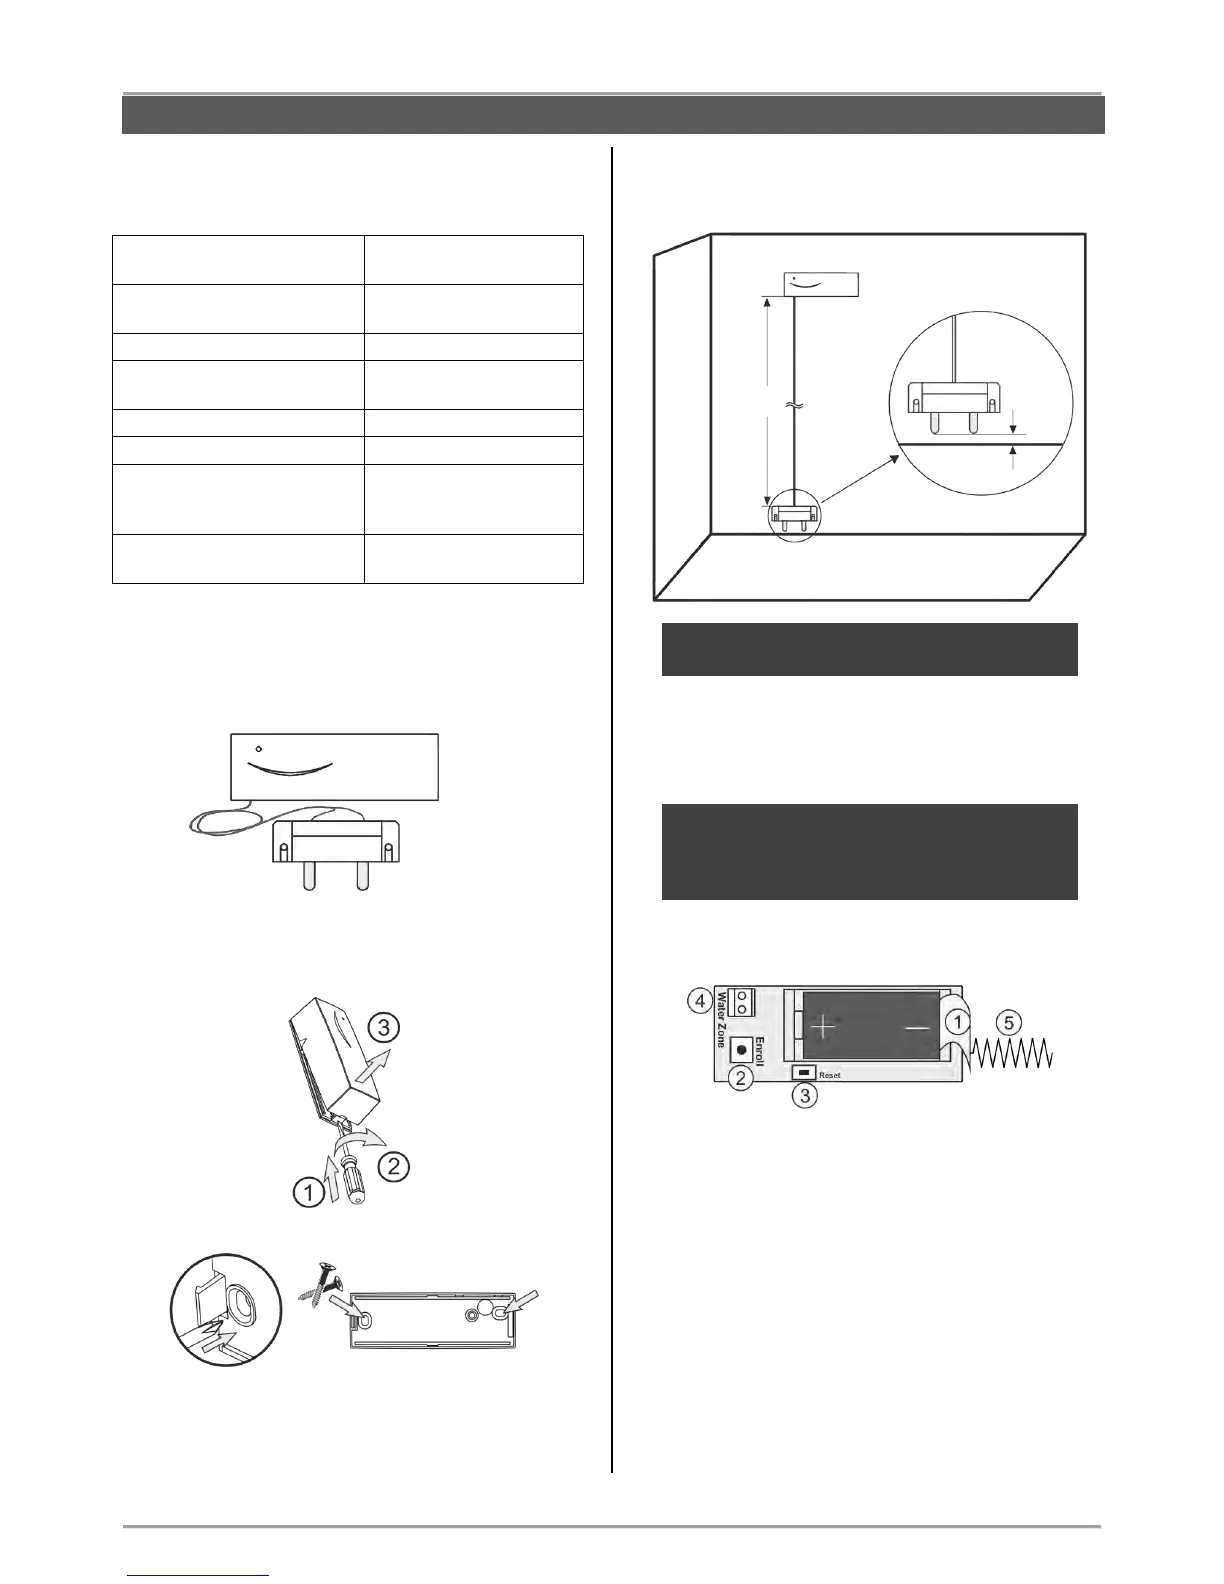
3.8. Mounting of BRAVO FL
BRAVO FL is a wireless flood detector.
Technical Characteristics:
1 х 3 V/ 1500mAh,
CR123A type
Battery life
(max. without LED)
Radio distance
(open space)
Dimensions:
- body
- flood sensor
93 x 31 x 27 mm
64 х 19 х 13 mm
2х0,35mm, white,
2 meters
Mounting
1. BRAVO FL is prepared for direct mounting at the
place of the installation. The main body and the flood
sensor are connected with wires 2 meters long.
2. Remove the base of BRAVO FL and prepare it for
mounting at the place of installation.
Note: The base of the detector can be mounted also
with double-sided mounting tape at the place of
installation.
3. Mount the flood sensor at max. 5 mm distance from
the floor of the protected room, and the main body
above is at higher position – up to 2 meters.
ATTENTION: Do not cut and change the length
of the connecting wires!
4. Enroll the detector to the panel configuration as follow
the steps described at item 6.2 in “System
Configuration” section.
Note: You can enroll BRAVO FL to every
position (zone number) from 3 to 16, as the “24-
hour security zone” zone type is set
automatically.
Description of the PCB elements
1 – Protection folio for the battery; it is removed directly
before the enrolment of the detector to the panel.
2 – ENROLL Button. Use it to enroll the detector to the
panel.
3 – RST (RESET) Button. Use it to reset the detector.
4 – Terminals for wired water (flood) zone – 2 meters
long wires are factory connected.
5 - Antenna.