BRAVO – Wireless Alarm Control Panel
9
3.5. Mounting of BRAVO MC
BRAVO MC is a wireless magnetic contact detection of
door or window opening. BRAVO MC has a wired zone
input for connecting of wired magnetic contact.
Technical Characteristics:
1 х 3 V/ 1500mAh,
CR123A type
Battery life
(max. without LED)
Radio distance
(open space)
Mounting
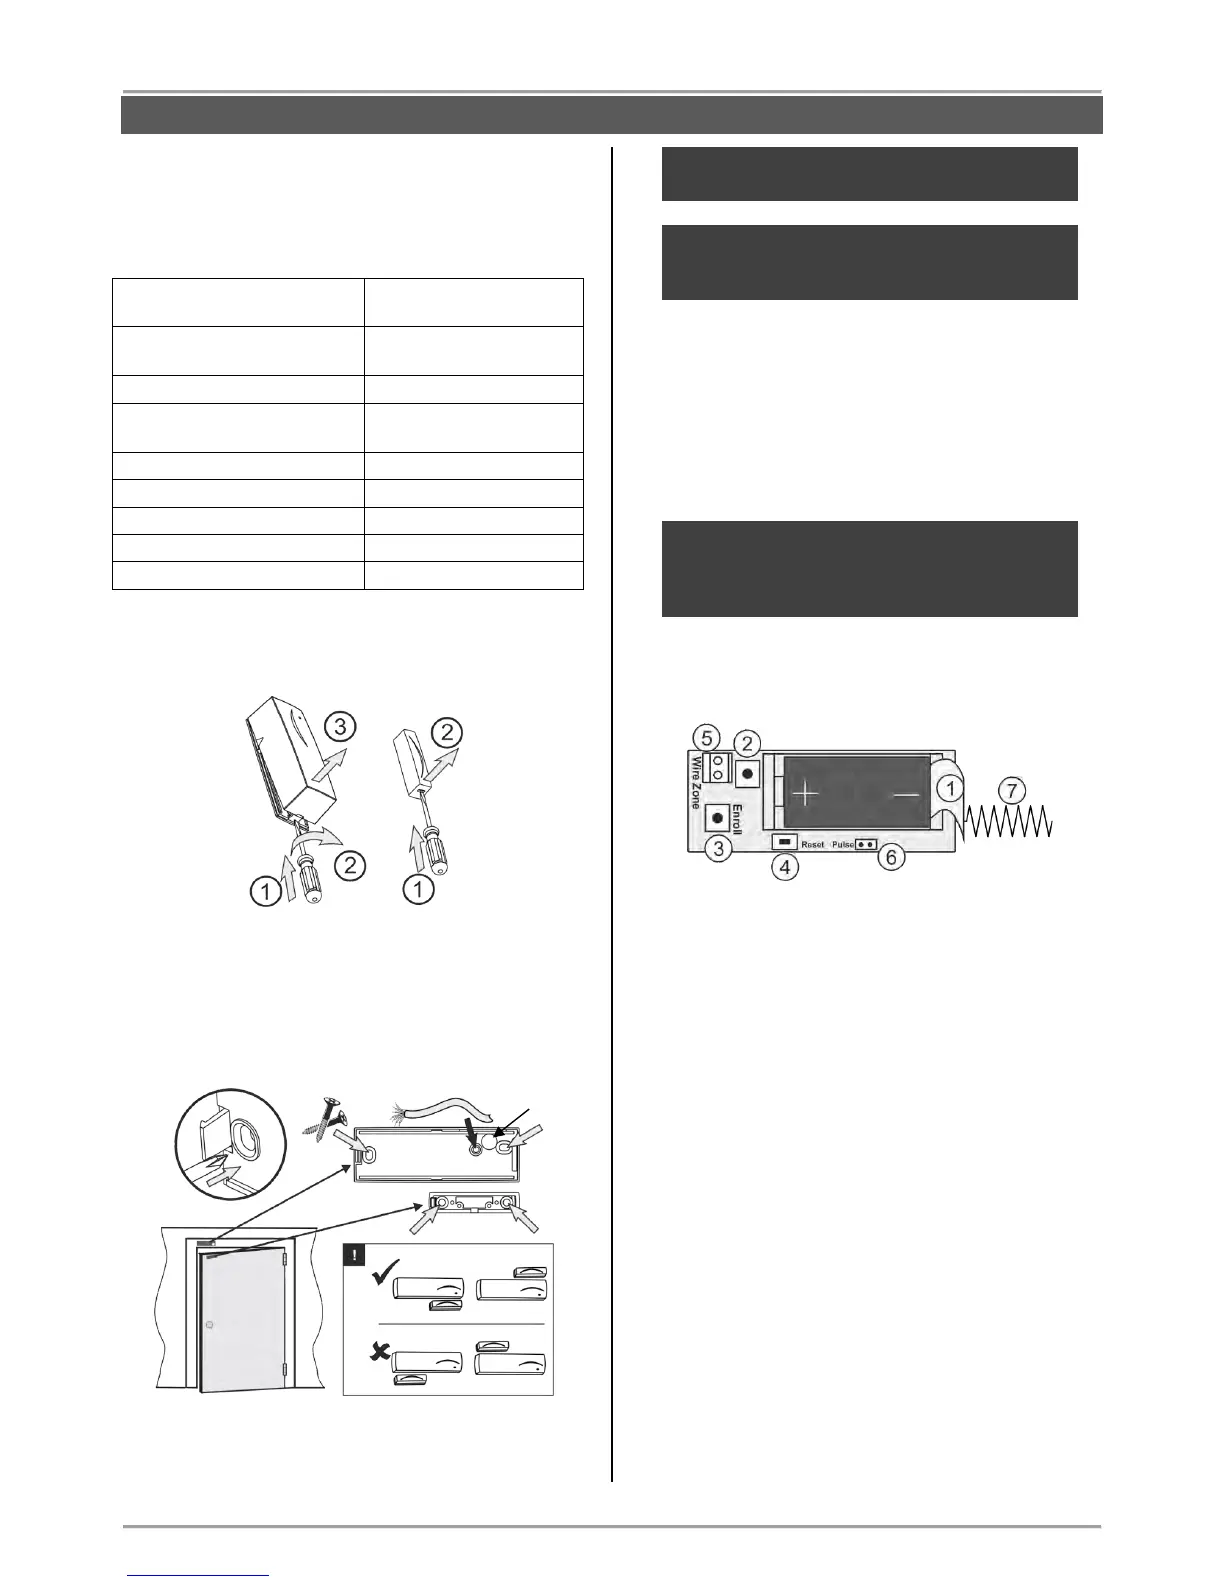
1. Remove the bases of BRAVO MC and the magnet.
2. Mount the bases on the place of installation, as pay
attention to the position of the magnet in relation to the
BRAVO MC body – see the picture below.
Note: To use the wired zone input you have to
drill an additional hole for the cables.
ATTENTION: Remove the plastic cover from the
base to ensure the double action of tamper
button for self-protection.
3. Enroll the detector to the panel configuration as follow
the steps described at item 6.2 in “System
Configuration” section.
4. Mount back the magnet and BRAVO MC to their
bases.
ATTENTION: Use the plastic pads when
installing the magnet on metal surfaces. The
pads will protect the magnet field from a “short-
circuit”.
Description of the PCB elements
1 – Protection folio for the battery; it is removed directly
before the enrolment of the detector to the panel.
2 – Tamper button for self-protection.
3 – ENROLL Button. Use it to enroll the detector to the
panel.
4 – RST (RESET) Button. Use it to reset the detector.
5 – Terminal for connection of wired zone.
6 – “Pulse” Jumper.
7 - Antenna.