BRAVO – Wireless Alarm Control Panel
5
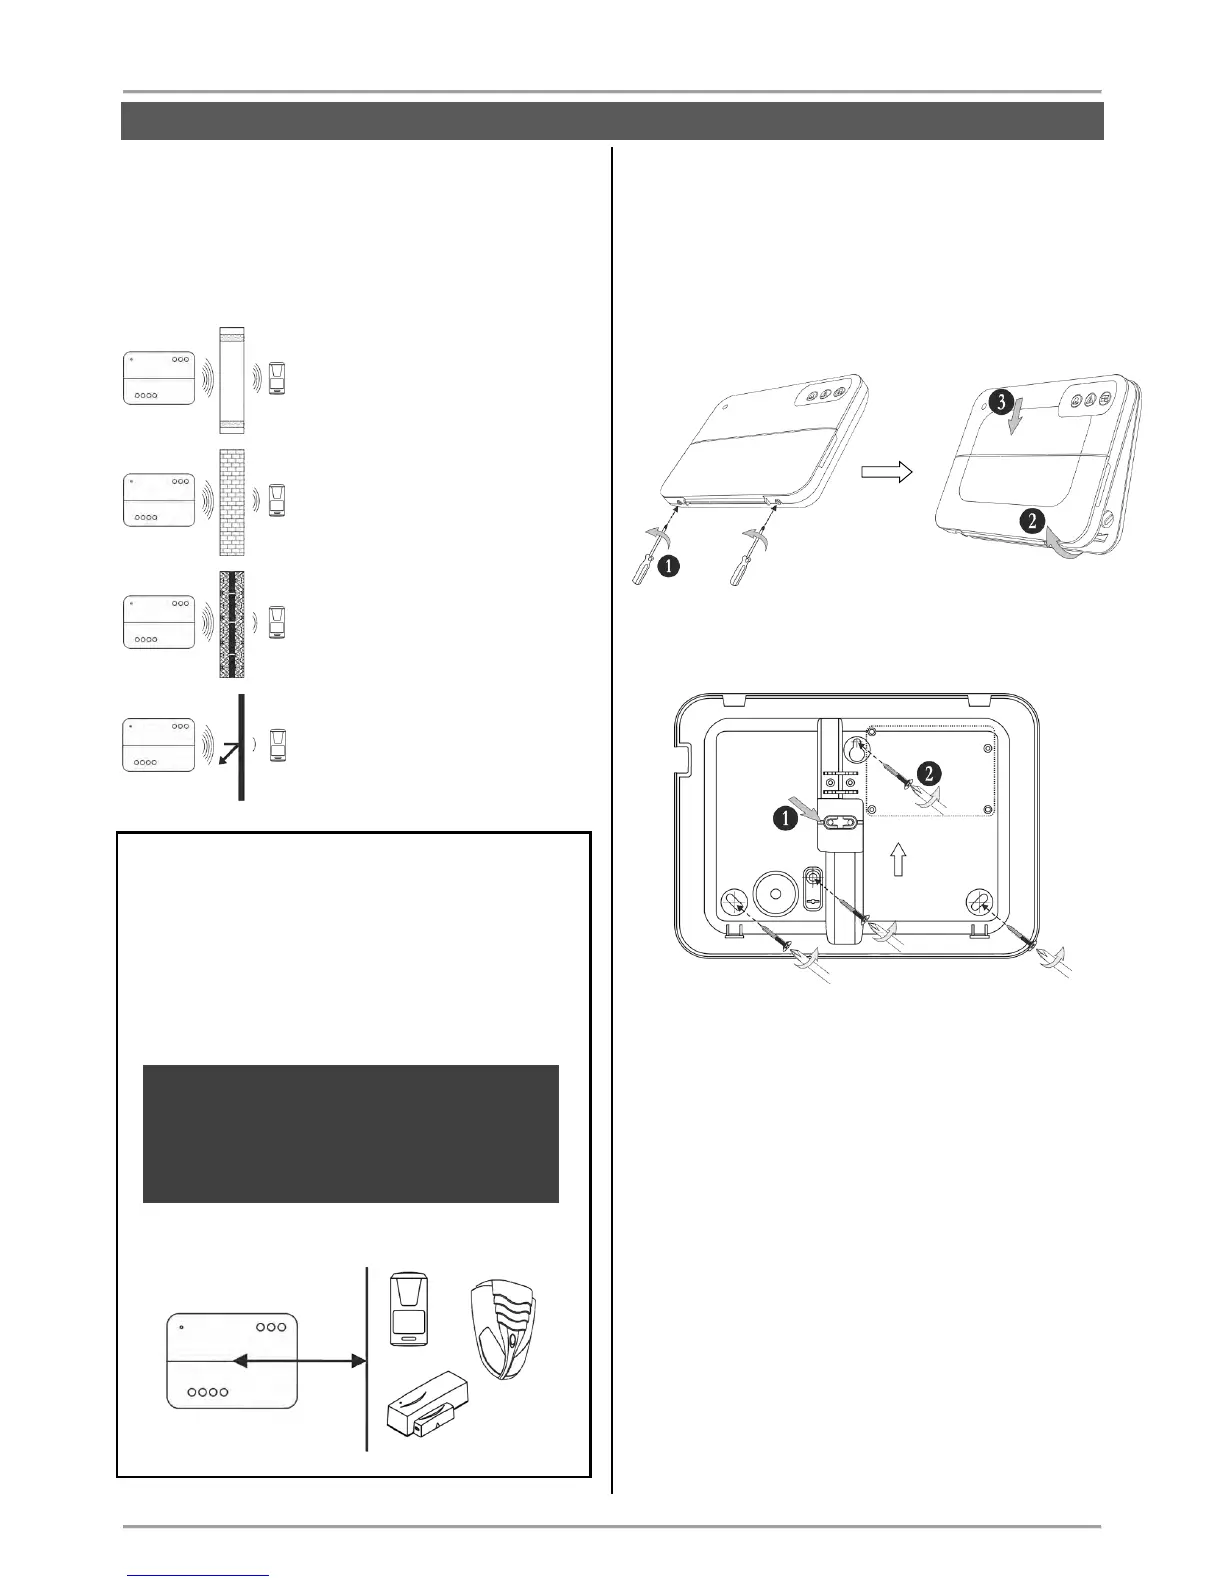
The construction and the width of the walls between
the premises also affect the radio signals
transmitted between the devices and the control
panel.
Attention: In the table below are listed approximate
values.
The quality of the radio coverage
and signal strength is reduced with
10-20% in premises with
plasterboard and wood walls.
The quality of the radio coverage
and signal strength is reduced with
30-40% in premises with brick
walls.
The quality of the radio coverage
and signal strength is reduced with
40-60% in premises with concrete
and building blocks walls.
The quality of the radio coverage
and signal strength is reduced with
80%, and sometimes with 100%
(full reflection) in premises with
metal walls or surfaces.
ATTENTION:
If you need to increase the panel’s sensitivity for
receiving the signals from the wireless devices
(because of specific conditions in the premises like
reinforced walls between the rooms, security zones
in a great distance from the panel, etc.), you can
make additional settings in the panel – move the dip
switch 8 in ON position – see section “Hardware
setting” (item 4).
In increased sensitivity for receiving signals
operation mode, the minimum distance
between the panel and enrolled peripheral
devices must be 2 meters to guarantee the
proper operation of the system, including in test
mode.
3. Basic Steps for Installation
3.1. Preparation for mounting
Undo the two screws fixing the cover to the bottom
and open the panel’s enclosure.
Attention: The screws are with interrupted thread
and you do not need to undo them all. They must
stay fixed to the cover.
Mount the bottom of the box as use appropriate
fixing elements according the mounting surface.
1. Break out the plastic cap from the bottom to
fix the main power cable – see the steps for
mounting of BRAVO INTR (item 3.3).
2. Fix the bottom to the mounting surface and
level it horizontally before the final fixing with
the supporting screws.