BRAVO – Wireless Alarm Control Panel
23
6. Device Enrolment
The enrolment is a process of adding peripheral devices
to the system configuration.
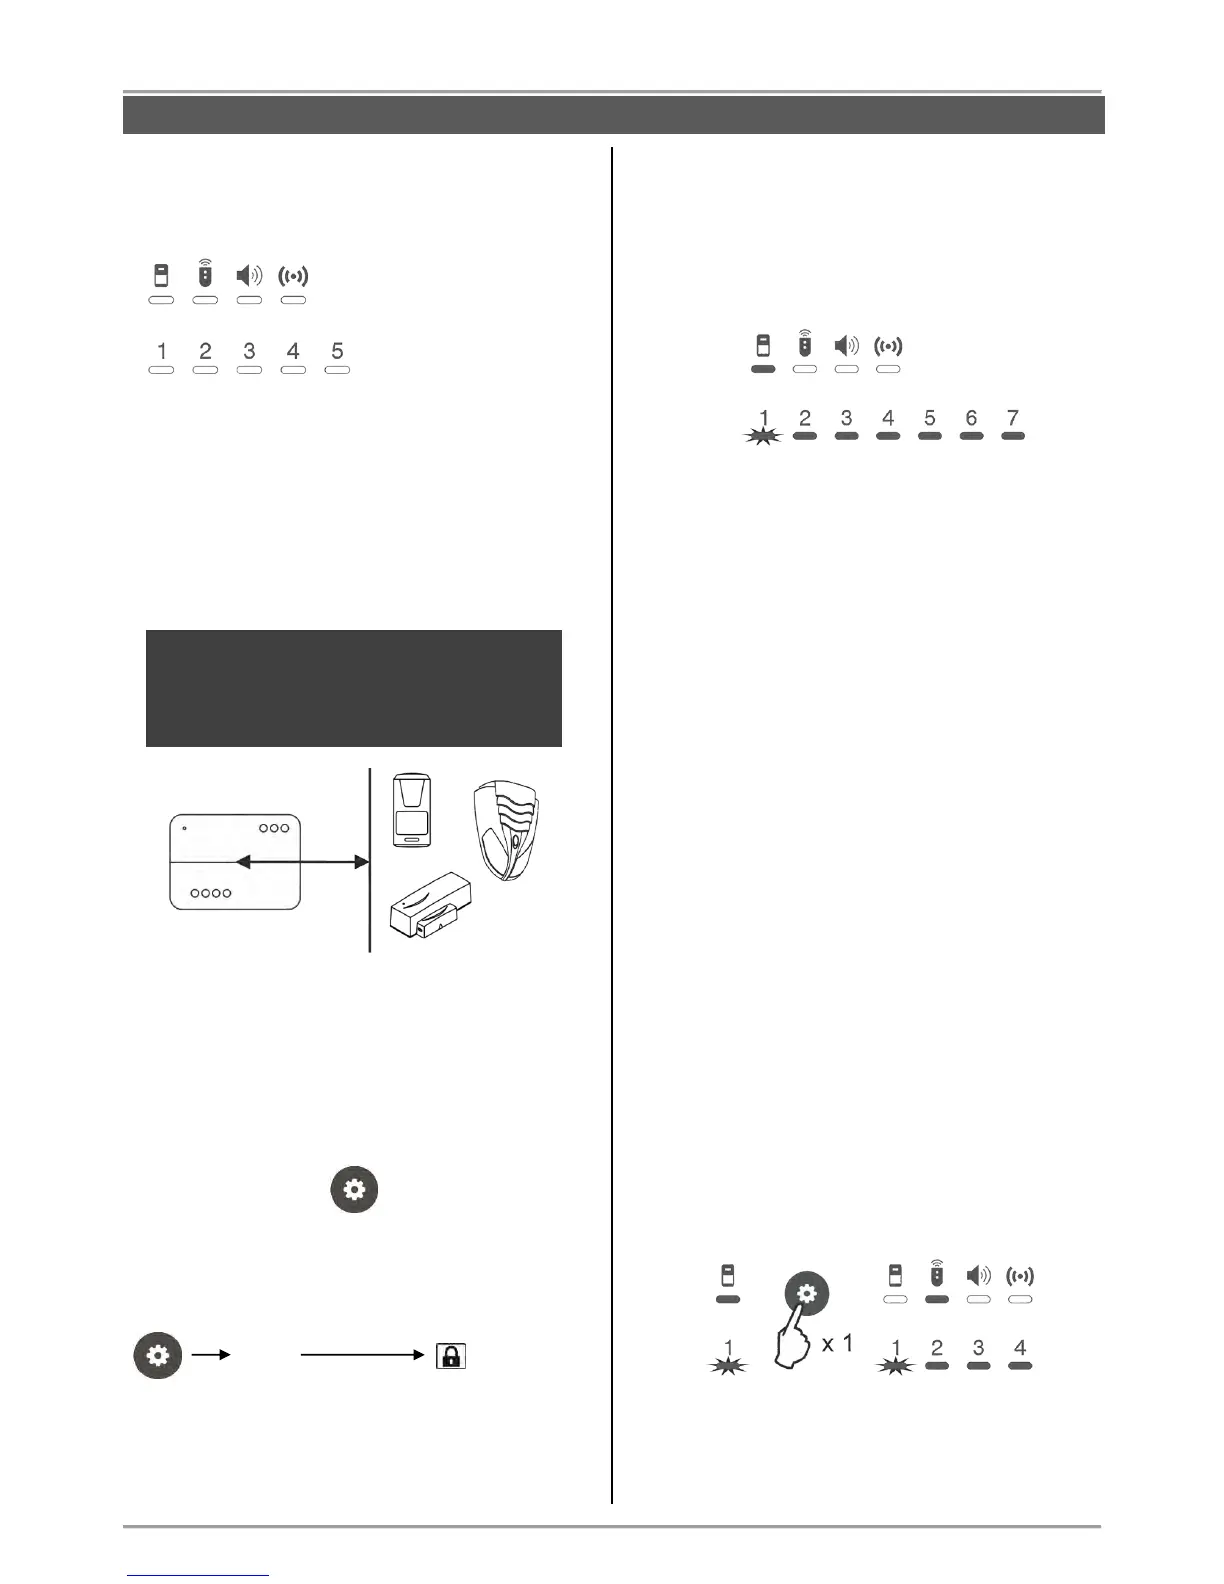
The LED indication has the following meaning:
A device group is selected, when the LED indicator
under the respective icon lights on permanently in red.
The exit from the “Device enrolment” mode is automatic
after 10 minutes if there is no activity with the panel
(button pressed). Exit from the “Device enrolment”
mode can be done also with pressing of button
“Programming” several times.
ATTENTION: Up to 1 detector can be enrolled to a
zone.
6.1. Access to the Device Enrolment mode
In case of a new system, or after realized hardware
reset, or NO MANAGER key fobs are enrolled to the
system configuration, to enter in “Device enrolment”
mode press button:
In case that there are MANAGER key fobs already
enrolled to the system configuration, to enter in
“Device enrolment” mode press in sequence:
6.2. General steps for enrolling a detector
Prepare the detector for enrolling – remove the cover
to access the detector’s PCB and the battery.
Enter in “Device enrolment” mode.
The system enters in the menu for detectors
enrolment. The LED indicator under the icon is
lighting on and the Zone 1 is blinking:
The numbers of the free zones (with no detectors
enrolled) are lighting in green, and these with already
enrolled devices – in red. The currently selected zone
number is blinking.
Use the buttons with arrows to select a number of a
free zone – the zone number blinks in green.
Remove the protection strip from the battery – the
LED(s) of the detector is lighting in sequence in red
and green.
Press the ENROLL button on the detector’s PCB –
the LED(s) is blinking in red and after a short time
interval – in green. The panel confirms the
successful enrolment with a sound signal, and the
selected zone number is blinking in red.
Go to the place for installation of the detector and
make a radio test for signal strength – see item 7.1.
Close the cover of the detector and check it for
proper operation – when the detector is activated
(zone open) the respective zone number on the
panel light on in red together with the indicator for
type of the device.
6.3. General steps for enrolling a key fob
Prepare the remote key-fob for enrollment to the
system – remove the cover and pull out the
protection folio. Close the cover and tight on the
bolts.
Enter in “Device enrolment” mode.
The system enters in the menu for detectors
enrolment. Press the “Programming” button once
again to move to the menu for key fobs enrolment.
The LED indicator under the icon is lighting on and
the position 1 is blinking:
The numbers of the free positions (with no key fobs
enrolled) are lighting in green, and these with already
enrolled key fobs – in red. The currently selected
position number is blinking.