BRAVO – Wireless Alarm Control Panel
35
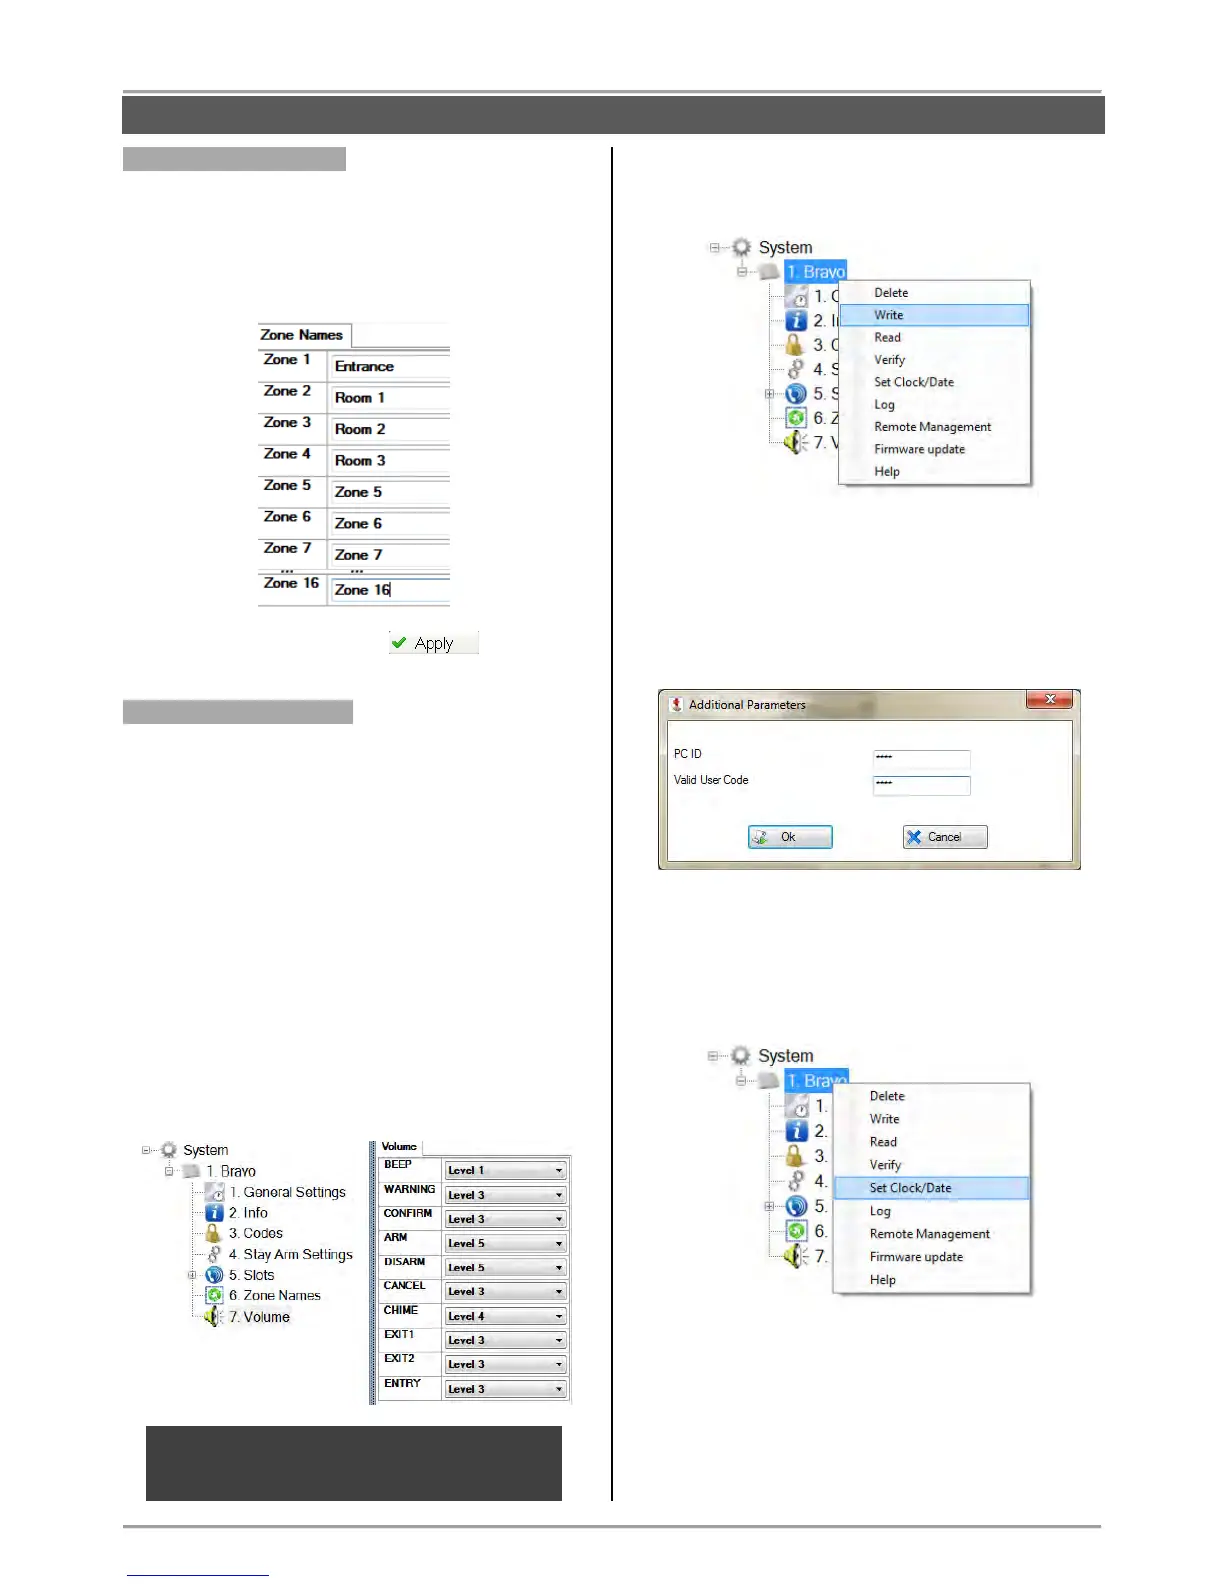
Menu 6. “Zone Names”
In this menu the installer can enter specific names for all
zones in panel.
By default the names of zones are set as Zone 1, Zone
2, etc. Enter the new name in the field next to the zone
number. The name must be no longer than 14 symbols
(letters A-Z, digits 0-9) including spaces.
Save the new configuration with button.
Menu 7. “Zone Volume”
In this menu the installer can set the volume level of the
built-in sounder in BRAVO panel for announcement of
different operation in the system.
The installer can choose among 9 volume levels
selected from a drop down menu.
The description of the fields:
BEEP – Single sound when a button is pressed.
WARNING – Sound signalization for system trouble.
CONFIRM – Sound signalization for confirmation of
an operation.
ARM – Sound signalization when ARMING.
DISARM - Sound signalization when DISARMING.
CANCEL – Sound signalization for rejecting of an
operation.
CHIME – “Chime” sound signalization
EXIT 1 – Exit time is running sound signalization.
EXIT 2 – Exit time for the last 10 seconds.
ENTRY – Entry time is running sound signalization.
Writing of system configuration.
Select the BRAVO panel and use the right mouse
button to open a list with control options:
Select “Write” option. In the “Write” window select
the “RS232” tab. Enter the COM port number to
which you are physically connected. Press the “OK”
button.
Enter a valid PC ID and Valid User Code in the
“Additional Parameters”. The default codes are listed
on the picture below:
Press the “OK” button and wait for the message for
successful writing of the configuration.
Setting the time and date
Select the BRAVO panel and use the right mouse
button to open a list with control options:
Select “Set Clock/ Date” option. In the “Set Clock/
Date” window select the “RS232” tab. Enter the COM
port number to which you are physically connected.
Press the “OK” button.
Enter a valid PC ID (1234 by default) and Valid User
Code (7777 by default) in the “Additional
Parameters”.