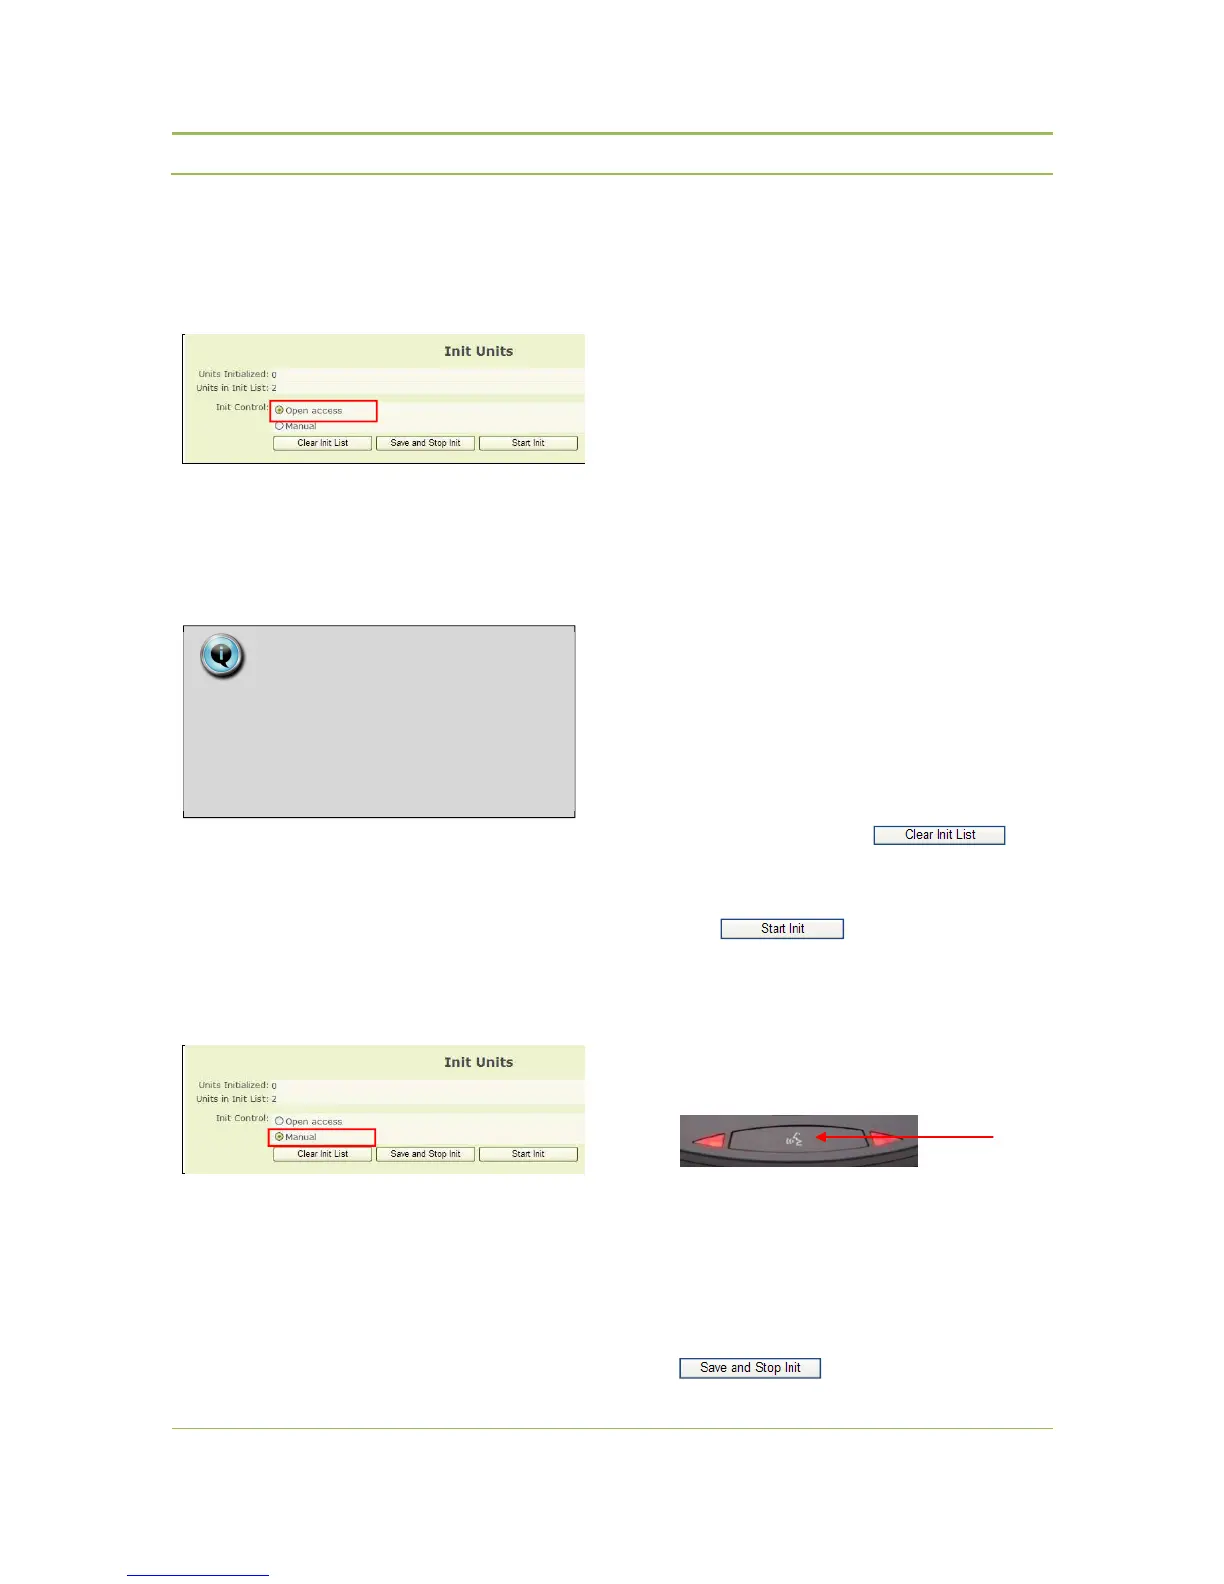
To select ‘Open Access’ click the radio button next to
‘Open Access’ on the ‘Init Units’ page (refer to Figure
13.3)
Figure 13.3: Init units page - Open access
Select this mode if the wireless units are not required
to be authorized, before they are allowed to connect
with the WCAP.
This mode is especially useful for a fast setup.
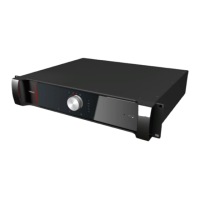
To select ‘Controlled Access’ click the radio button
next to ‘Manual’ on the ‘Init Units’ page (refer to
Figure 13.4)
To control which wireless units connect with the
WCAP a manual initialization of the units is required.
Figure 13.4: Init units page - Manual
13.2.3. Unit initialization in
‘Open Access’ mode
Switch on all wireless units and wait a few seconds
until the units have discovered the WCAP (see
chapter 10)
All active wireless units will automatically connect
with the WCAP and join the conference.
13.2.4. Unit initialization in
‘Controlled Access’ mode
In this mode, a manual initialization is required.
The manual initialization procedure requires the use
of the 3 buttons on the web server displayed above:
“Start Init”, “Save and Stop Init” and “Clear Init List”.
Take the following steps to initialize all units:
1. Switch on all wireless units and wait a few
seconds until the units have discovered the
WCAP
2. Select the “Clear Init List”, , to
clear any previously created initialization list.
3. Start the new initialization by selecting the “Start
Init”, ,button.
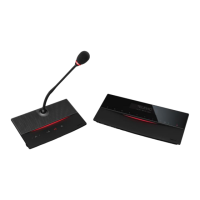
After you started the new initialization, the red
Microphone Status LED’s on all wireless units
will start to blink.
4. To add a unit to the initialization list, press the
microphone button of the unit to add.
5. The LEDs will go out indicating that the unit has
been added to the list.
6. Repeat step 3 for each unit that needs to be
added.
7. When finished, stop and save the initialization by
pressing the “Save and Stop Init” button,
.
Note:
Avoid using Open Access in areas with
more than one active Confidea wireless
system, as there is no control over
which WCAP the delegate units will