EasyManuals Logo

Tenda O1 User Manual

Tenda O1
170 pages
To Next Page IconTo Next Page
To Previous Page IconTo Previous Page
Page #20 background imageLoading...
Page #20 background image
13
Step 3 Wait for the two CPEs to negotiate and connect to each other automatically. The following LED
indicator status indicates successful connection of the two CPEs.
Automatic Bridging is only applicable when the CPEs are in factory settings, and the bridging process lasts less than 1
minute after the CPEs are powered on.
Automatic Bridging is only applicable to peer-to-peer bridging. If there are three or more powered
CPEs nearby, automatic bridge fails. So if you want to perform peer-to-multi peer bridging, please
refer to Method 2: Set up the CPEs Using Web UI.
If the bridging succeeds, the DHCP servers of the two CPEs are disabled, and the IP address of the
CPE working in Client mode changes to 192.168.2.2.
----End
Method 2 Set up the CPEs Using Web UI
Step 1 Place the two CPEs next to each other.
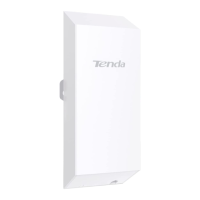
Table of Contents

Other manuals for Tenda O1

Questions and Answers:

Question and Answer IconNeed help?

Do you have a question about the Tenda O1 and is the answer not in the manual?

Tenda O1 Specifications

General IconGeneral
5 GHzNo
Bandwidth2.4 GHz
Networking standardsIEEE 802.11b, IEEE 802.11g, IEEE 802.11n
Maximum data transfer rate300 Mbit/s
PlacementWall
CertificationFCC/CE/RoHS
Product colorWhite
LED indicatorsLAN, PoE, WLAN
International Protection (IP) codeIP64
Output voltage9 - 12 V
Power consumption (max)2.6 W
Security algorithmsWEP, WPA-PSK, WPA2-PSK
USB 2.0 ports quantity0
Ethernet LAN (RJ-45) ports1
Antenna featuresIntegrated antenna
Cables includedLAN (RJ-45)
Storage temperature (T-T)-40 - 70 °C
Operating temperature (T-T)-30 - 55 °C
Operating relative humidity (H-H)10 - 90 %
Weight and Dimensions IconWeight and Dimensions
Depth67.5 mm
Width80 mm
Height190.35 mm

Related product manuals