SERVICE AND ADJUSTMENTS
6 - 4
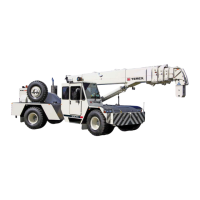
Issued: August 2003RT700 Series
RELIEF VALVE REPAIR RECOMMENDATIONS The
cartridge type service port reliefs used in the swing valve are
of the pilot poppet type with external adjustment. Any mal-
functioning is usually the result of foreign matter lodging
between the piston, relief valve poppet, and check valve.
To perform service, clean the surrounding area and remove
the complete relief valve cartridge. Examine the seat in the
main valve housing for grooves or ridges. If damaged, either
replace the valve or have it re-machined.
The design of the pilot poppet and its seat provides positive
seating and very seldom requires any maintenance. The pilot
section can be removed from the cartridge housing without
disturbing the setting.
With it will come the check valve poppet and other internal
parts. These are easily disassembled and should be examined
for foreign matter. All seats and seating surfaces should be
free of nicks, scratches, or grooves. Examine “O” rings and
back-up washers for any damage. If any parts are found to be
faulty, replace the relief cartridge. All moving parts should
slide freely, with only seal friction being present. After
inspecting and cleaning, immerse all parts in hydraulic oil
and re-assemble. If pressure setting was not disturbed, unit
can be tested for proper functioning under normal working
conditions. If operating difficulties indicate that the pilot
poppet is still leaking or sticking, replace the relief.
OUTRIGGER RELIEF Use the 5000 psi test gauge and
check as follows:
1. Attach the gauge at the quick disconnect on the diverter
valve (B), located on the L.H. side of the front outrigger
box.
2. Start engine and run at full throttle.
3. Set the outrigger extend/retract switch to the retract
position and read the gauge. The correct pressure setting
is 2500 psi outrigger relief. The relief valve is located
above the outrigger diverter valve. Adjust to proper set-
ting as follows:
OUTRIGGER RELIEF ADJUSTMENT With the test gauge
still attached to the test port, remove the hex cap, insert an
allen wrench. adjust to the proper setting while holding the
outrigger in the retract position. Turn in to increase pressure,
out to decrease. After completing adjustment, replace cap on
the relief valve.
VALVE ADJUSTMENTS